We are babysitting the grandsons for three days next week. Rhea asked me to come up with a construction project to keep them busy. I had previously considered making a marble run. Upon further consideration that will be the project to keep them busy. Designing the toy needs to not only take playing with it, but also a 5 and a 7 year old making it into consideration.
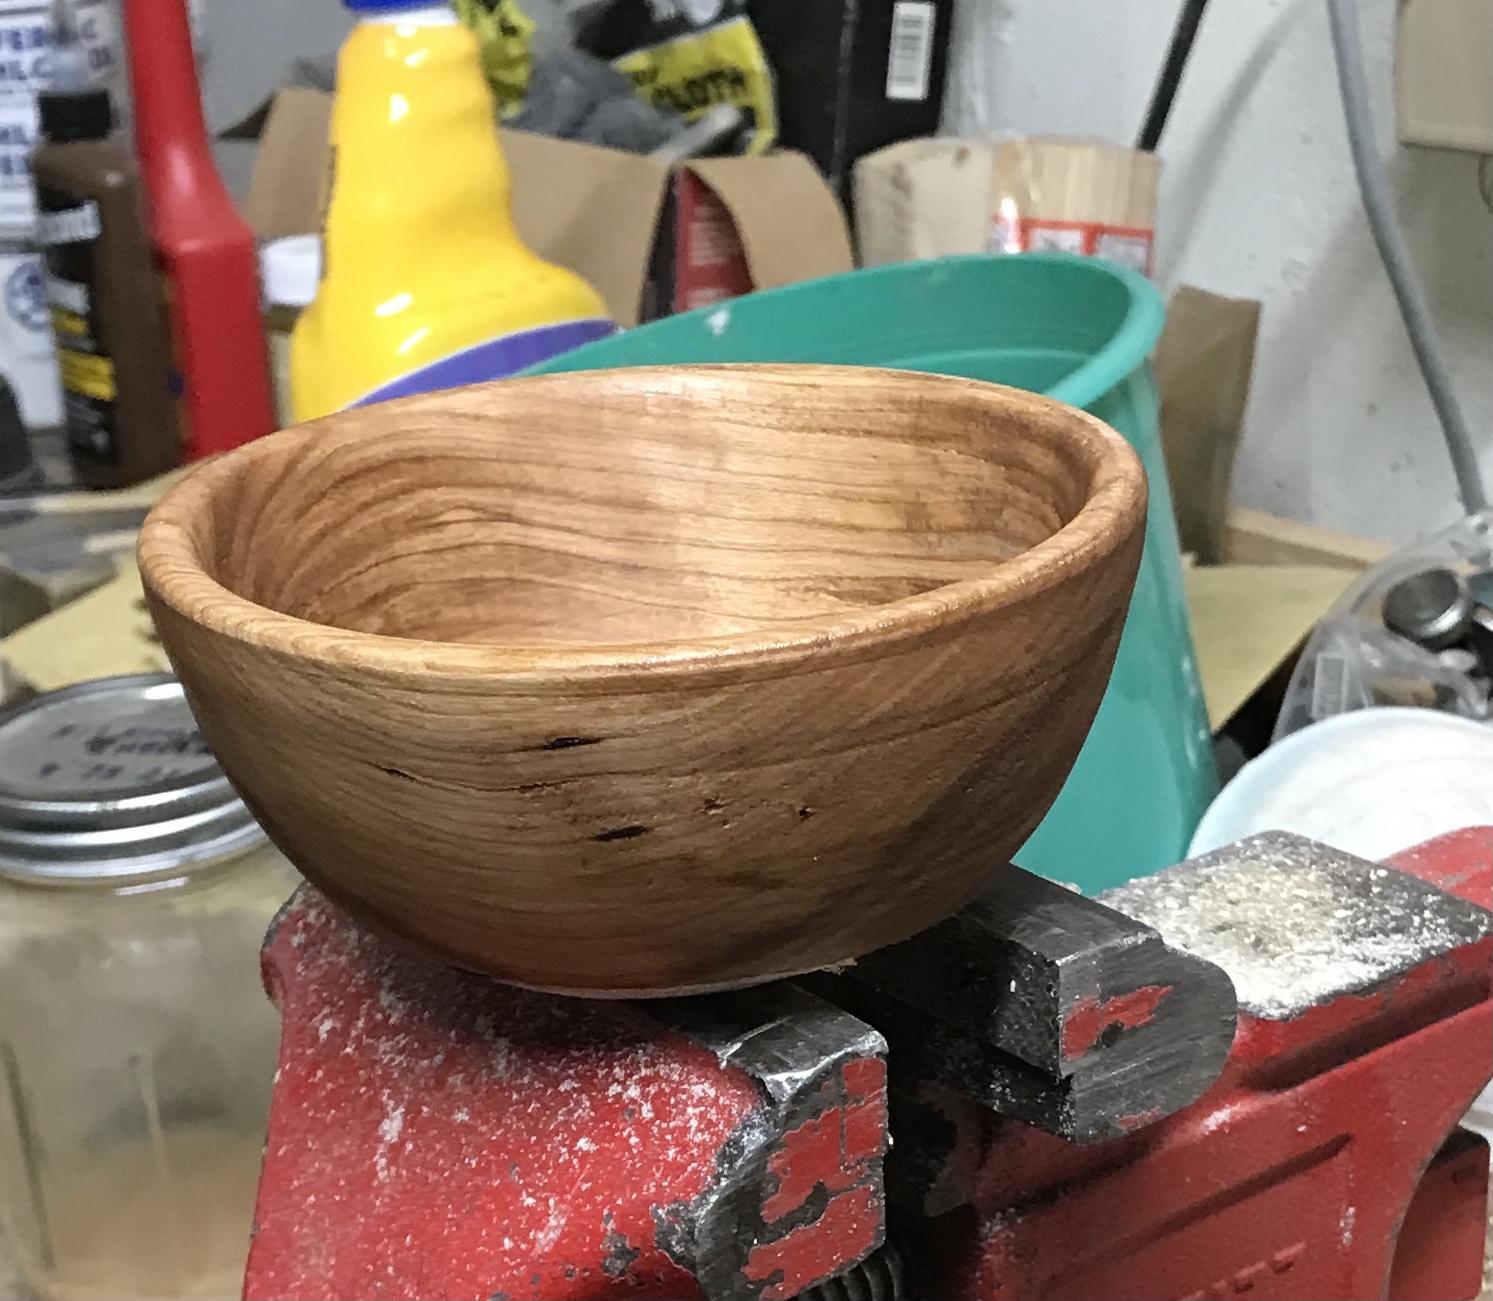
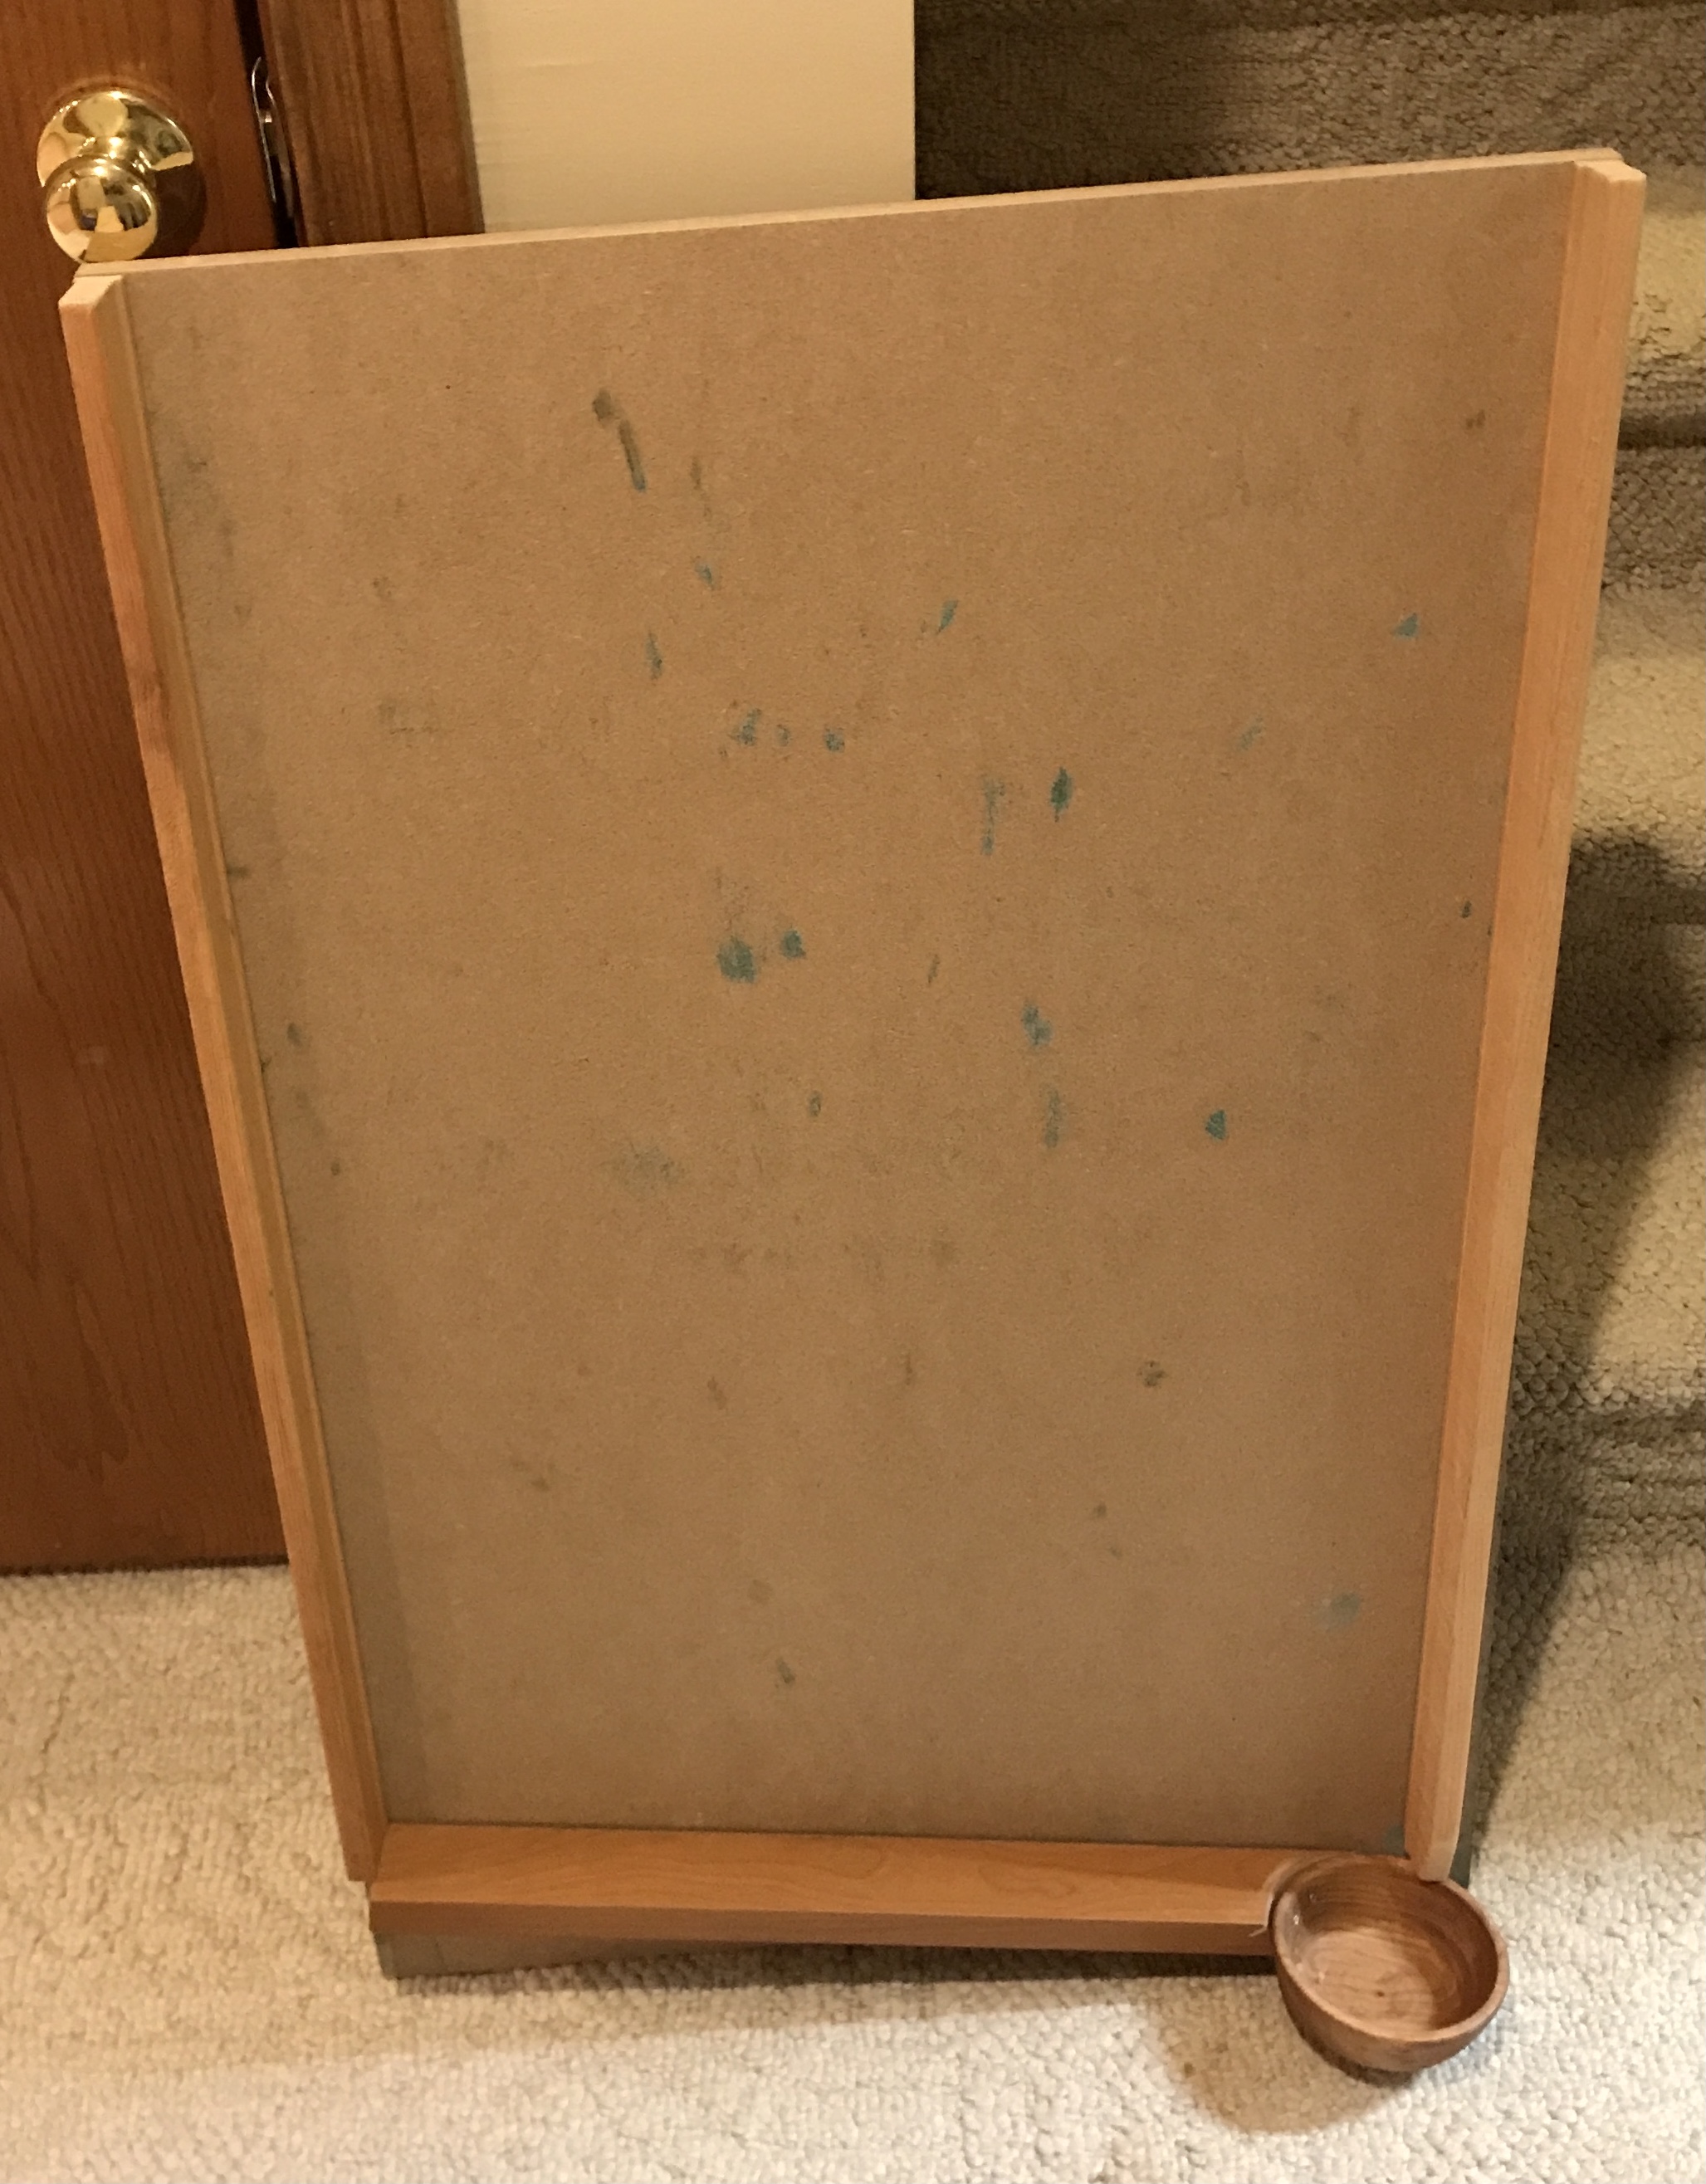
I happen to have a 3/4" thick slab of 2' X 3' particle board. This will serve as the back of the marble run. It needs to lean back slightly so the marbles stay on board (not bad as puns go). So it will need some legs. It will also have sides to help contain the marbles. The bottom of the board will use an angled board ending in a bowl (just happen to have the perfect bowl made during my turning class) to catch all of the marbles. I am finishing it with the 1:3 shellac in EtOH over the course of the day. The photo shows it after half a dozen coats.
The board will be drilled for equally spaced holes. All of the attachments will have tabs on them The tabs will hold the attachments on 1/4" dowels inserted into the holes. A little figuring indicates that holes 2" on center will lead to a 14° angle on a 10" run. This seems about right. This will also put the tabs 4 3/4" apart on a 5" long run and 8 1/2" apart on a 10" long run, placing the tabs outside the dowels. For the 5" run dowels are placed down one hole and over two holes (26°) and for the 10" long run, down one and over four holes.
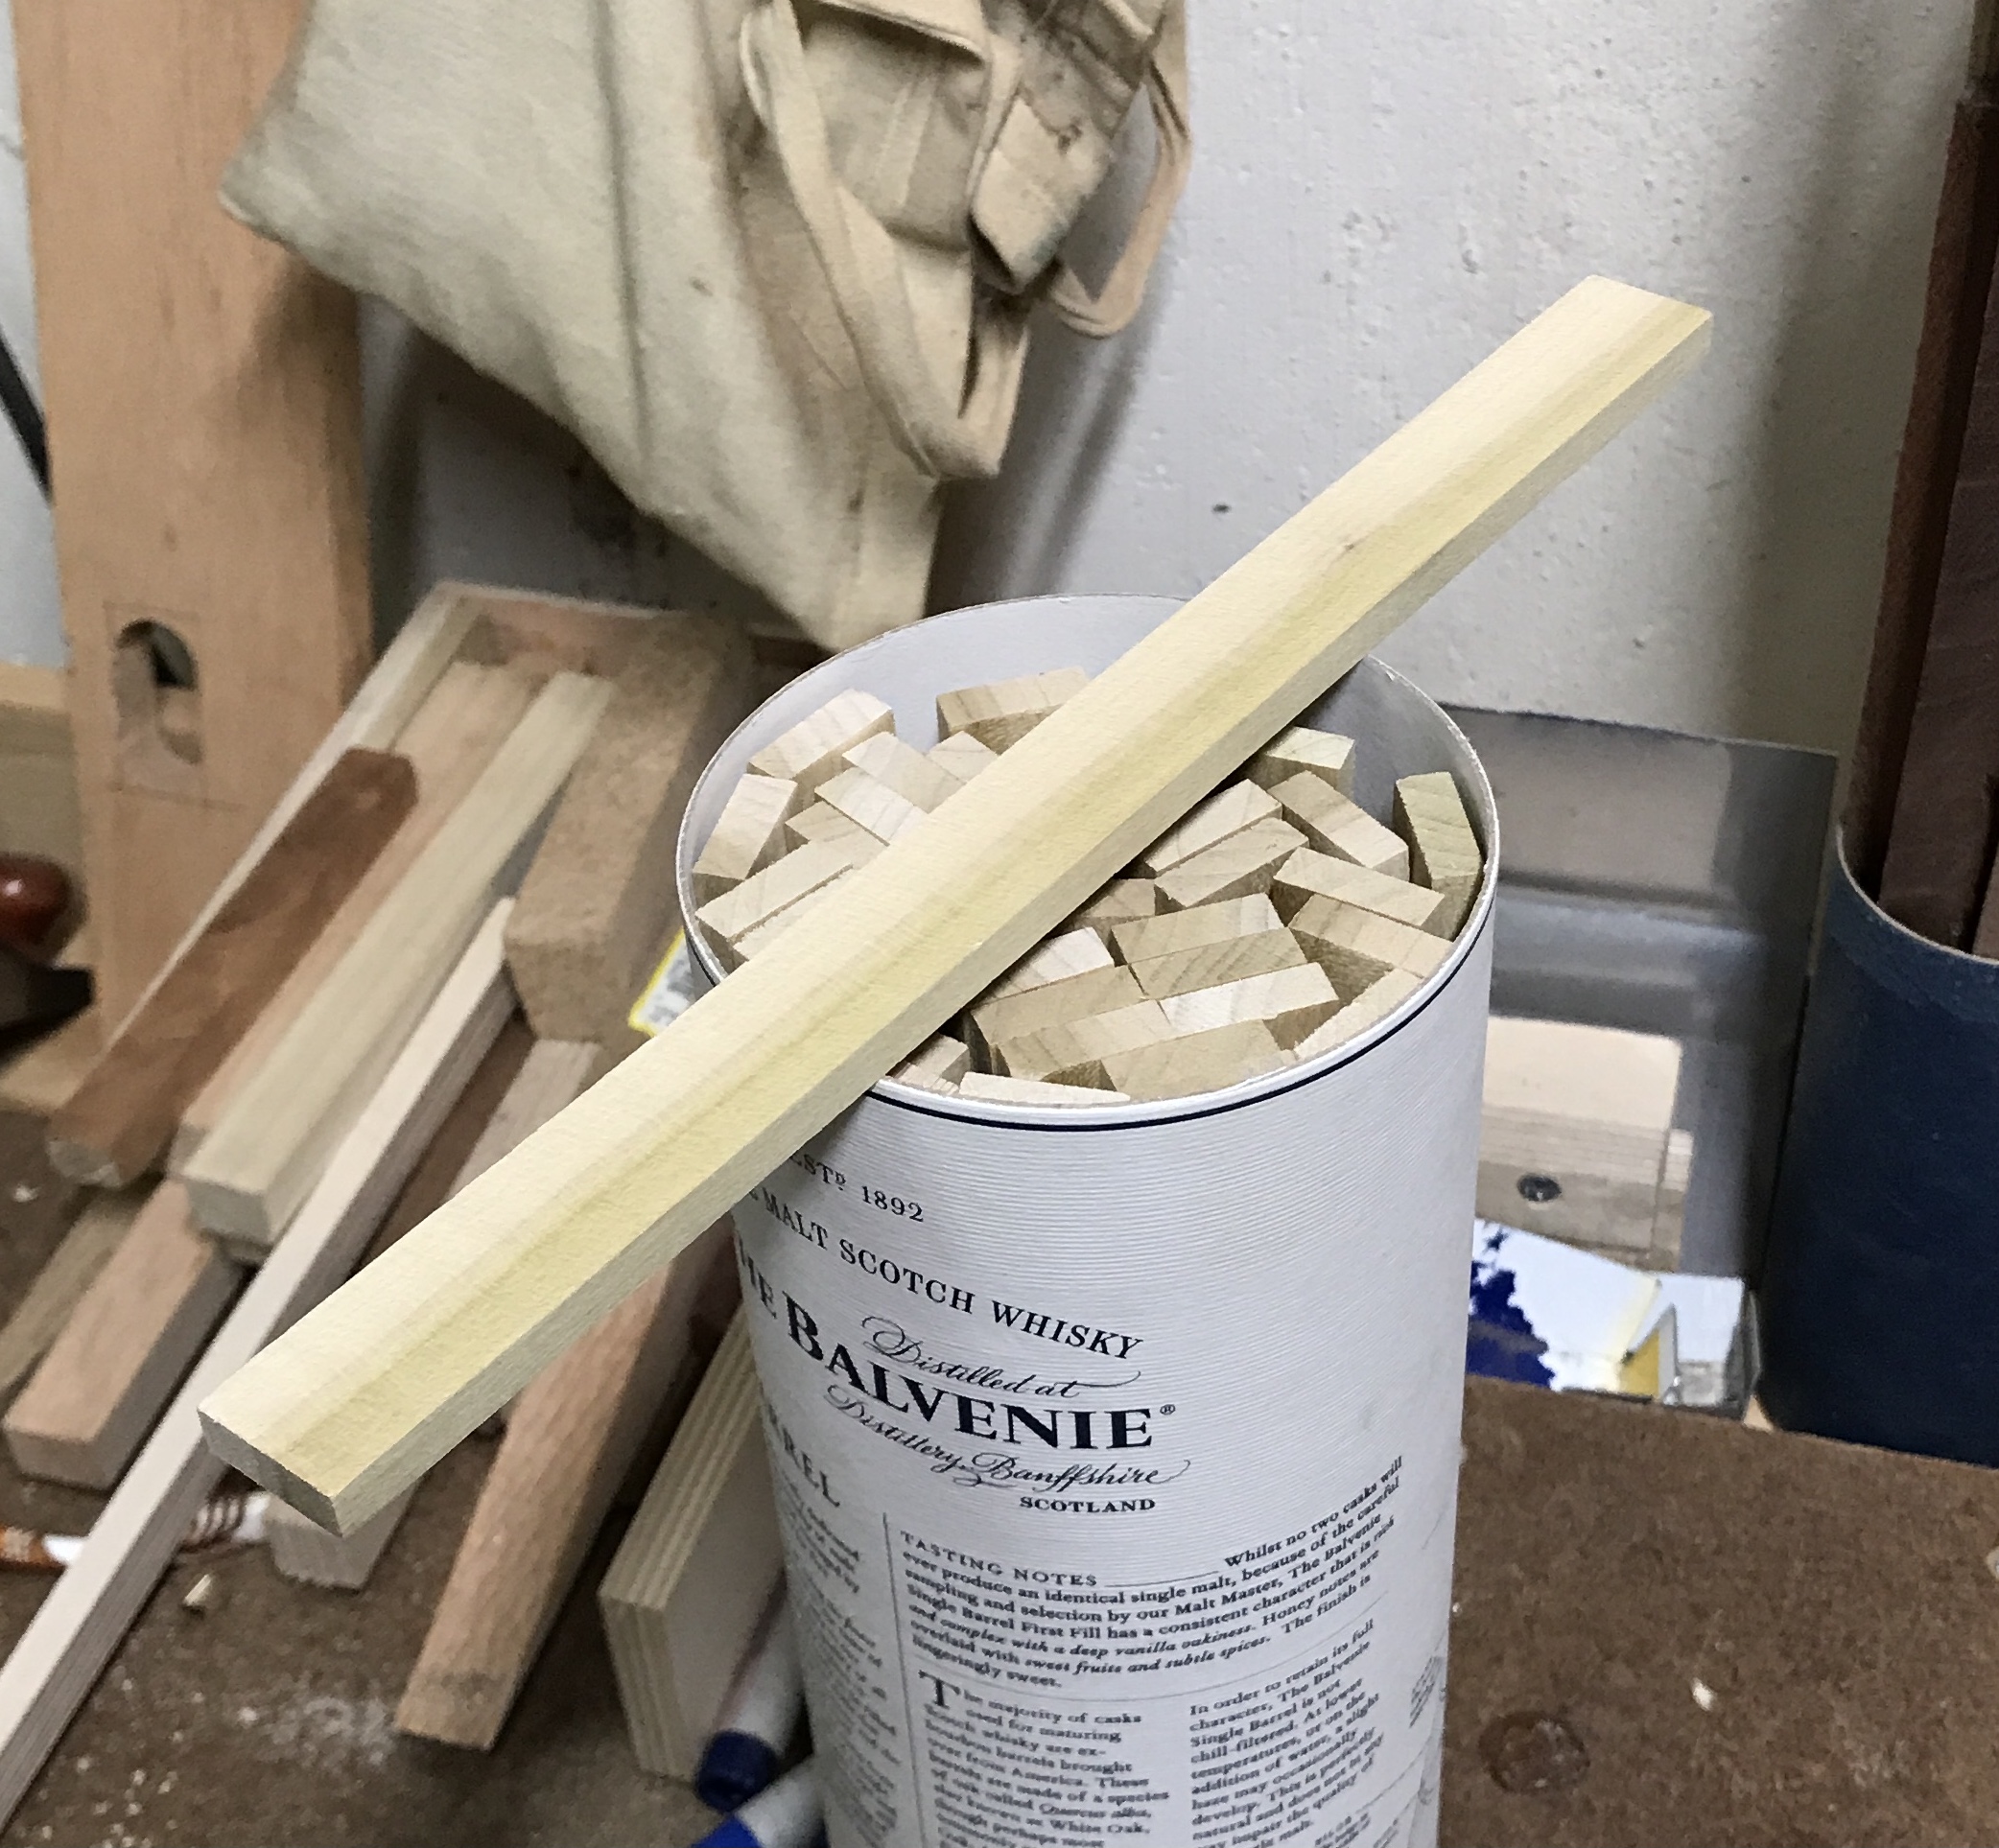
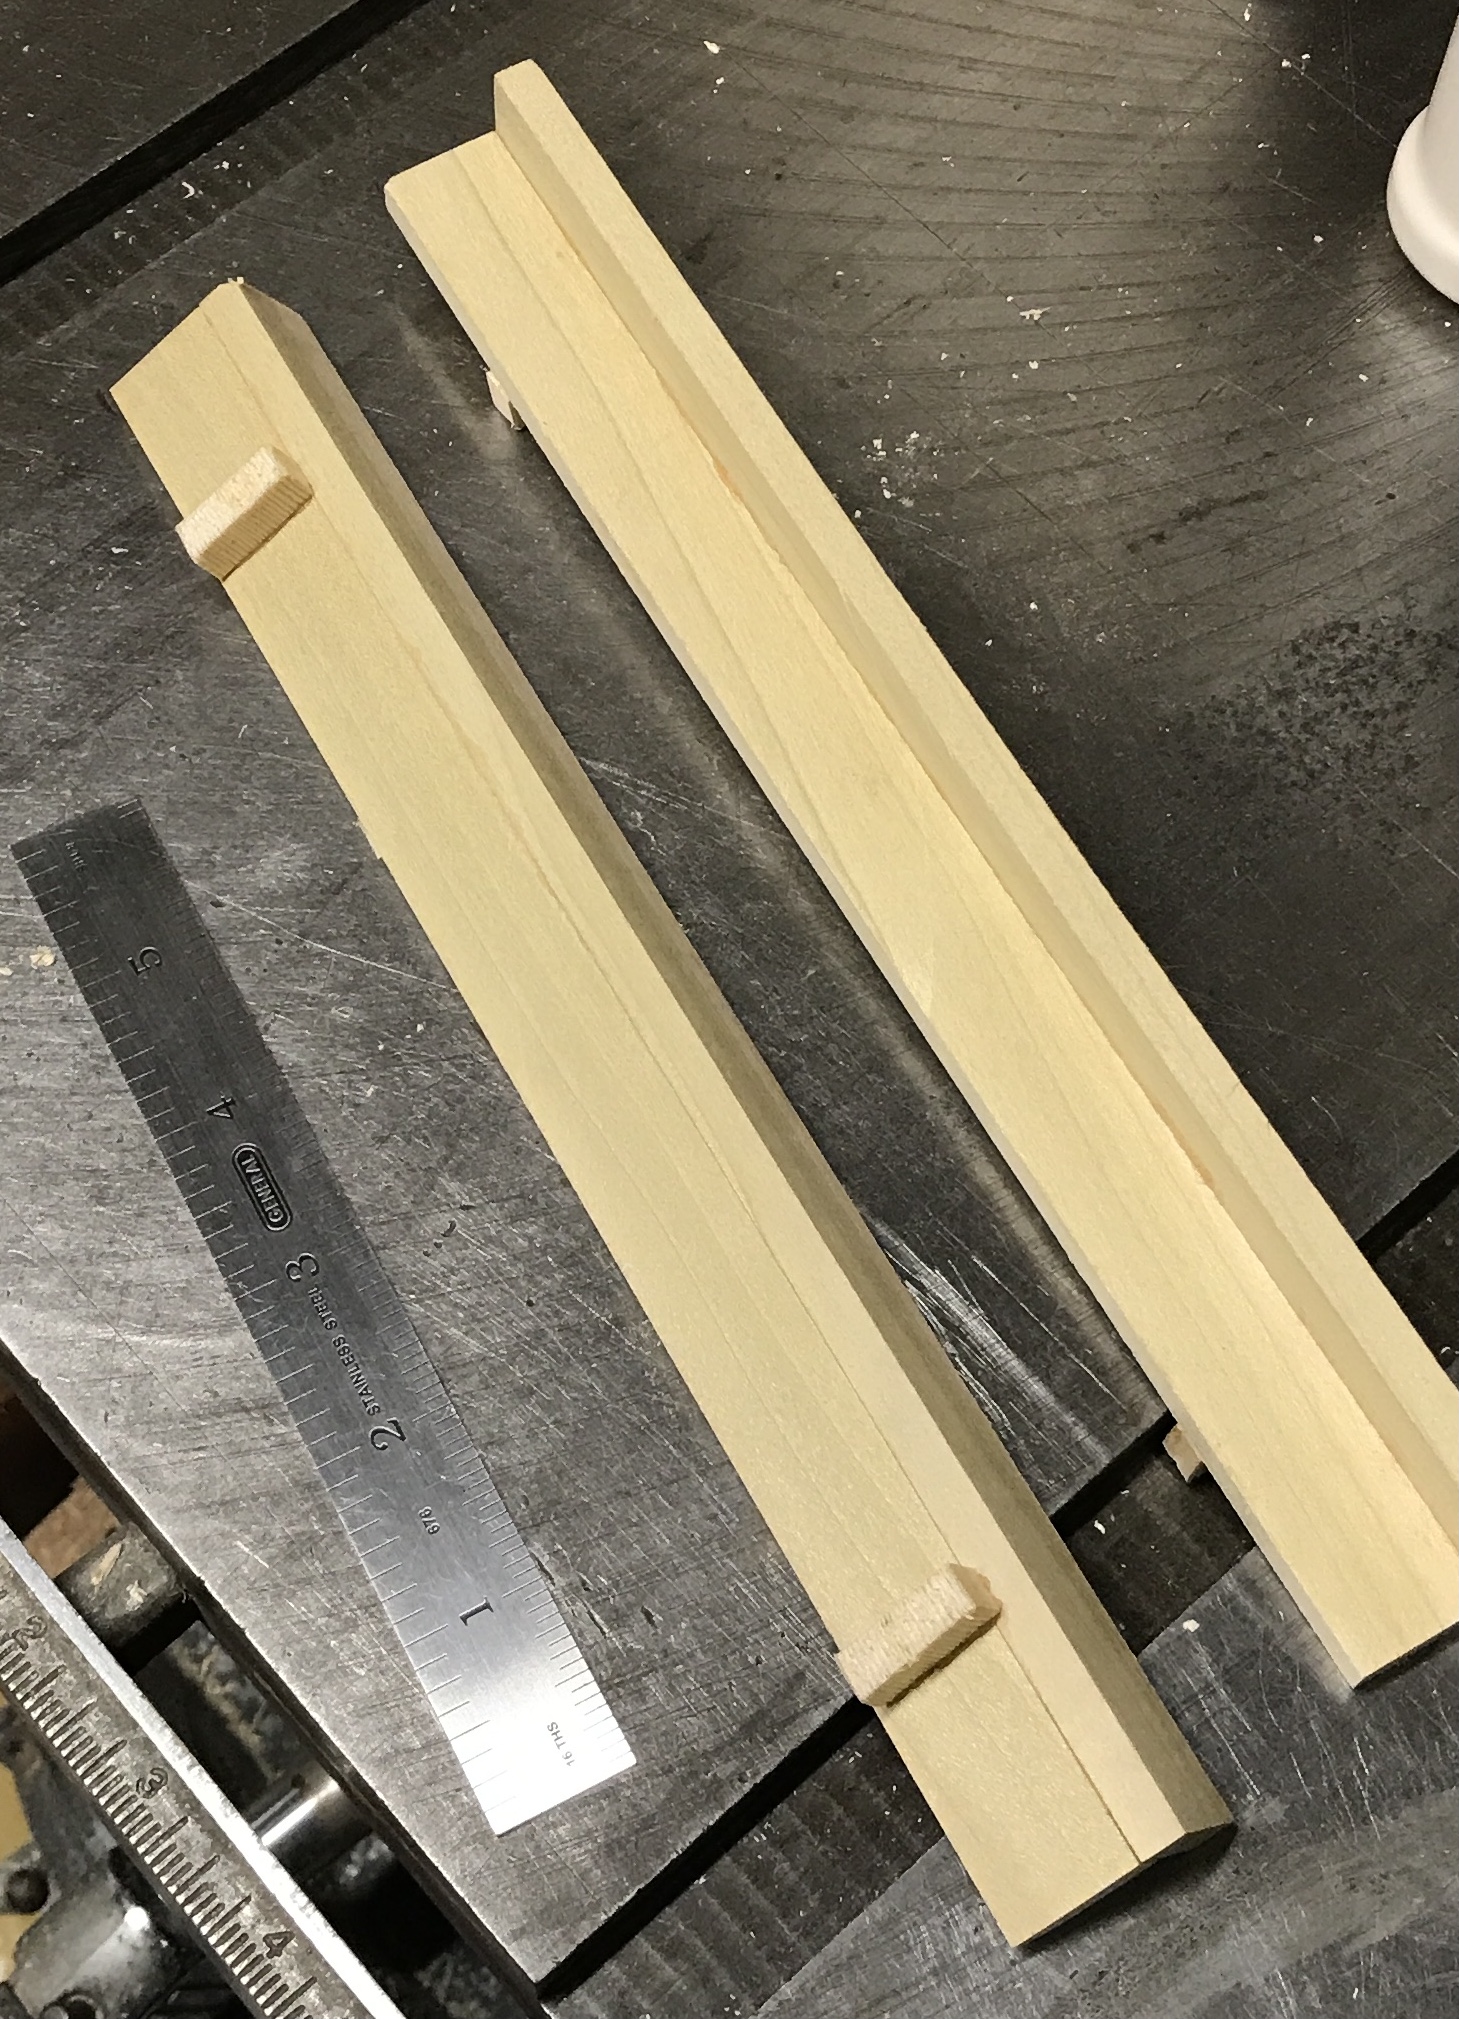
I have 37 10" long strips of poplar from the tetrahedron project. They are 1/4" X 3/4". These strips will be used for the bottoms and the sides of the runs. There will be four different styles of runs: smooth in 5 & 10" lengths and slotted in 5 & 10" lengths. The sides will be glued to the outside of the bottoms. Since two strips are needed for each 10" run, 12 long runs and 12 short runs can be made from these strips. It is not clear how wide or how far apart the slots in the slotted strips should be. Maybe 1/4" to 3/8" apart and similar width. Some experiments will need to be done.
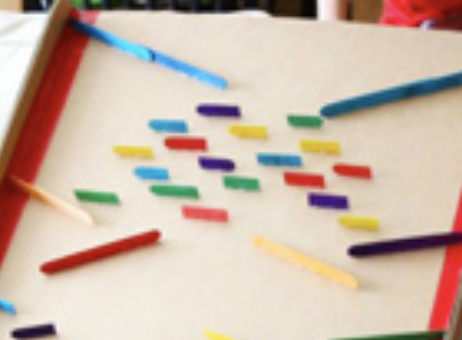
I am considering two ways to make a pachinko style run. This could consist of eight or more short (2") horizontal runs. A ball dropping onto such a run could go either direction, so three or four rows would give some chaotic action. An example of this is seen below. These could be made from popsicle sticks as shown. Alternatively, a board with a heavily chamfered top edge (allowing the balls to easily move over the edge of the board) could have brads inserted so as to mimic a pachinko run. This might need a plexiglas cover like the input funnel described below.
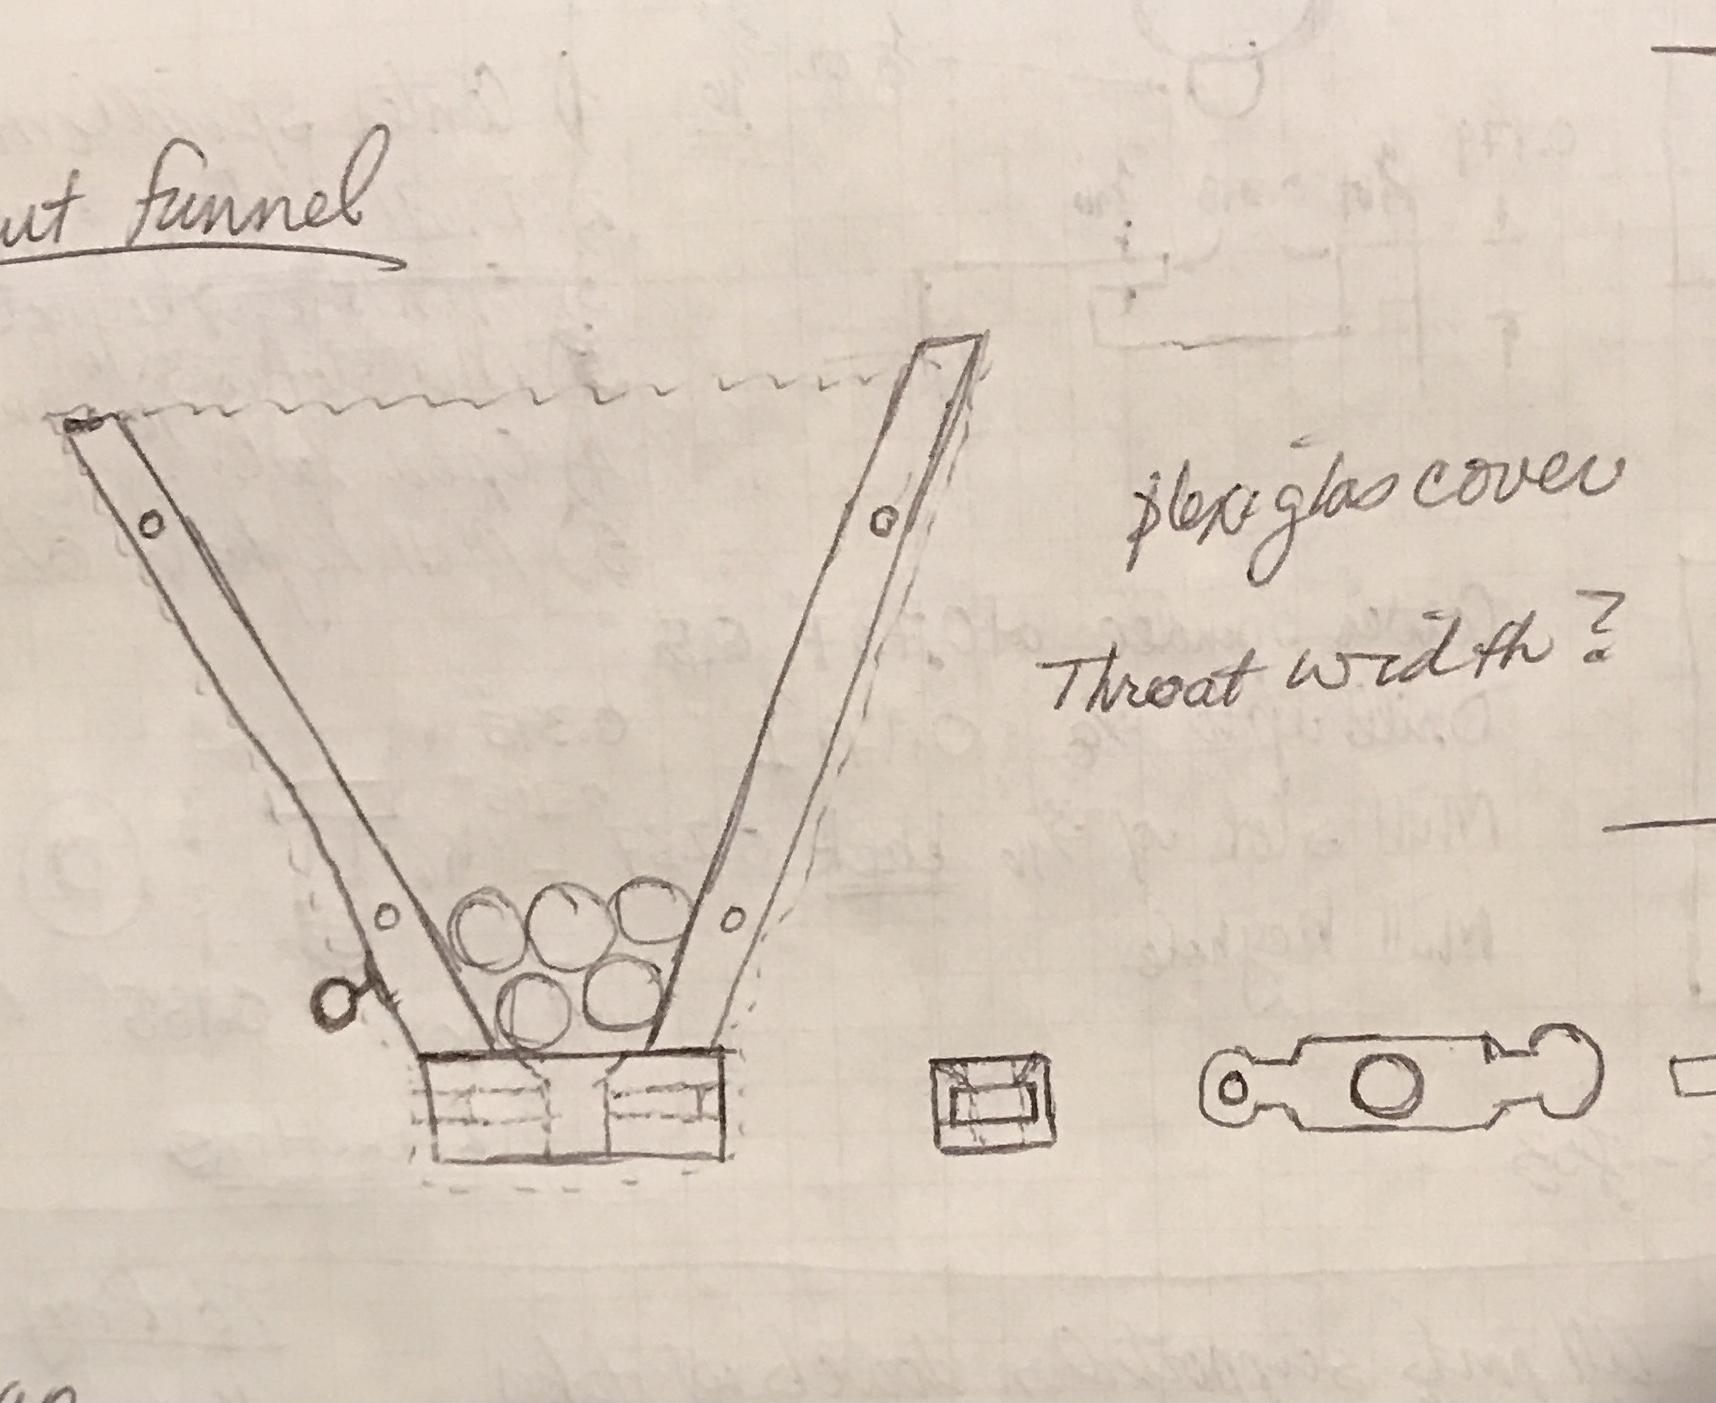
Some means of dropping the balls onto the top of the maze is needed. A type of funnel with a gate at the bottom is planned. The rough plan is shown below. It consists of two angled sides, a gated bottom with hole, and a plexiglas front. The gate would simply be a hole with a sliding door to open and close the hole. The dimensions depend on the size of the marbles. I pulled out a handful and measured them. They ranged from 0.574" to 0.688" with most less than 0.625". I will consider the marbles to be 5/8" in diameter and work from there. The marbles used might need to be filtered. A throat width of 1" and a 3/4" hole should work well. Maybe a colorful cloth back would look nice and hold the balls in if the funnel is above the top of the backing board.
The bottom will be made by drilling a marble sized hole through a block of wood. The hole will be heavily chamfered. The block will be cut in half. One or both halves will be hollowed out to fit a slide. The blocks will then be glued back together. The slide could be a simple piece of wood or a piece with a hole drilled through. Depending on the size of the input funnel it will be supported by dowels 4, 6, or 8" apart.
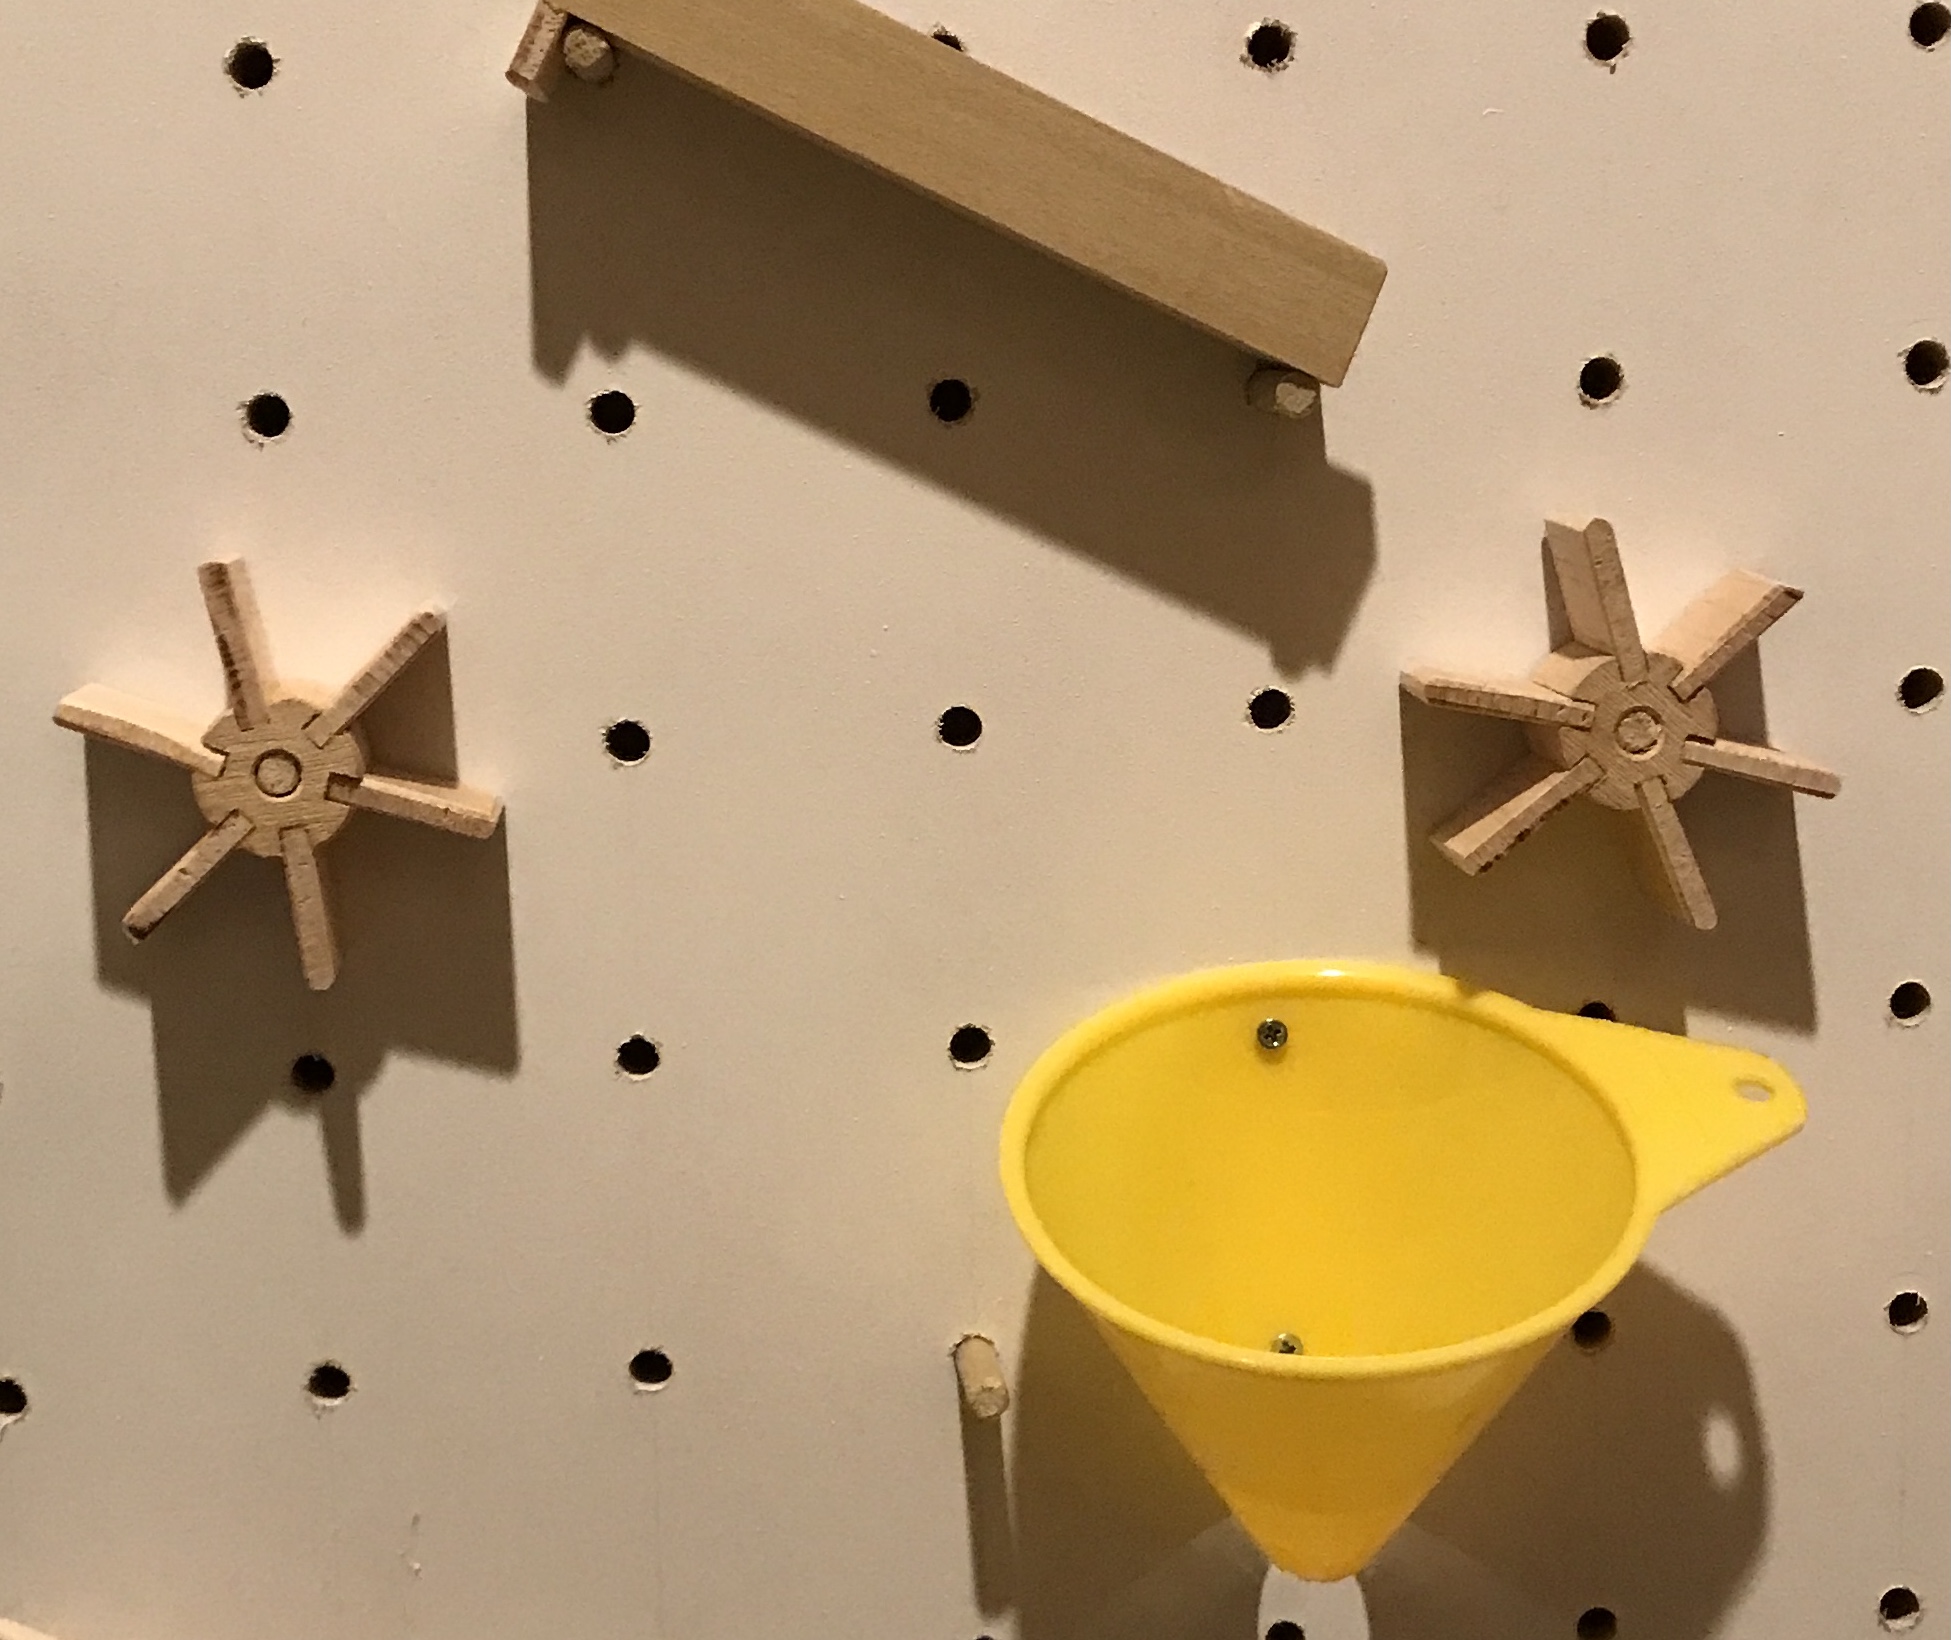
The final parts of the marble run under consideration are additional attachments to add variety. One possibility is spinners. A wooden hub with a 1/4" hole would have six slots cut in the outside. Paddles would be glued into these slots. The paddle wheel would be placed on a dowel below a chute. A second possibility is a bell. An old style bicycle bell might be ideal. It is not clear how to keep the marble in line after ringing the bell. A third possibility is a funnel. A kitchen funnel might make the marbles revolve around on their way to the bottom, like an coin in orbit demonstration in a museum. Again, a device needs to be made to get the marbles back in line with the other chutes.
At this pint three items need to be purchased. At least 75" of 1/4" dowel needs to be purchased. A kitchen funnel, ideally aluminum, may also be available in the auto section. A bicycle bell, if they can still be found, would be fun. The boys should be able to use a small saw, a hand drill, and screwdrivers, glue and paint. The bench block was modified by adding a wall to keep small fingers holding a strip of wood away from the saw.
My current plan is to make the board and mark the holes. Make the sides and prepare them for attaching with screws. Make the legs and prepare for attachment with screws. Make the marble receiver/bowl and again prepare for attaching with screws. The boys can drill most of the holes in the board and then attach the sides, legs, and receiver. I will mark and start cuts on the strips to be cut in half. I will cut grooves in the rumble strips. The boys can finish the sawing and glue the strips together to make the chutes. The boys will also glue the tabs to the bottoms of the chutes. I will make the marble input funnel and let the boys screw it together. I will make the hubs for two spinners and the boys can make and glue the paddles. If possible, I will make a funnel holding device as well as one for a bell. They will be made so some assembly is required and the boys can finish them. Finally, the boys will decorate and paint everything.
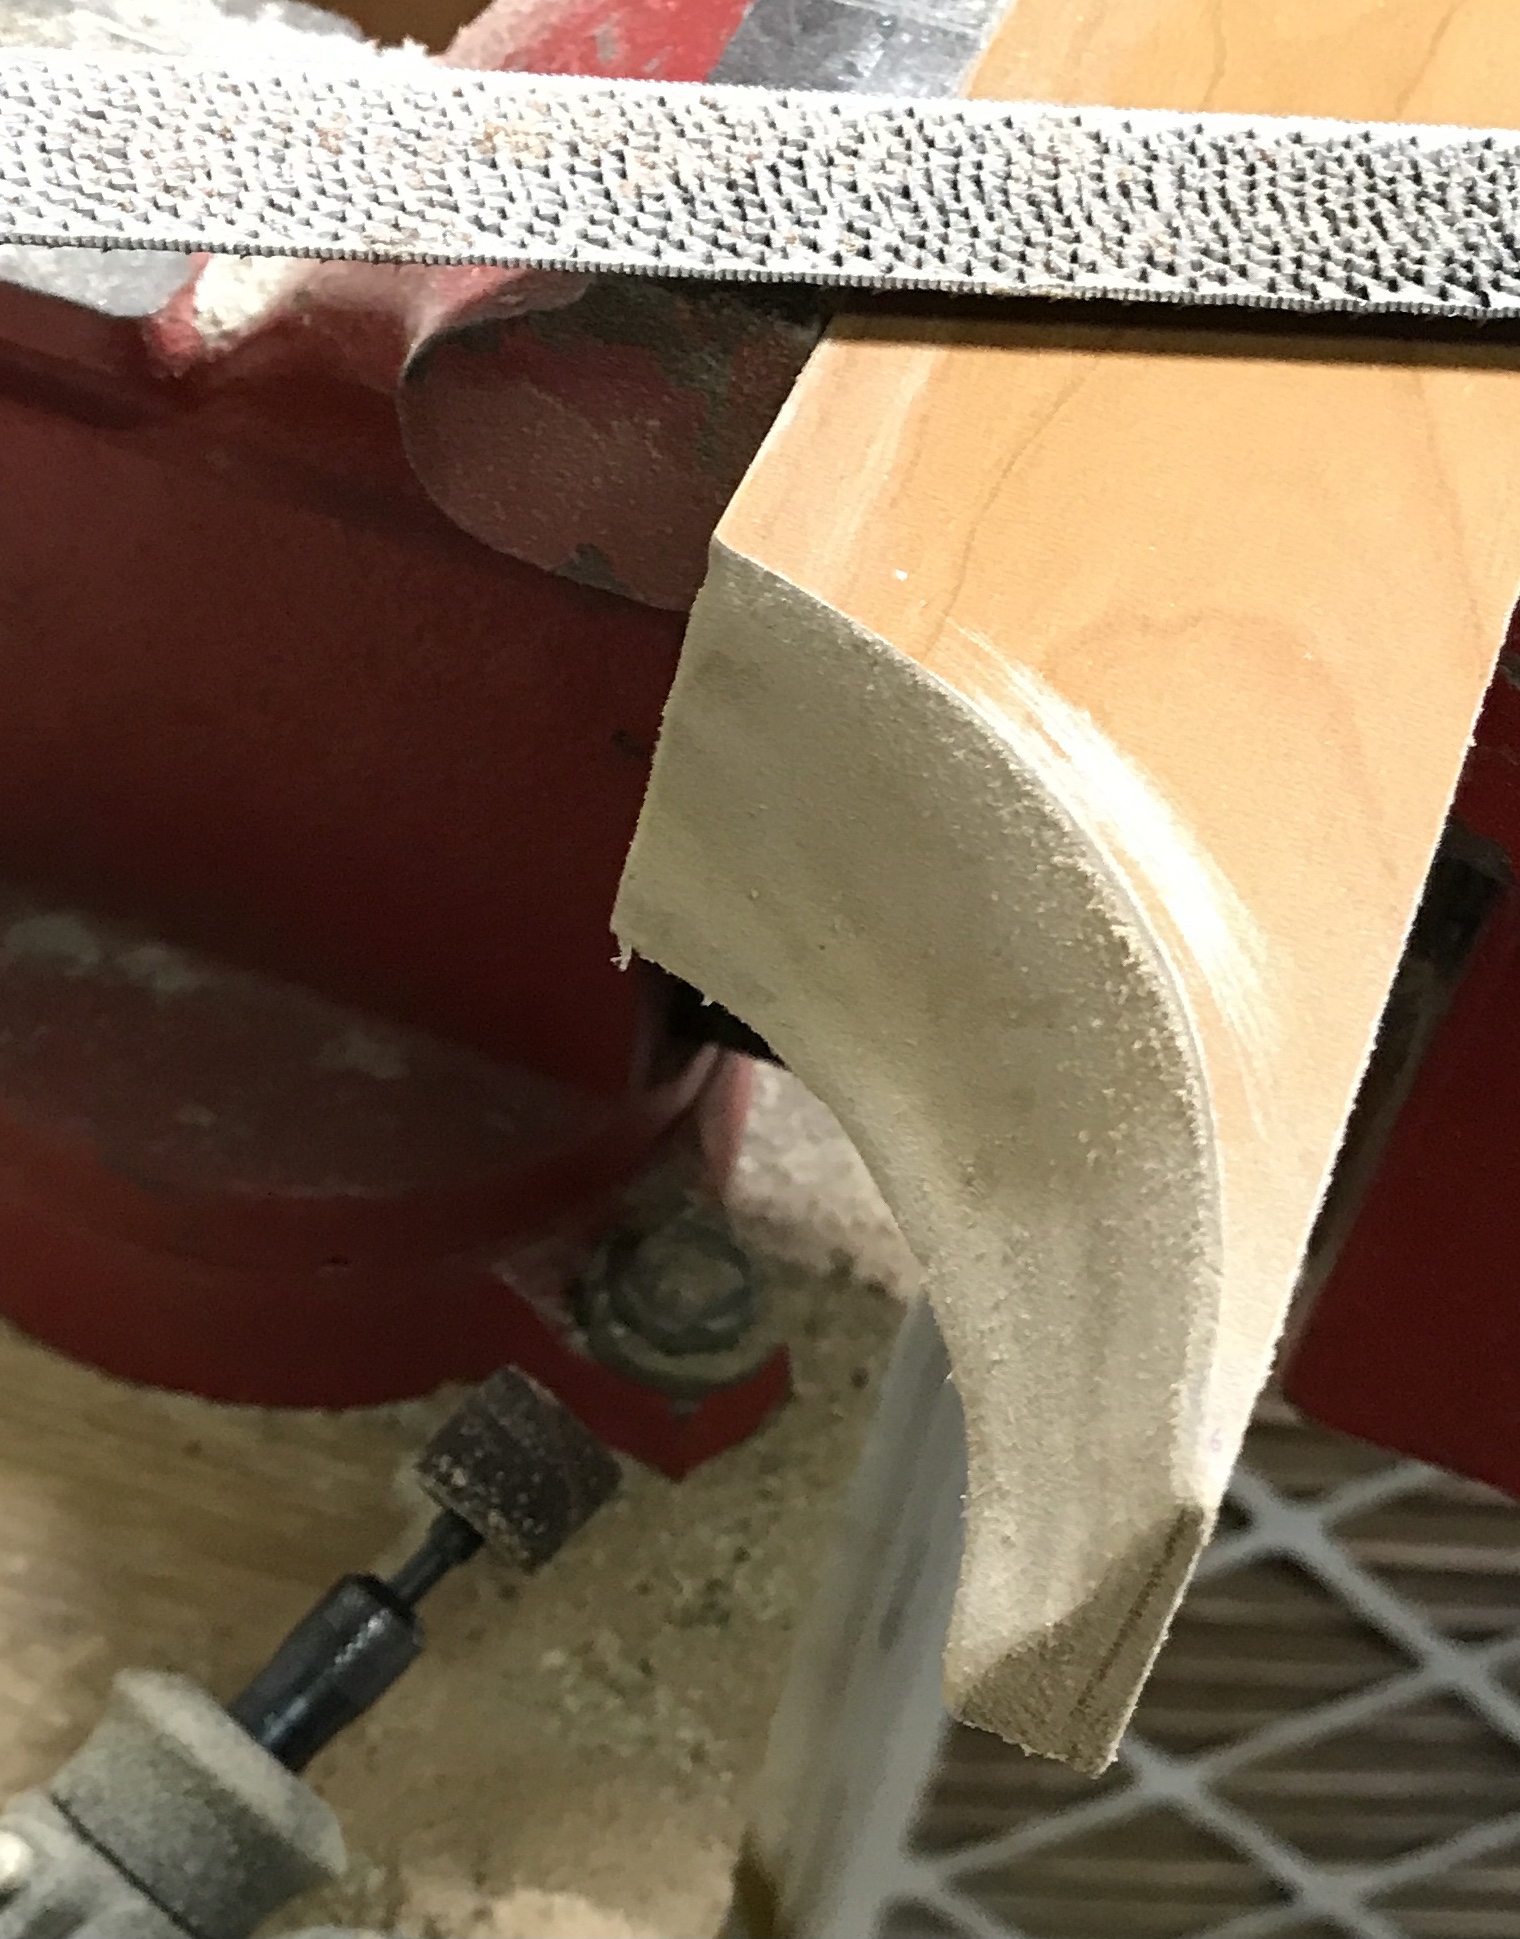
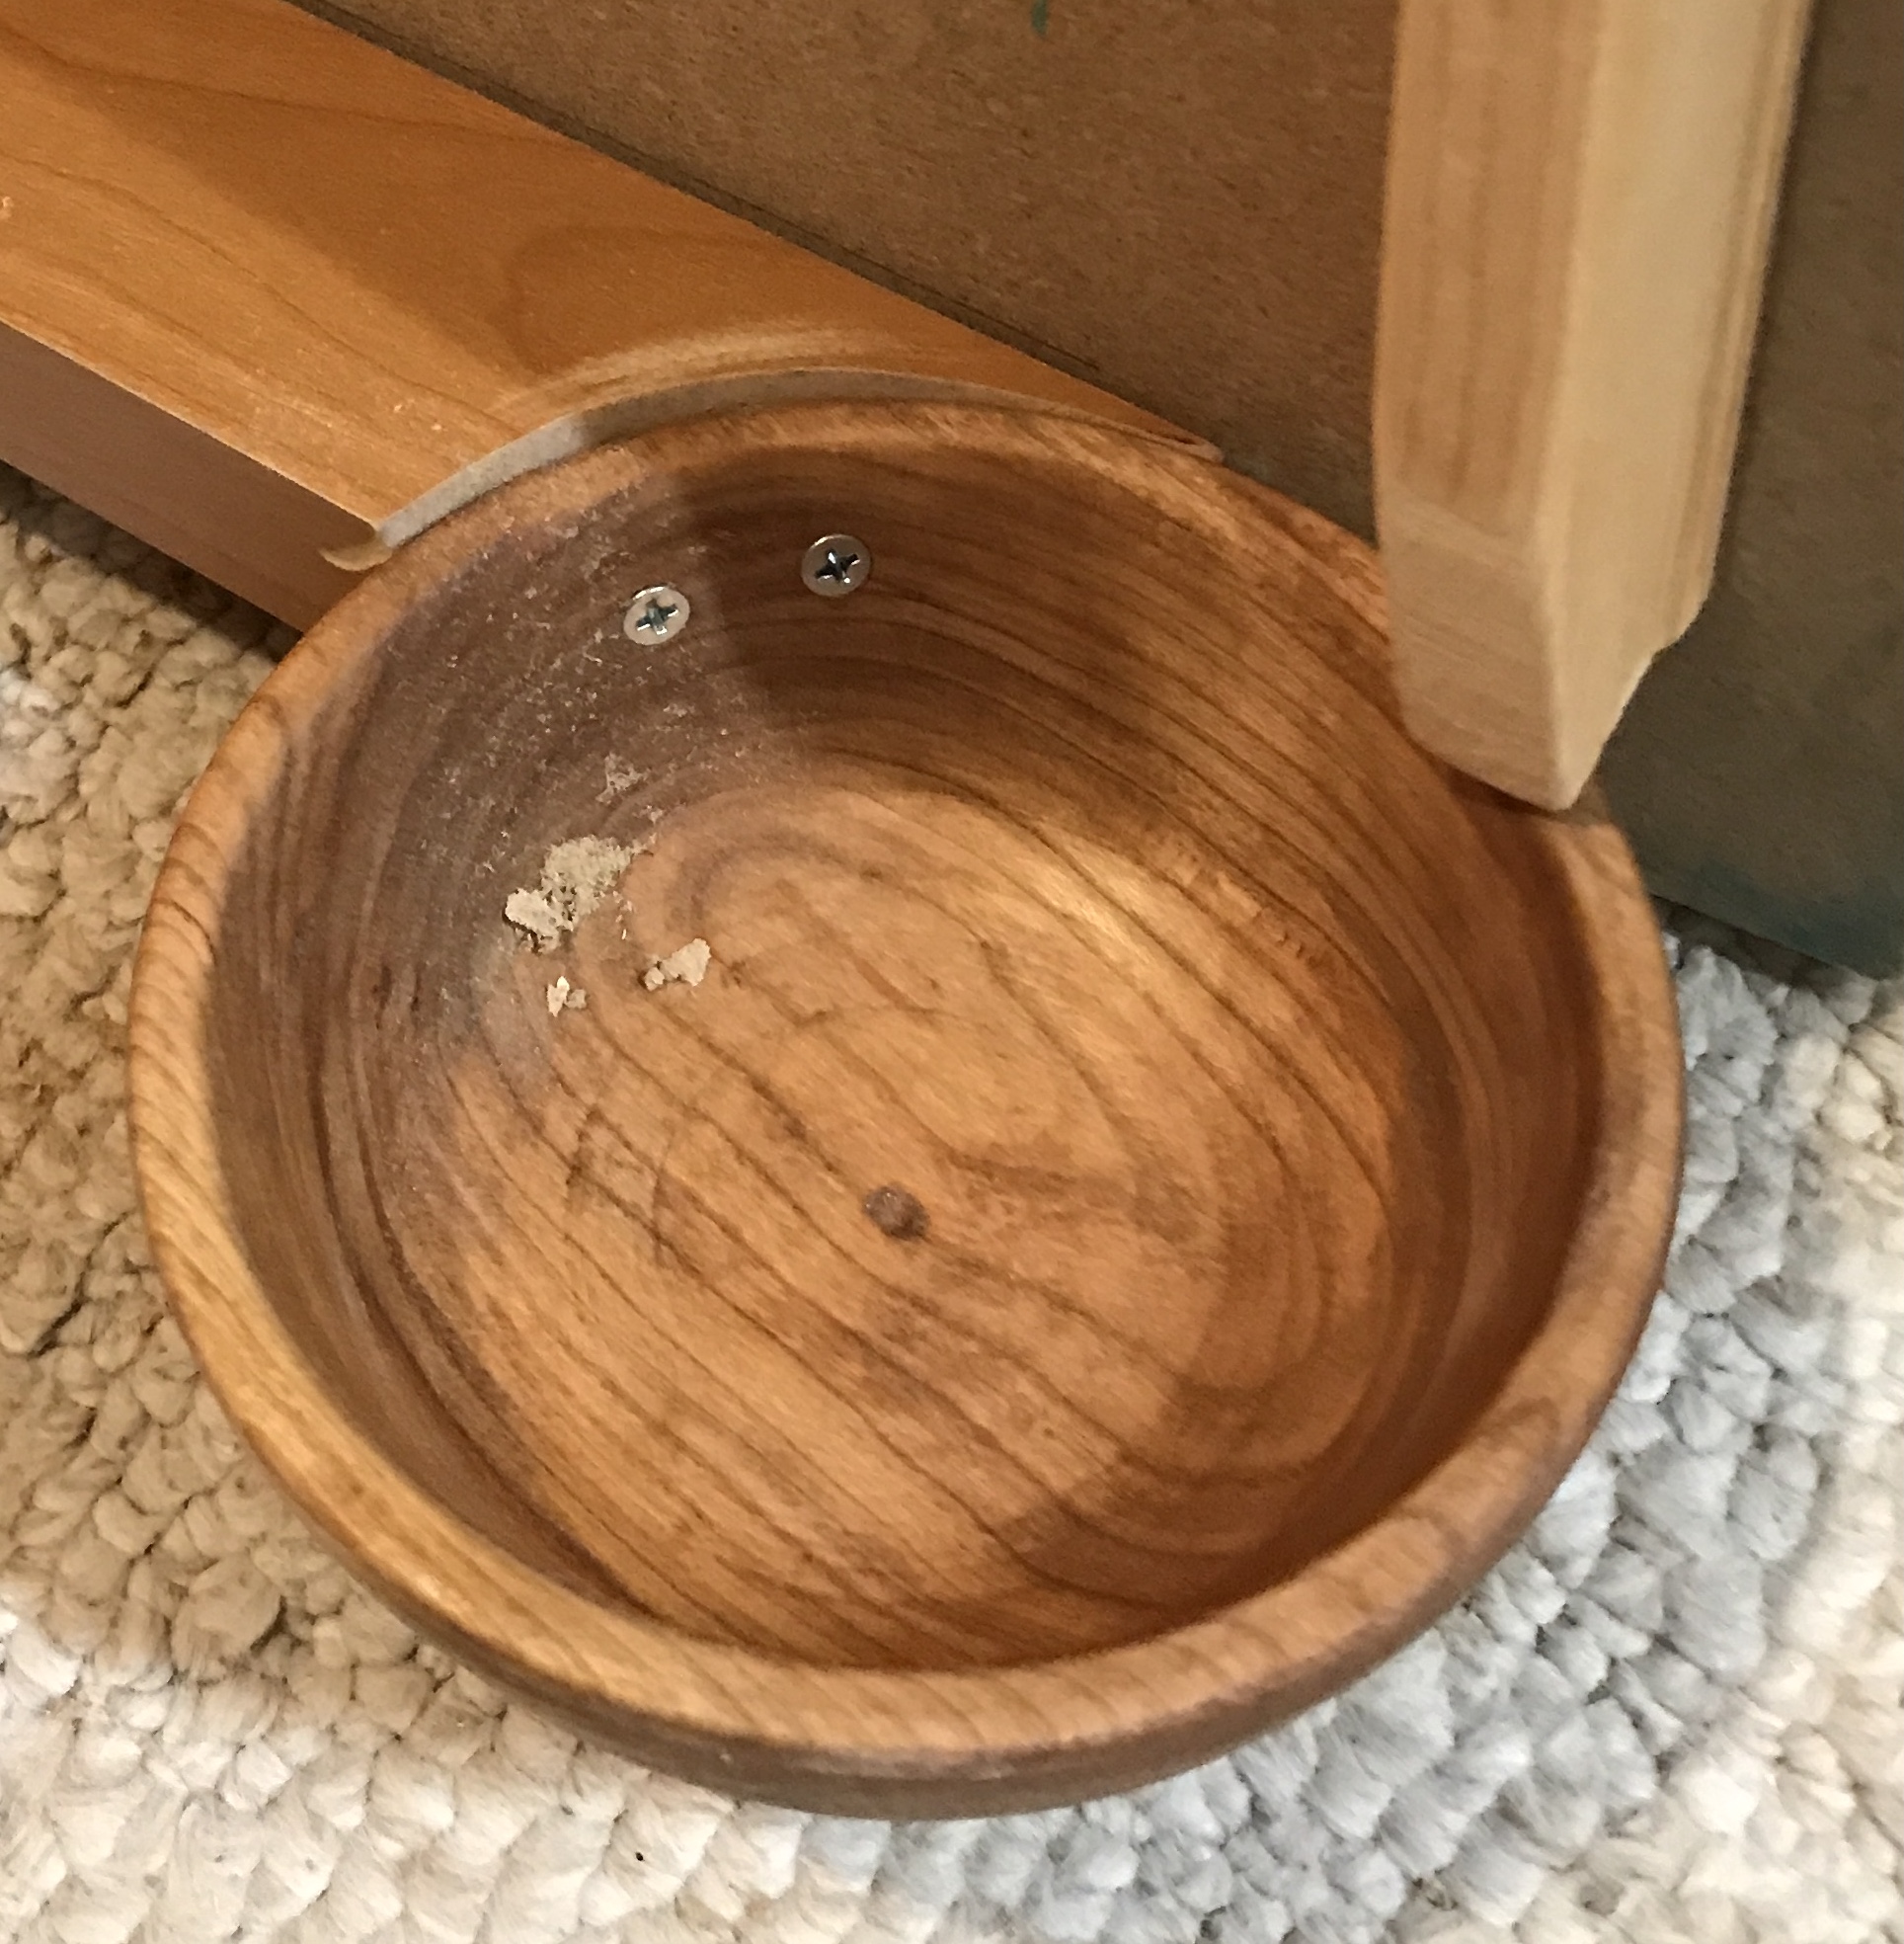
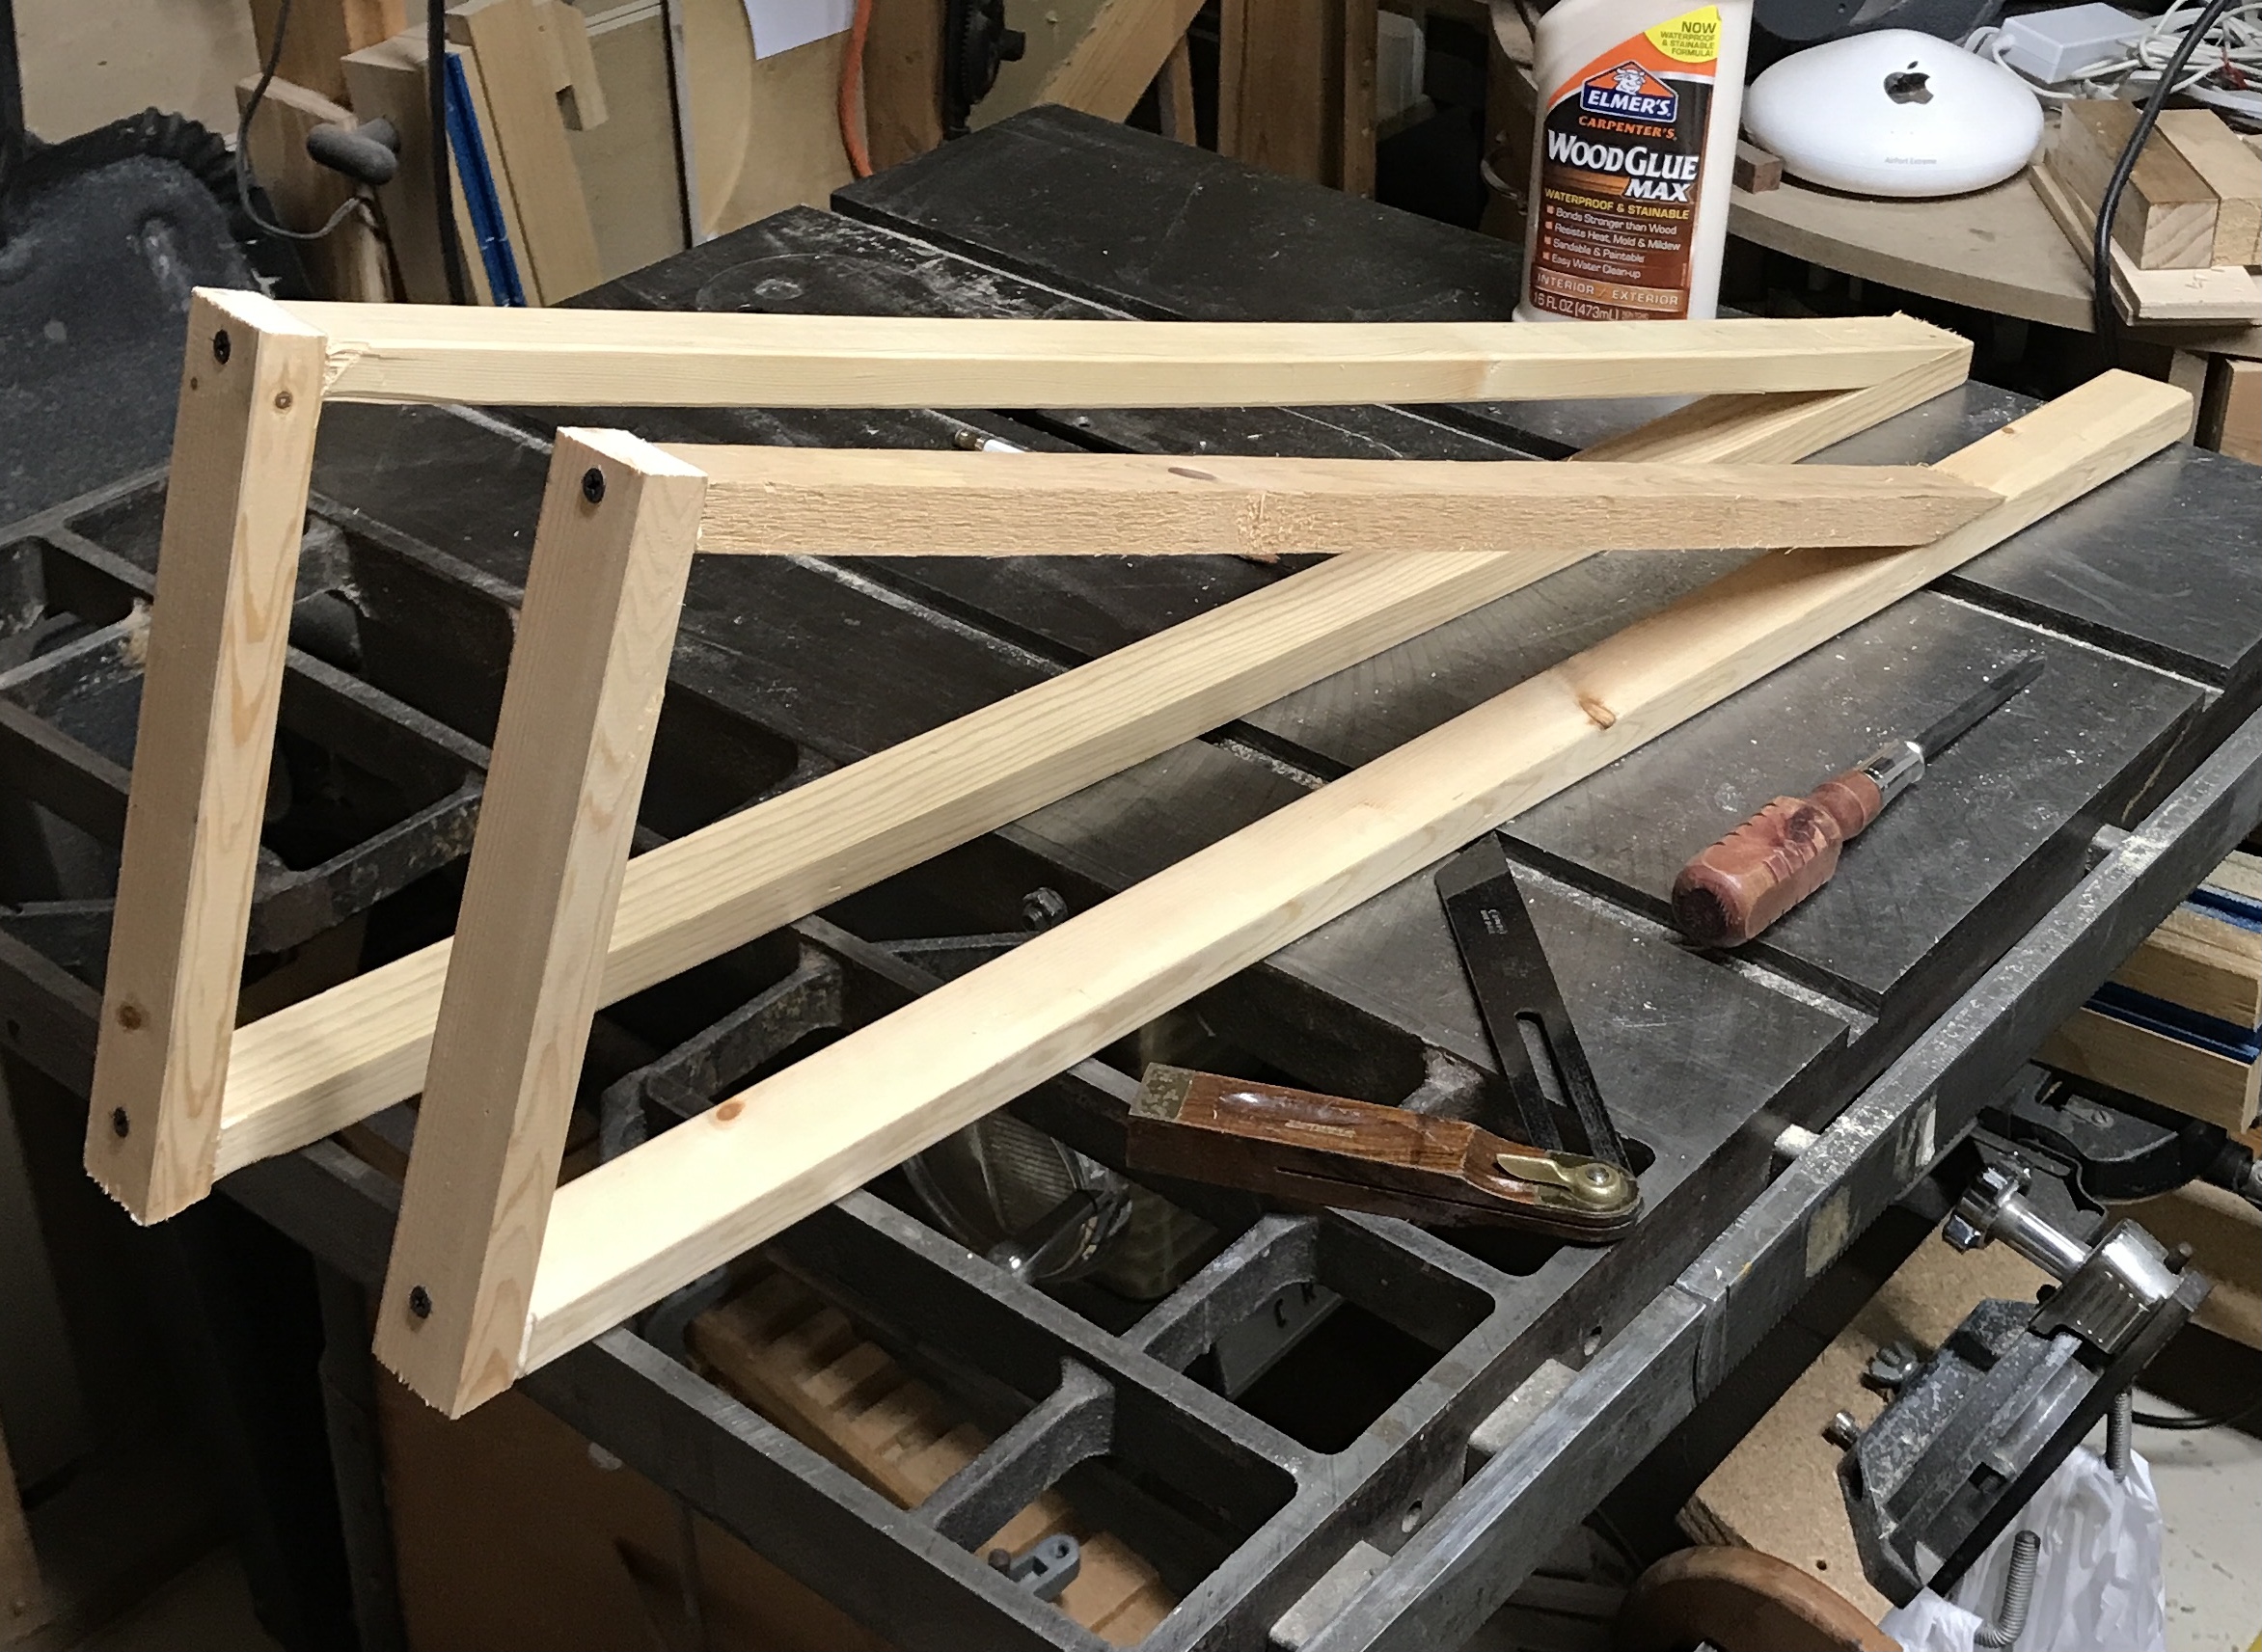
Began construction this morning. The biggest challenge was tackled first, attaching the bowl to the bottom return. The board was cut to length and then cut at a compound angle to mimic the addition of the return angle and the bowl angle. A lot of time was spent with the rasp and finally with the Dremel. The rasp got the angle and the circumference of the bowl. A sanding wheel in the Dremel helped with the curve of the bowl's side. Two holes were put through the bowl and two screws were driven into the return.
The return was attached by setting the angle, marking the top and end, drilling through holes, drilling for screw heads from the back, transferring the holes to the return, drilling the holes in the return, and screwing the return to the back. The left side was cut to fit and attached the same way the return was with #10-1 1/2" wood screws. The right side was cut to fit and attached at a slight angle. Before attaching a marble was run down the return, hit the side, and dropped into the bowl. The right side was attached after sanding where needed. A lip needs to be made for the return.
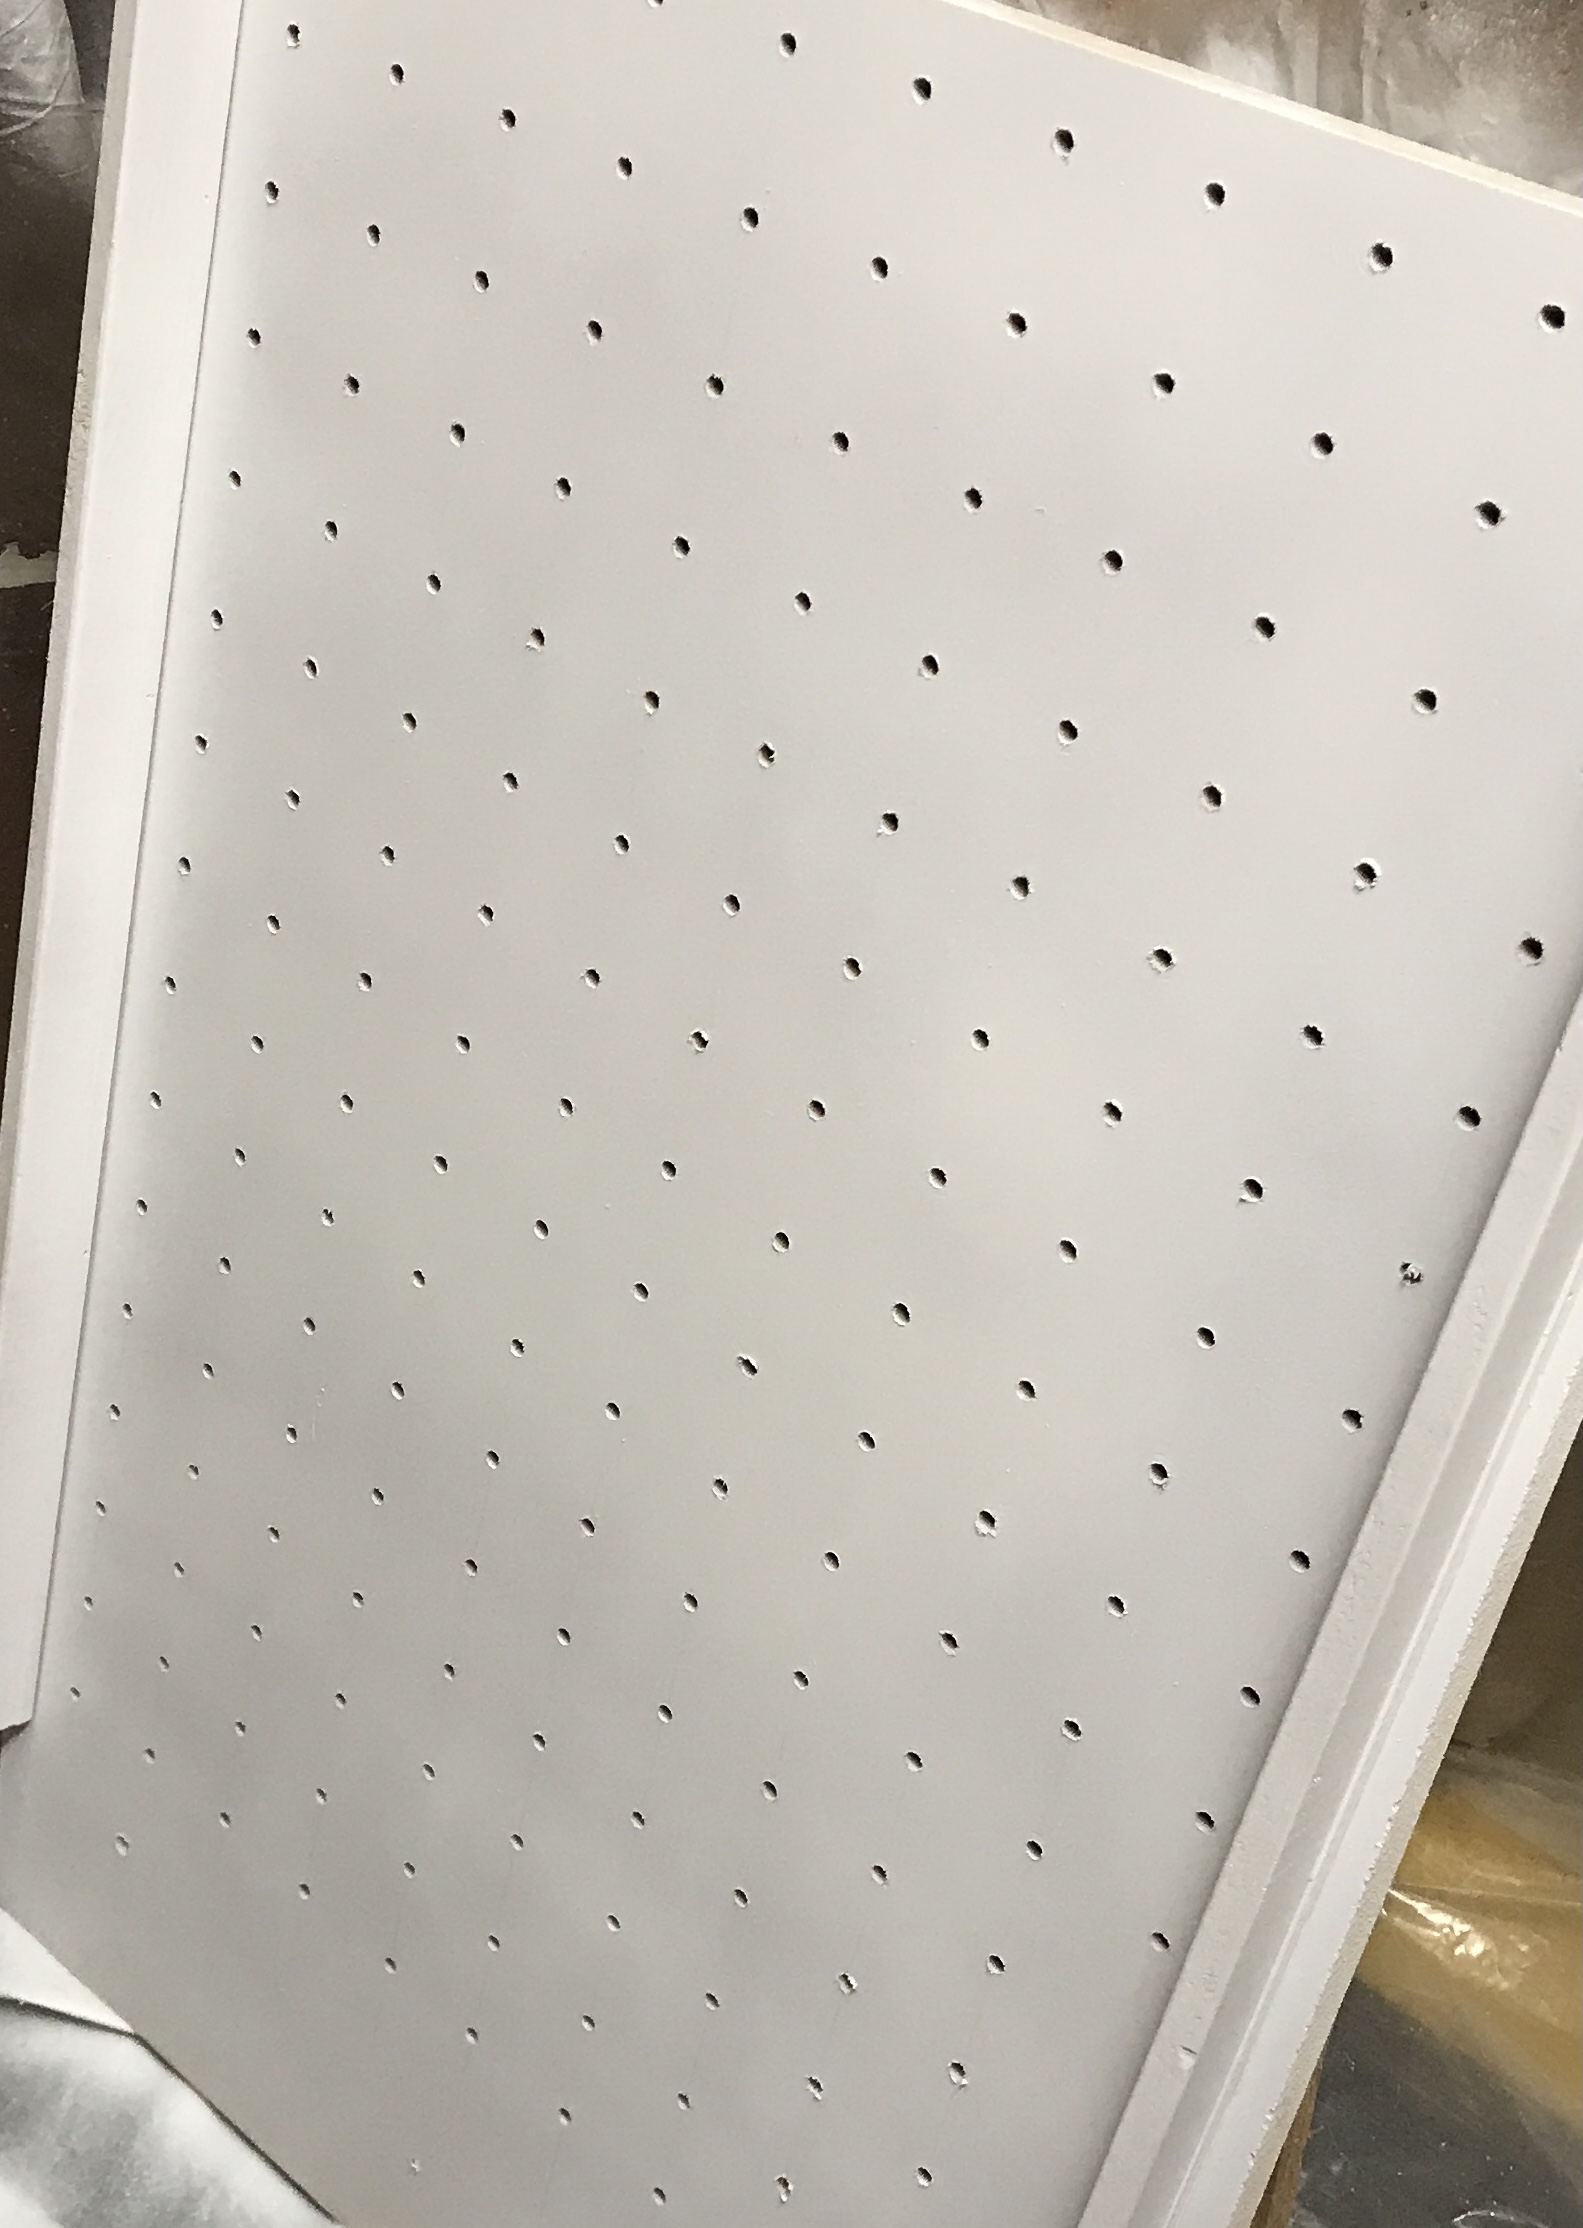
A grid was plotted out for the dowel holes. Before any were drilled a few test holes were drilled in a scrap of particle board. The 1/4" dowel I have on hand was tested in these holes. The F drill was perfect, a little tight but not too tight. A few holes were punched and drilled with a stop set at 5/8".
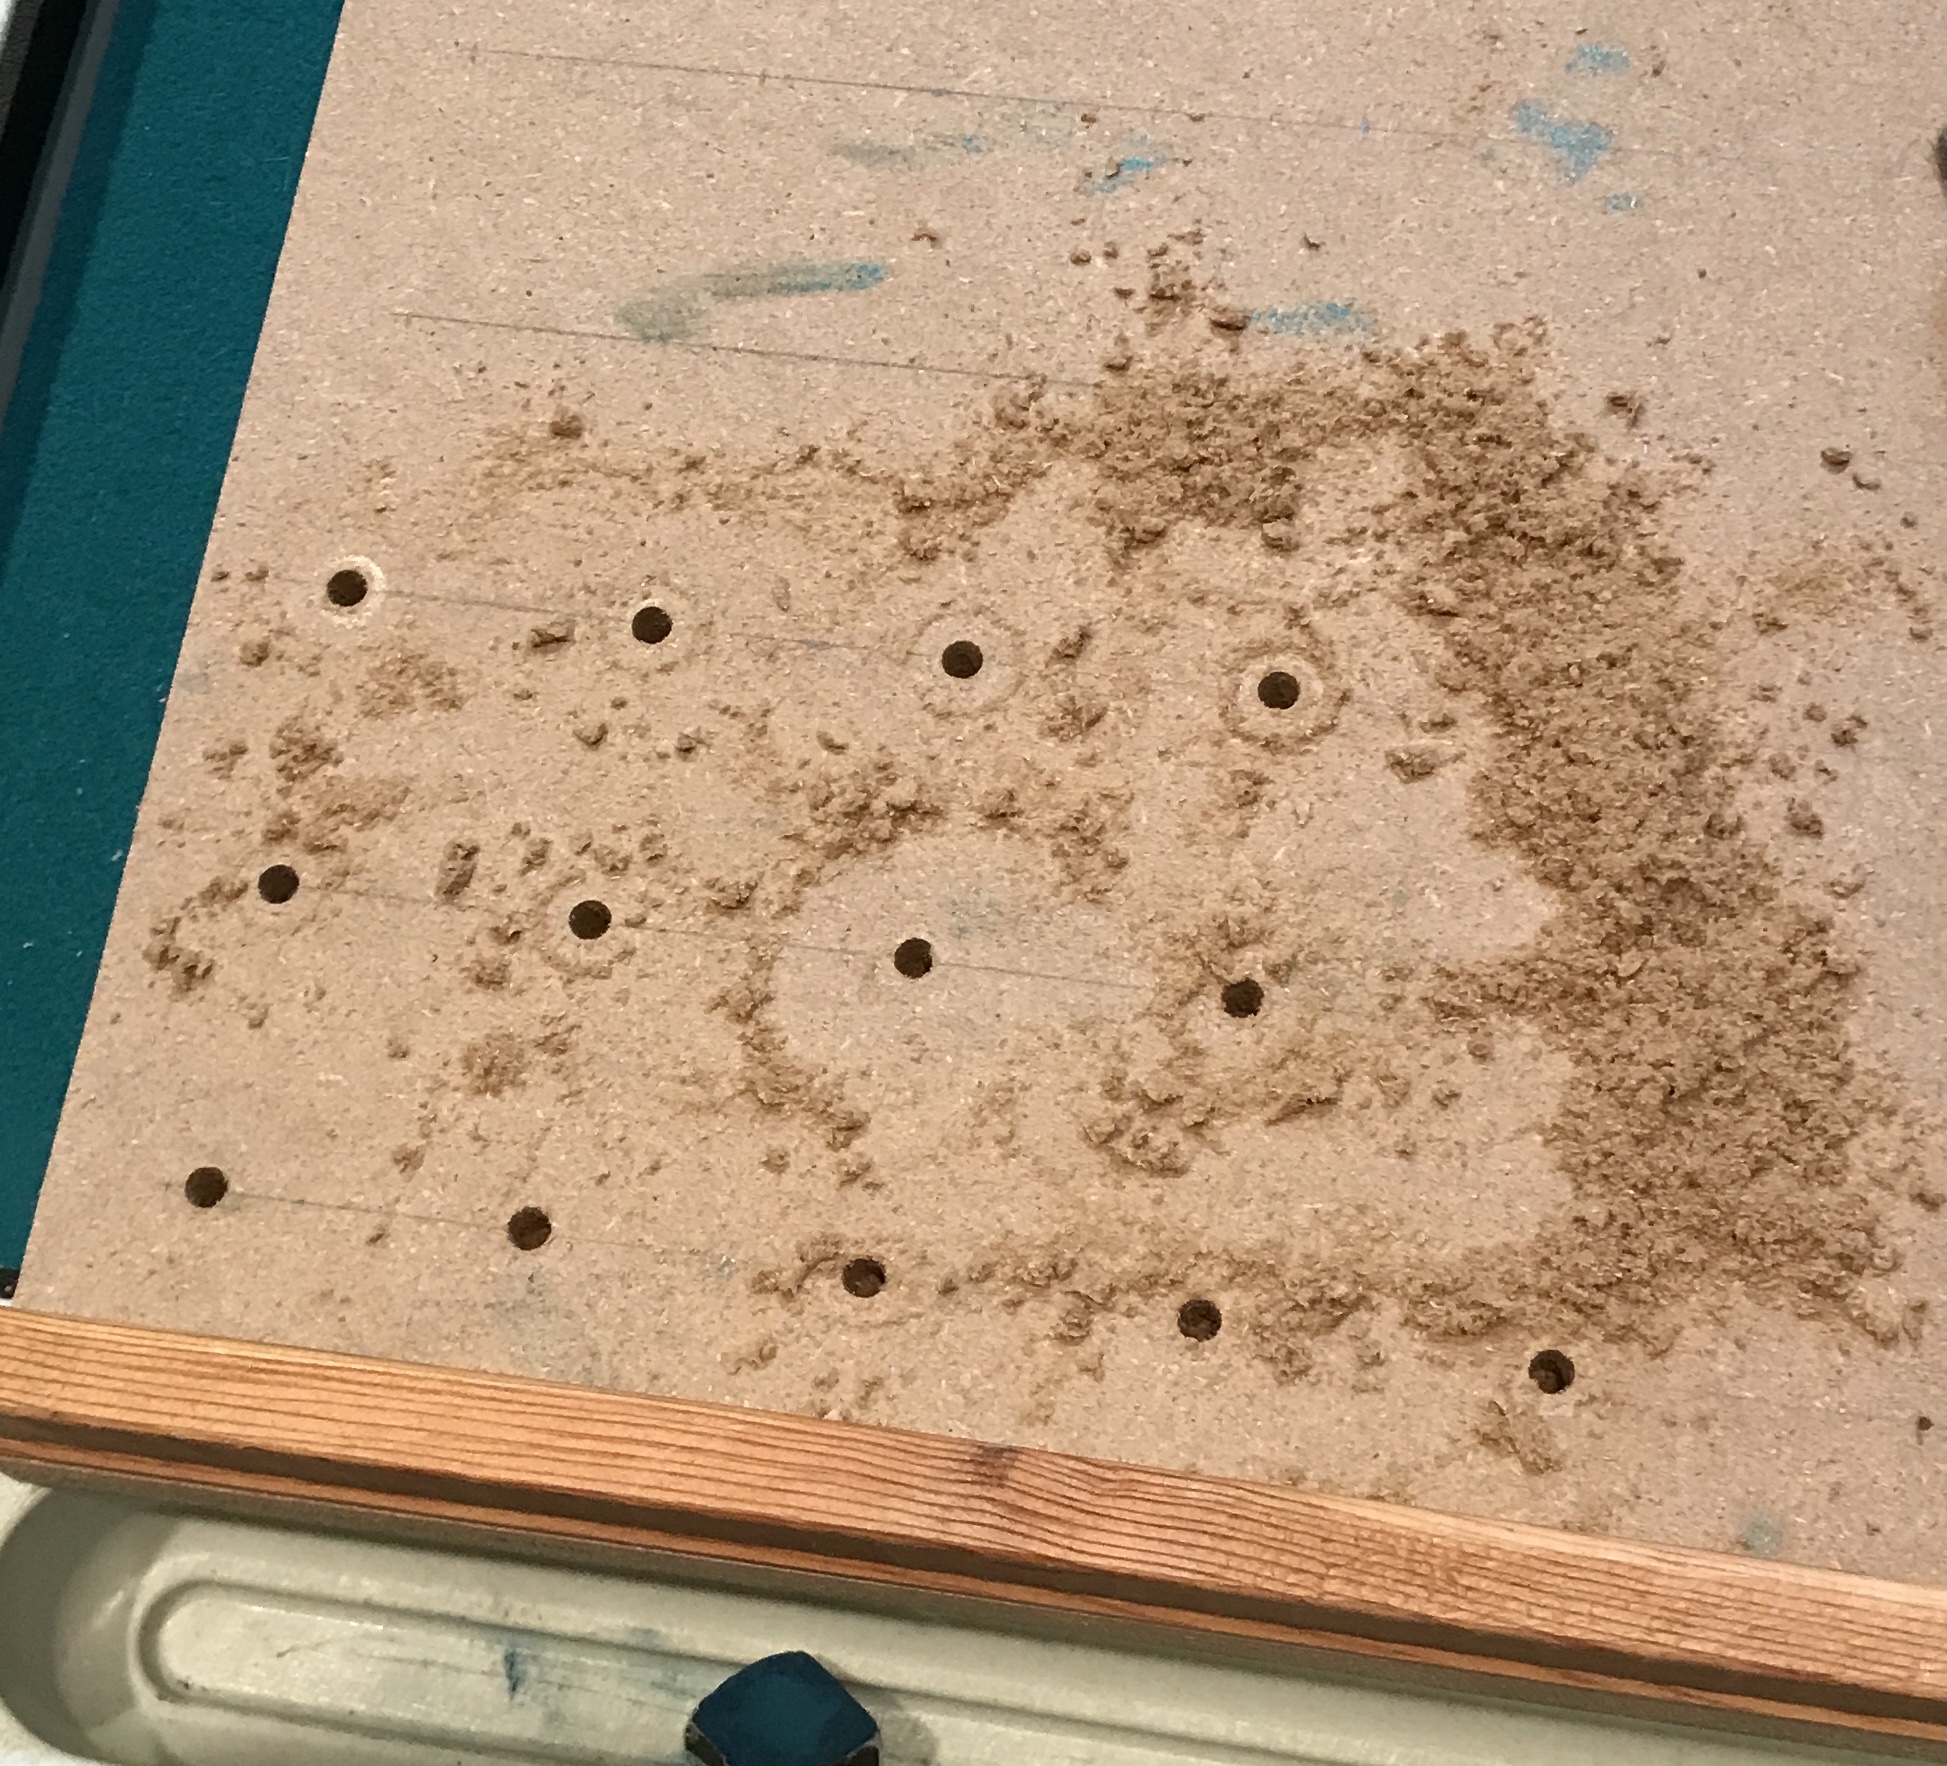
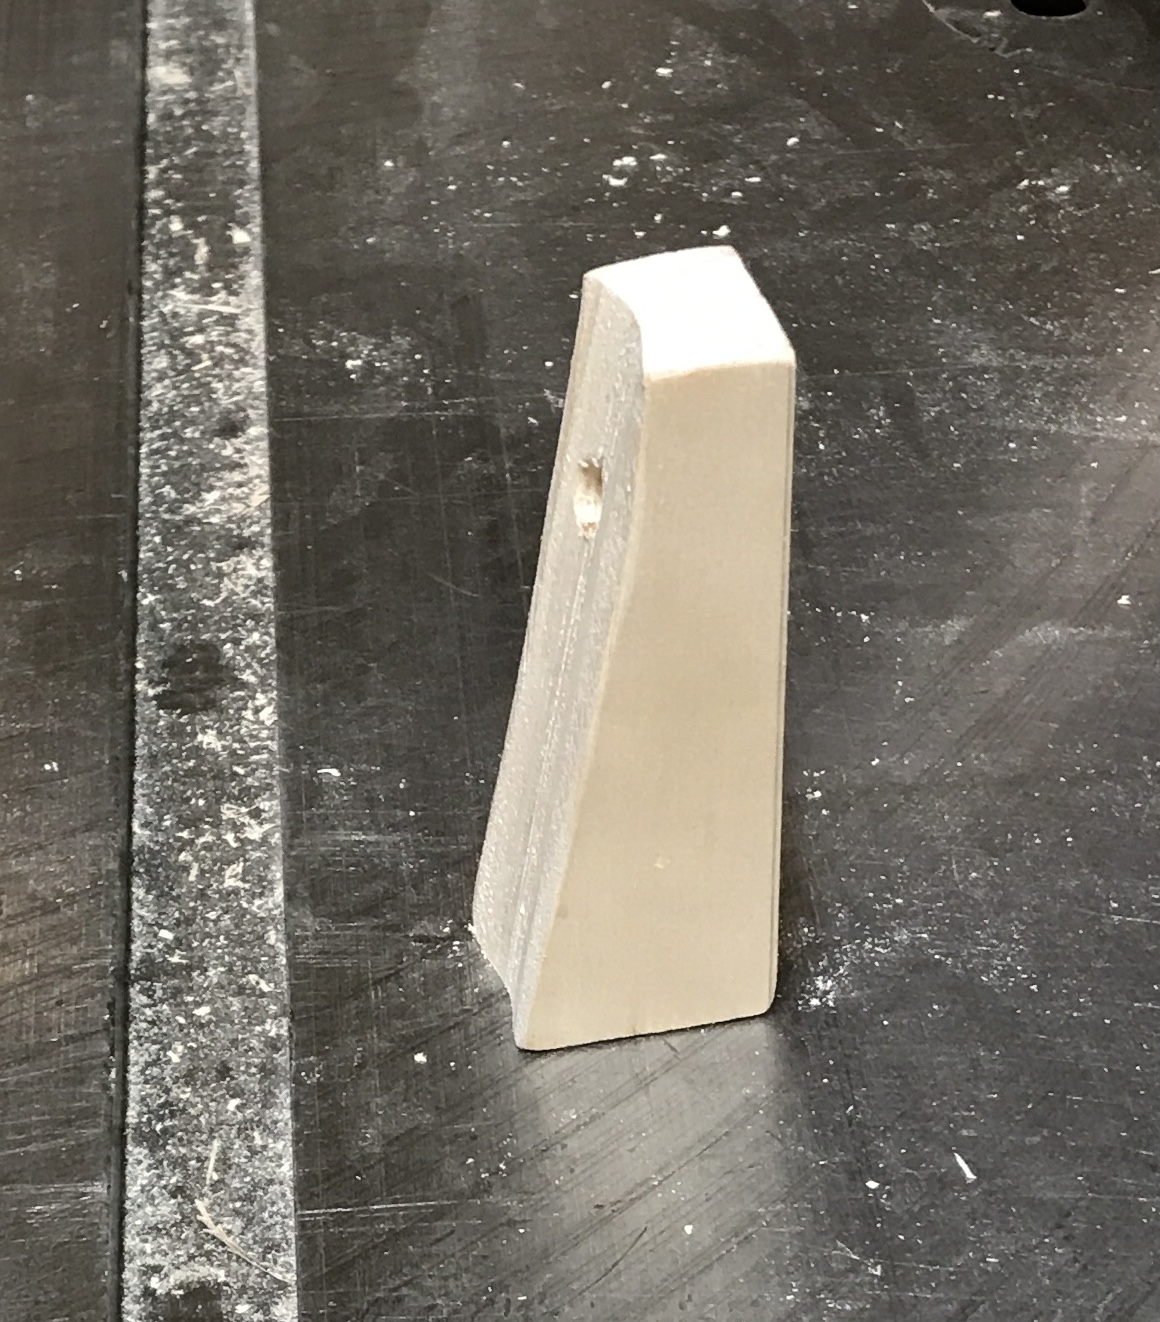
Most of the holes were drilled as shown below. About 20 were left for the boys to drill. The stop slipped and one row was drilled almost through. A scrap of the material used for the ball return had a 1/2" length cut from one side. This scrap was split down the middle with a coping saw making two lengths that are 1/2" X 1/2". One cut face of each was sanded on the belt sander. A full length piece was glued to the edge of the return. The second piece was cut to fit and the end cut at a 45° angle. It was also glued to the outer edge of the return forming a wall as seen below.

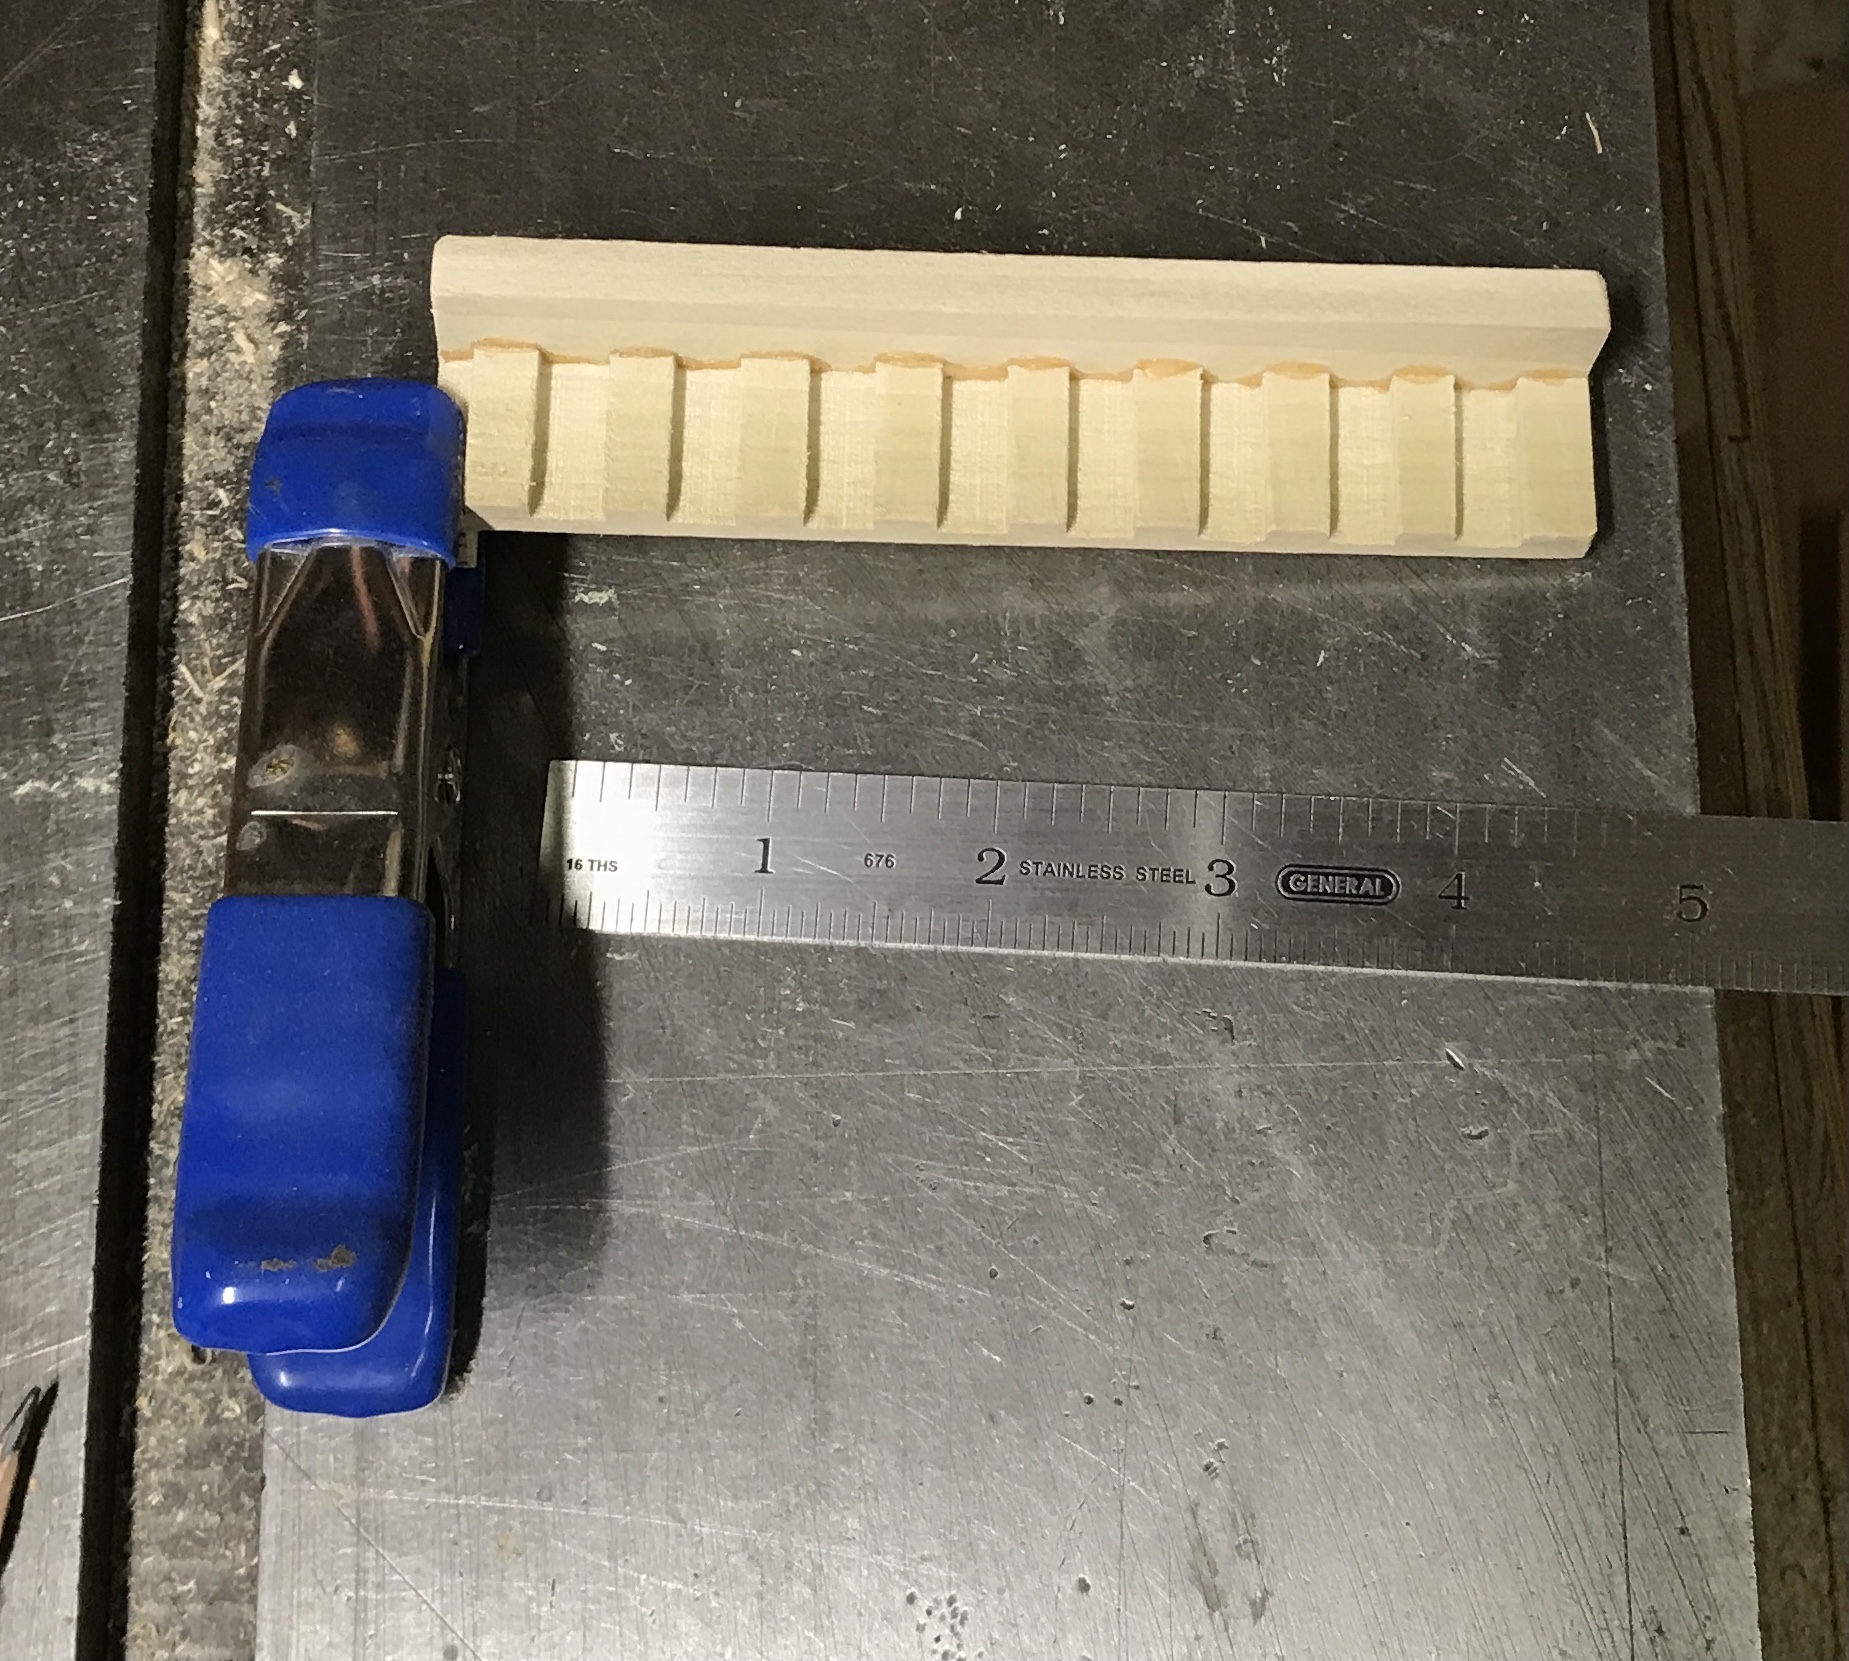
The next step was making the ribbed tracks. These should make some noise. I started with a 1/4" X 1/8" groove. A piece of scrap was prepped. The table saw blade was equipped with the dado washers set to 3, which according to the story board should give a 1/4" groove. The first groove was cut with the scrap held against a stop. Two 1/4" blocks of wood were placed between the stop and the scrap and another cut was made. Three more cuts were made with an additional two blocks each time. As it turns out the width of the cuts is 5/16", so the gap between successive cuts is 3/16". This was held against the back and marble rolled down the scrap. The marble bounced a little as it hit the cuts, but there was not enough noise for the effort. Since making the ribbed tracks is a lot of work, I decided to pass.
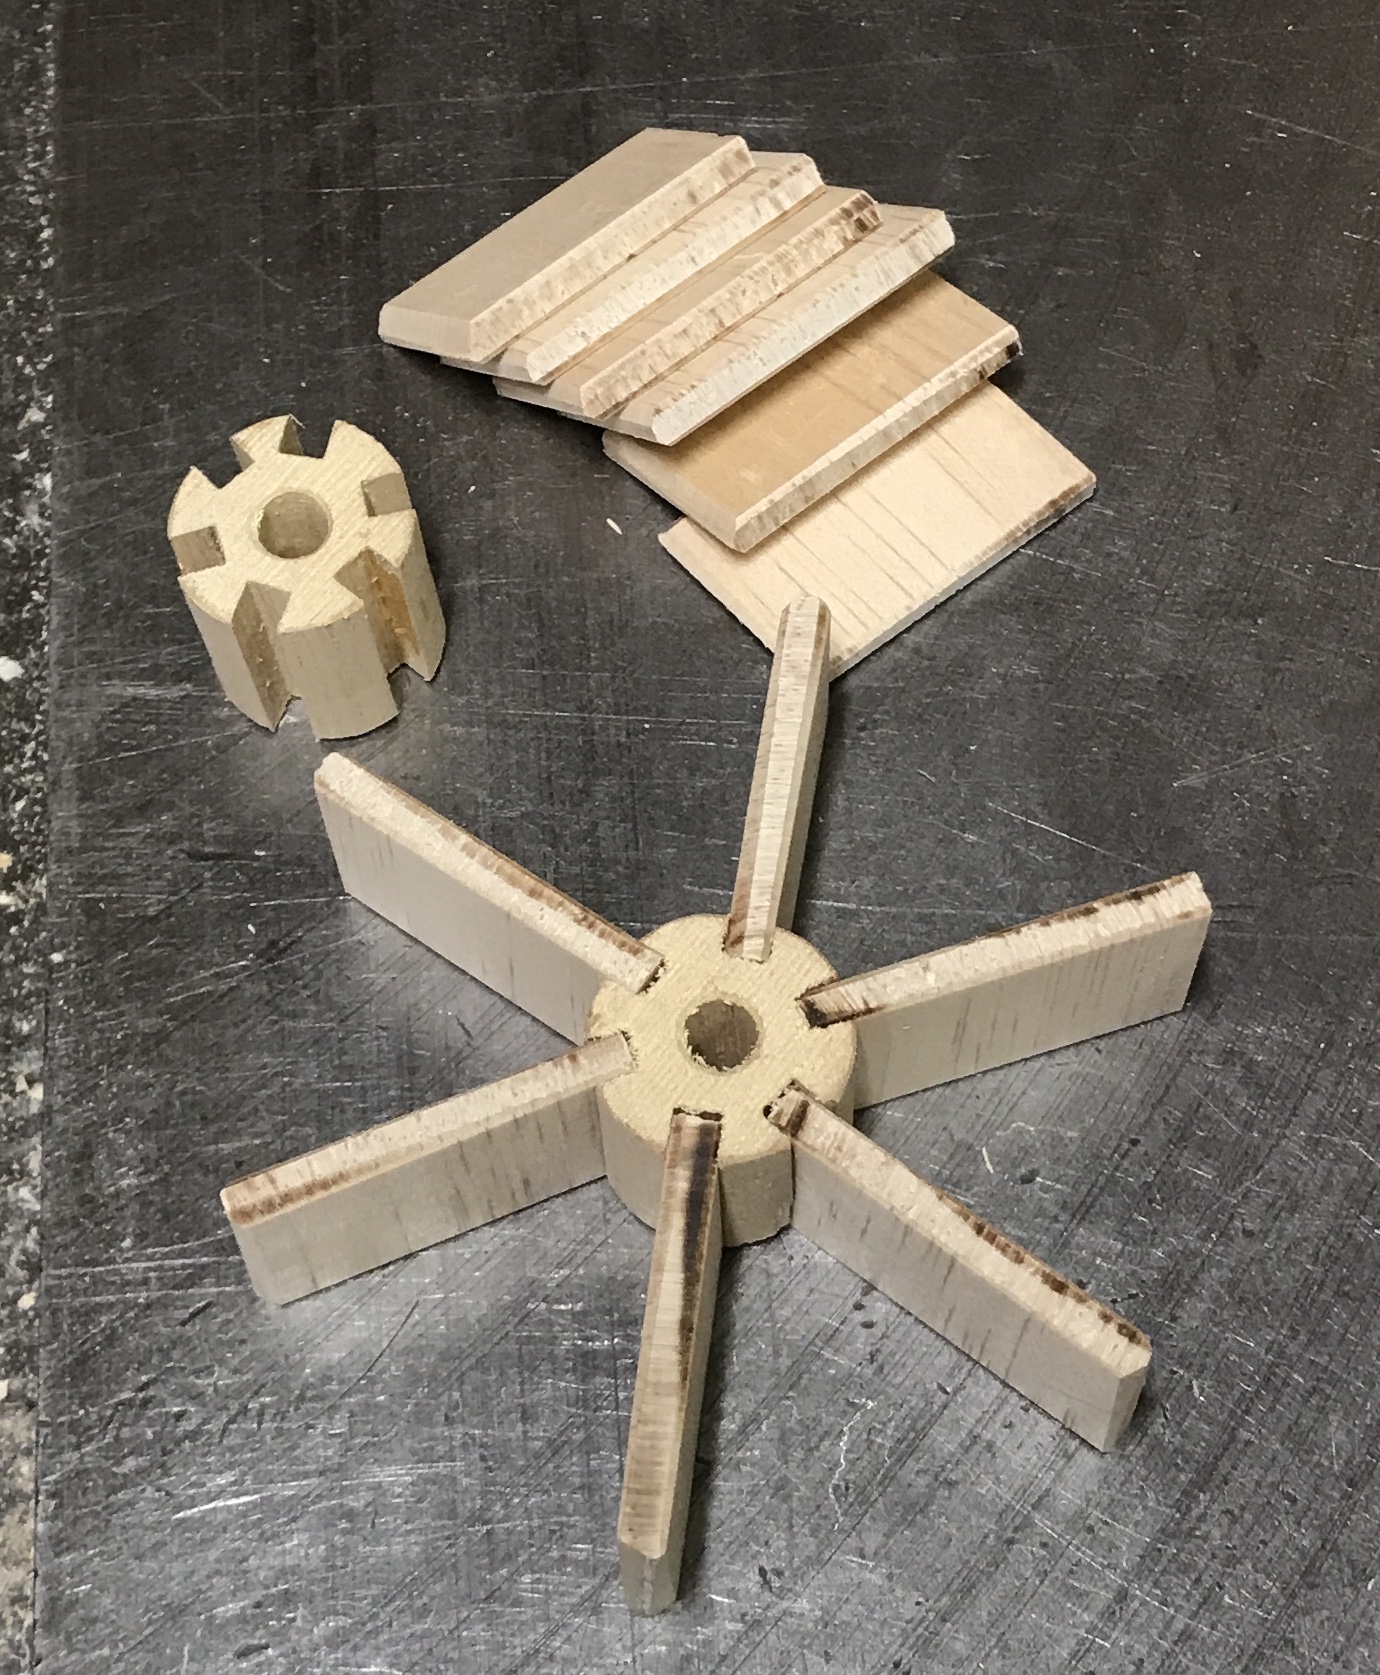
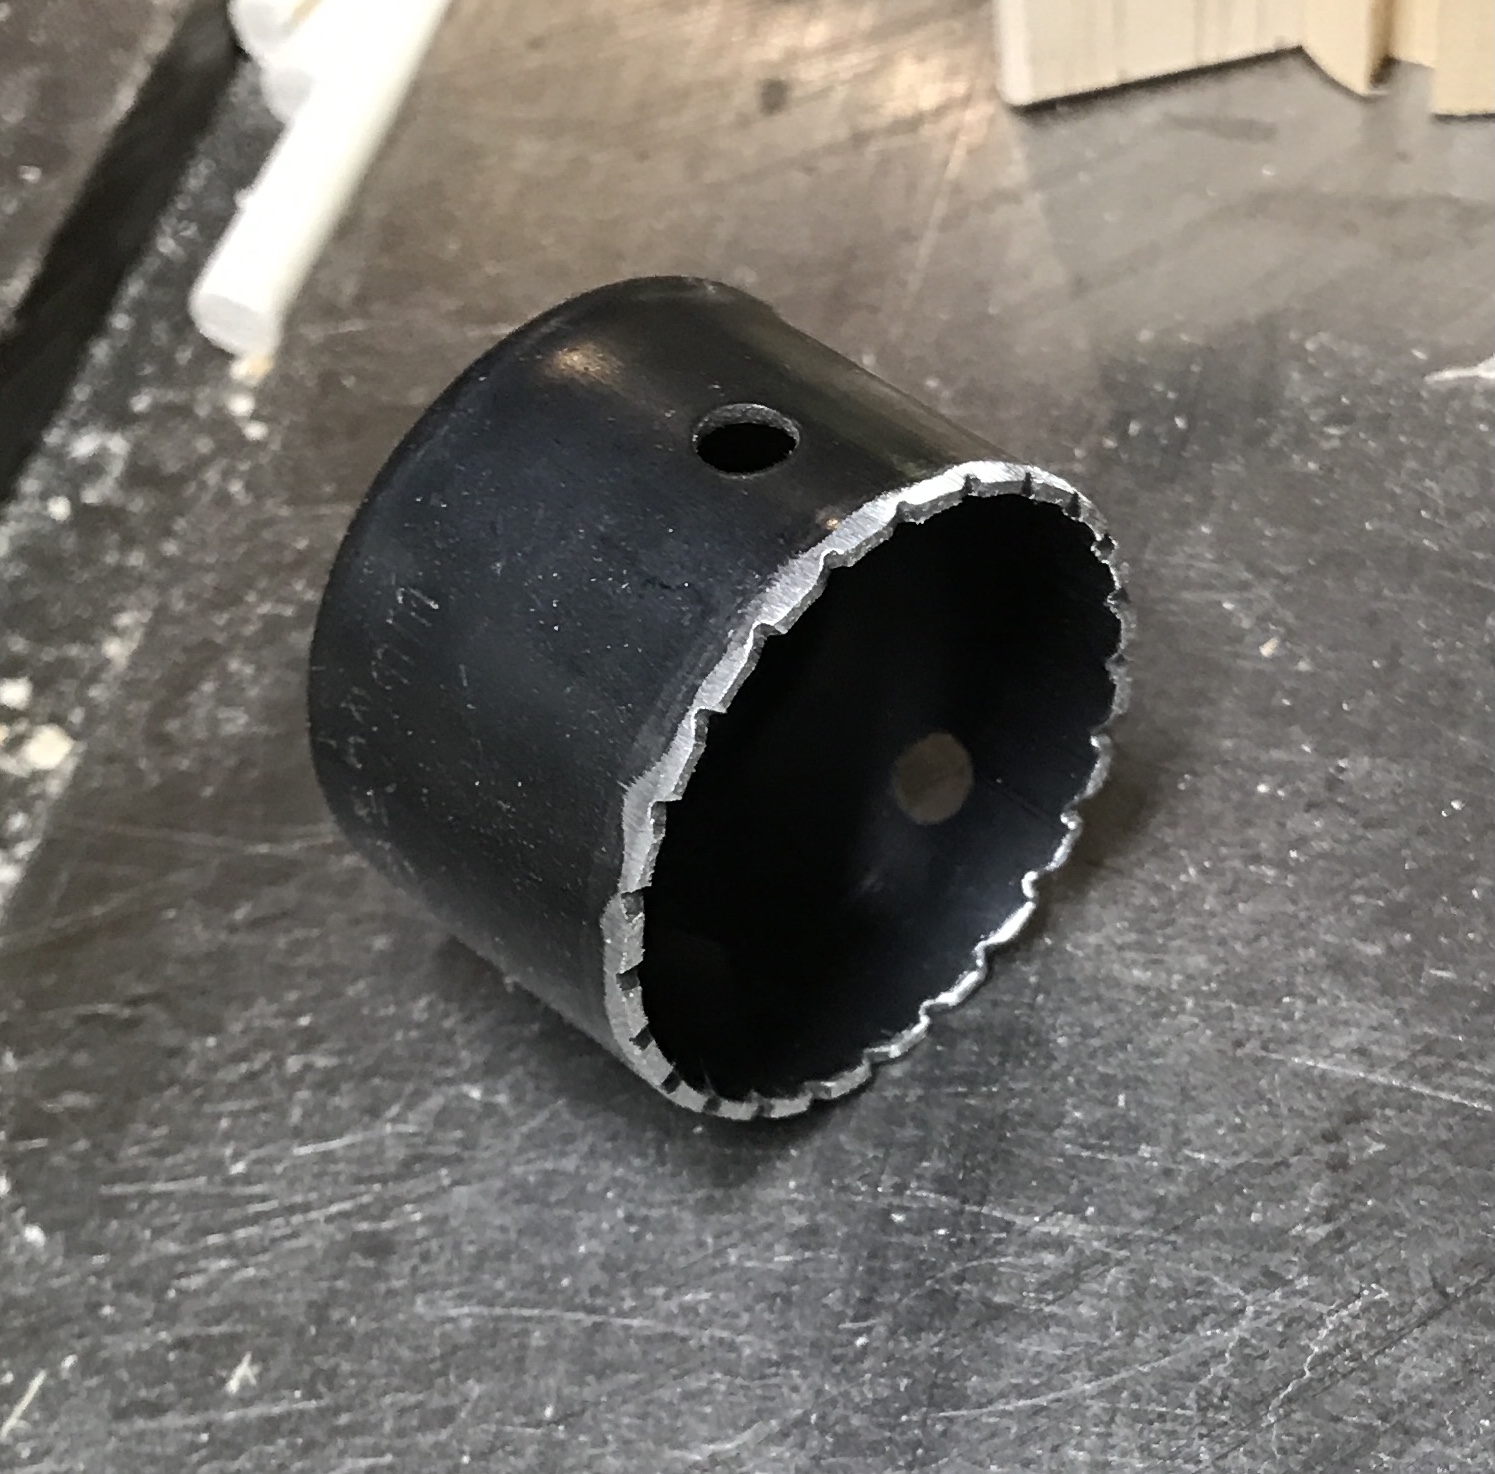
I pulled out two hole saws and dropped a marble on them. They both gave a nice "plink". I need to hit the store as I don't like the idea of filing the teeth off the hole saws. Time to make some hubs for the spinners. A 1" diameter dowel was located and 3" was sawed off. An attempt was made to use the three jaw chuck and the indexing block, but the chuck did not hold the wood tight enough to mill. The chuck left nice index marks in the wood. The wood was turned in the chuck so one index mark was centered between two jaws and the chuck tightened. This left six evenly spaced marks on one end of the dowel.
The marked dowel was held in the vise. The spindle was centered over the dowel after touching off on the fixed jaw. The dowel was rotated until an index mark was centered under the 3/16" end mill. The end mill was lowered to the top of the dowel. Four passes of 0.050" depth for three and 0.038" for the fourth were made to giving a 2" long square groove. This was repeated for the other five marks. The part was drilled up to an I drill, which gave an easily spun cylinder on a 1/4" dowel. Two 1" lengths of this grooved cylinder were cut off with a saw.
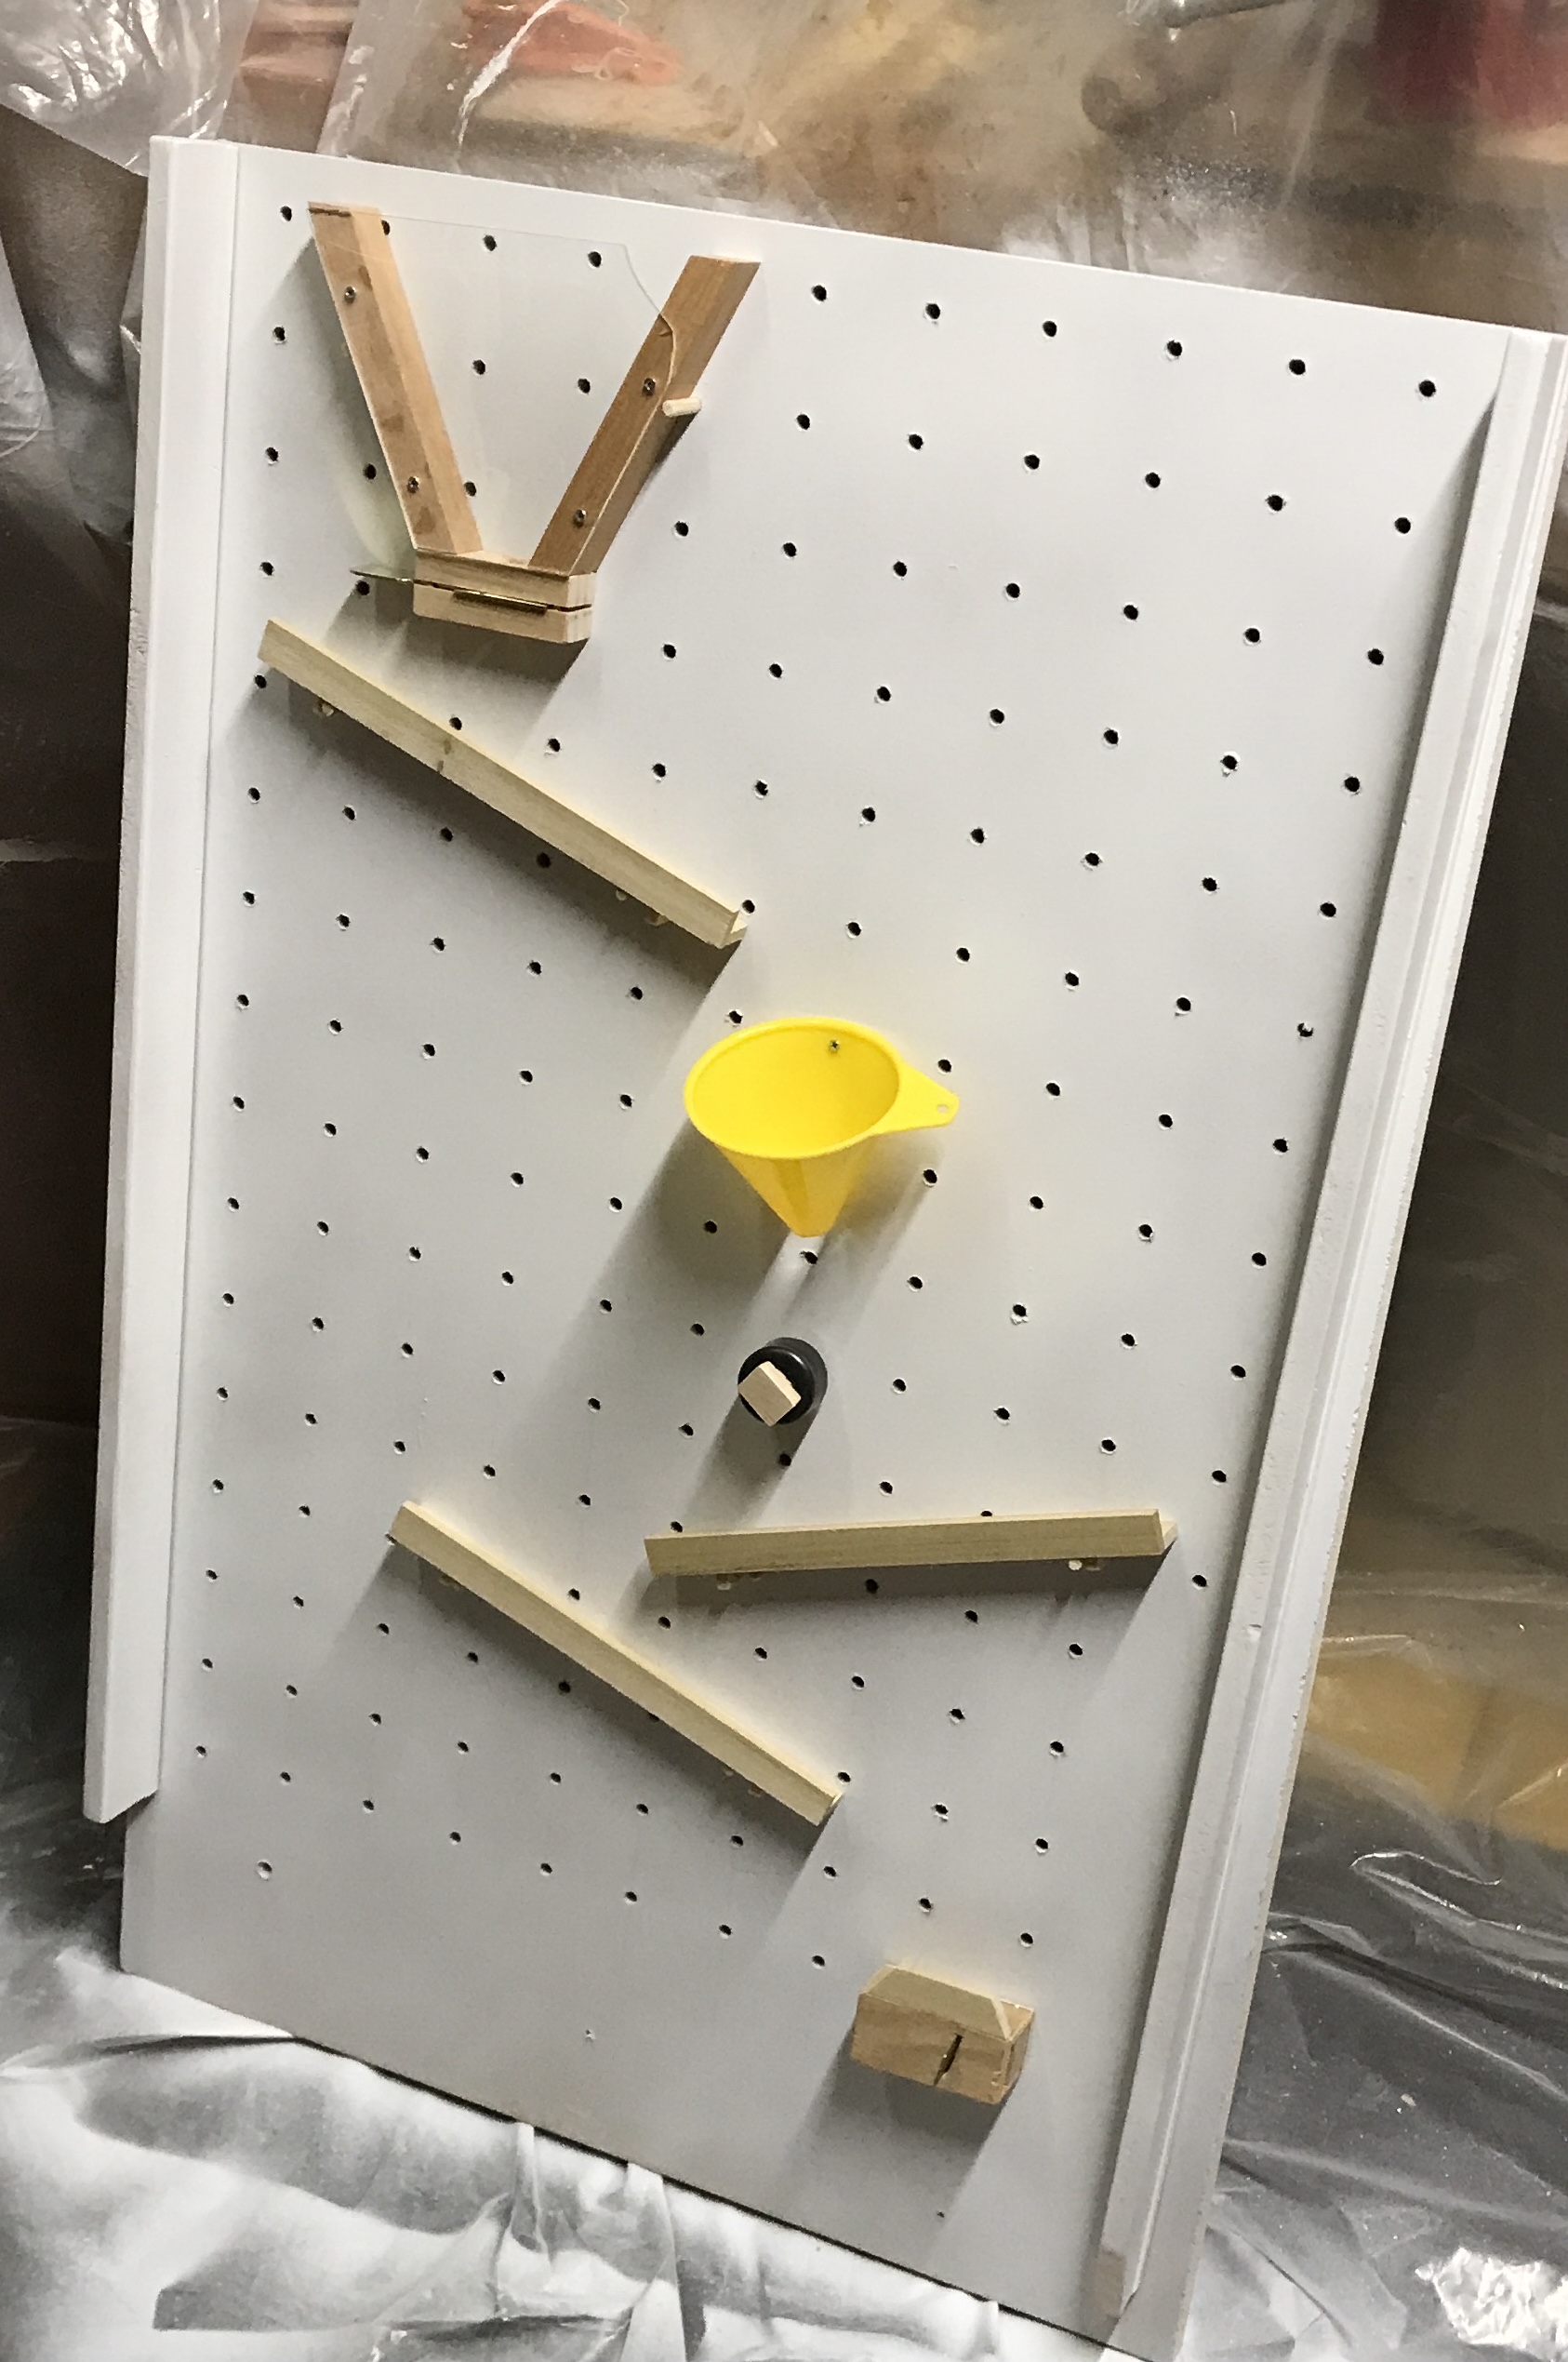
An 8" long 1 1/2" square block of wood was used for the next steps. Two 3/16" thick slabs were cut off with the table saw. Twelve 1" wide lengths of this were sawed off by hand. These paddles were cleaned up with the disk sander. All corners were chamfered except for one end to fit in the grooved hub. The hubs and paddles are shown in the following photo. They are ready to be glued up by the boys after the paddles are shortened by 1/4-1/2".
The vanes were shortened by 1/2" and the sawed ends flattened on the disk sander. An old prototype music box was located. It was cleaned up on the sanding belt. With two holes it should make a nice sound when the marble hits it. Went to Menard's this morning and purchased 1/4" poplar dowels, funnels and a set of four hole saws. The smallest hole saw had most of the teeth filed off on the belt sander. The burr on the outside was sanded off on the disk sander. There was still a bit of a burr between the stumps of teeth. These were filed off with a round file as was the inside burr. The two musical devices are shown below along with audio clips of a marble hitting the hole saw bell and the music box.
The tip was cut off one of the three funnels purchased so a marble easily fits through. The marble when sent in at an angle runs around the funnel a few times before dropping out the bottom. Holding the funnel at an angle to the back board drops the marble against the back board. A holder of some sort needs to be made for the funnel. So a holder for the funnel, inserts for the bells, the support legs, and the ball input remain to be completed.
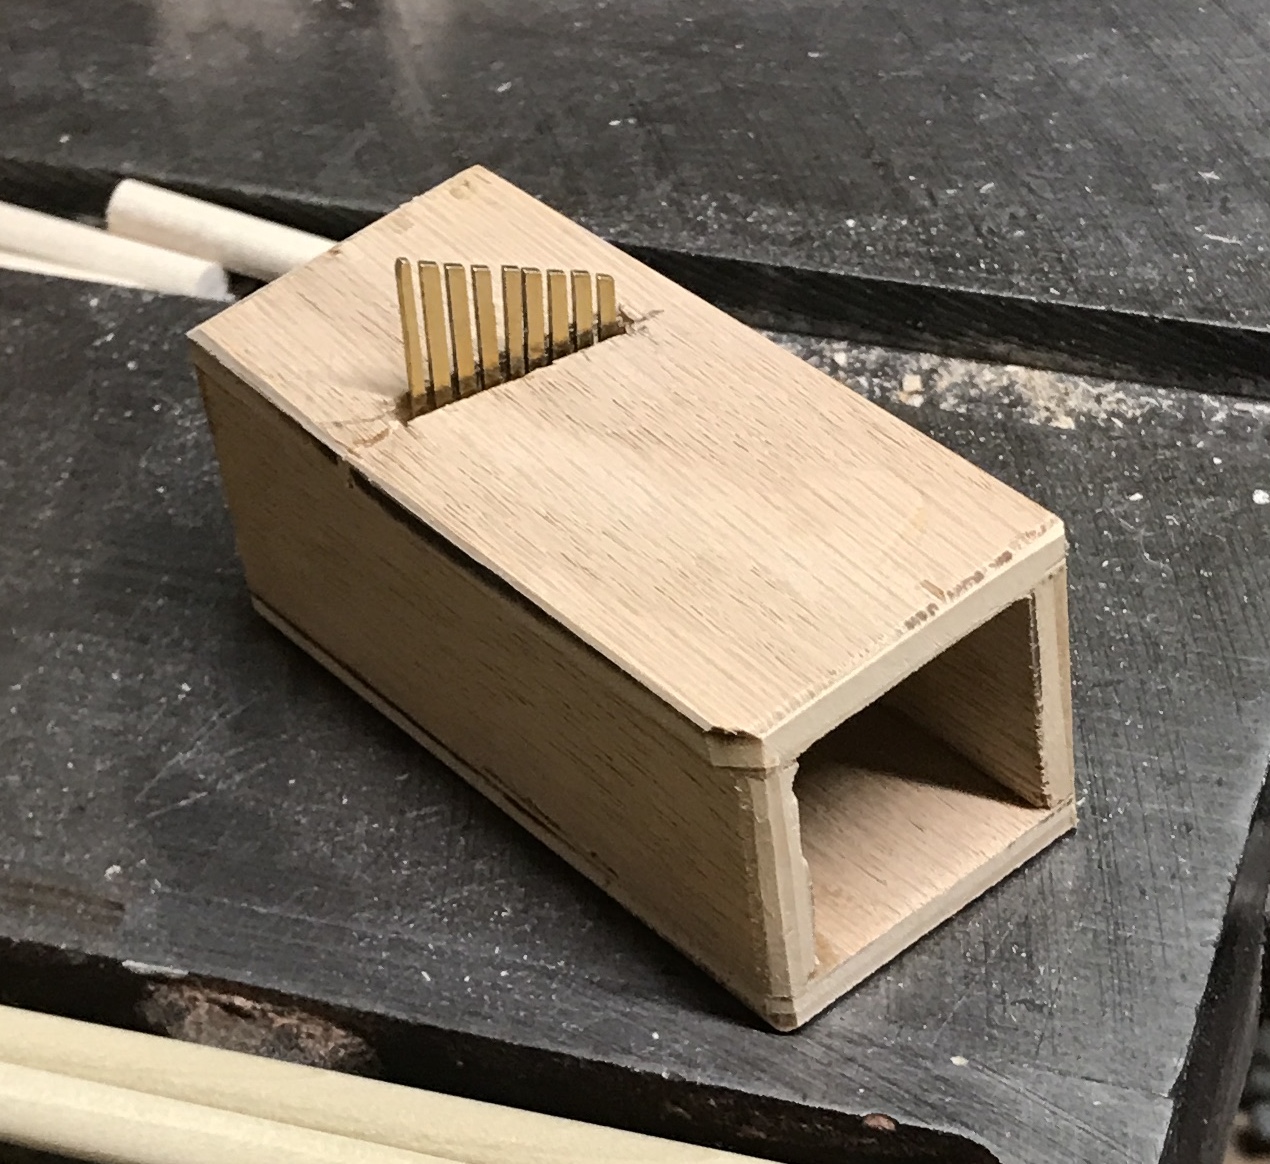
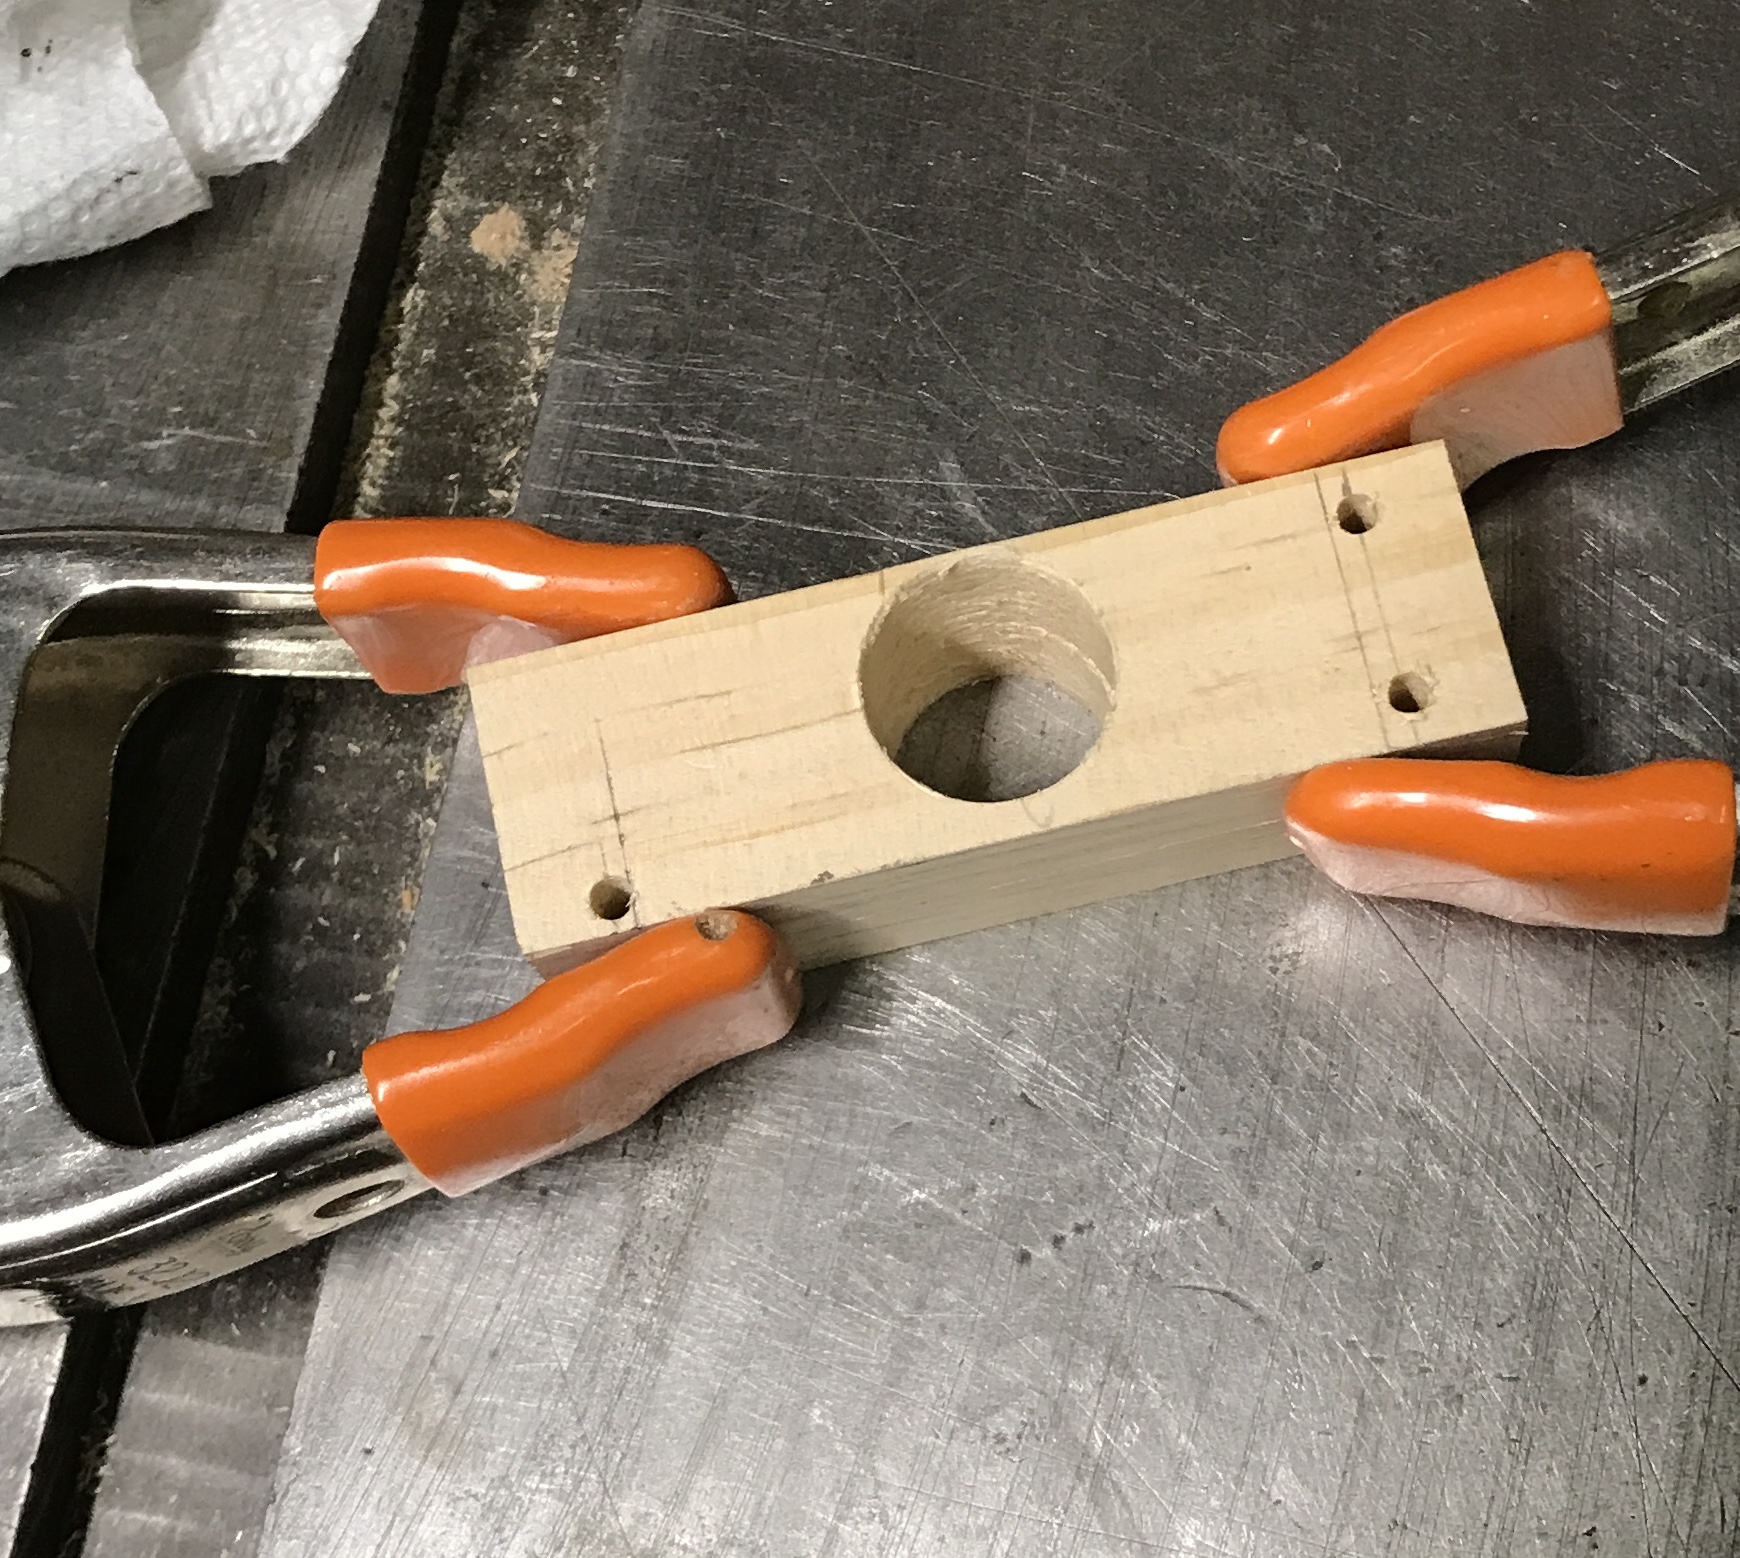
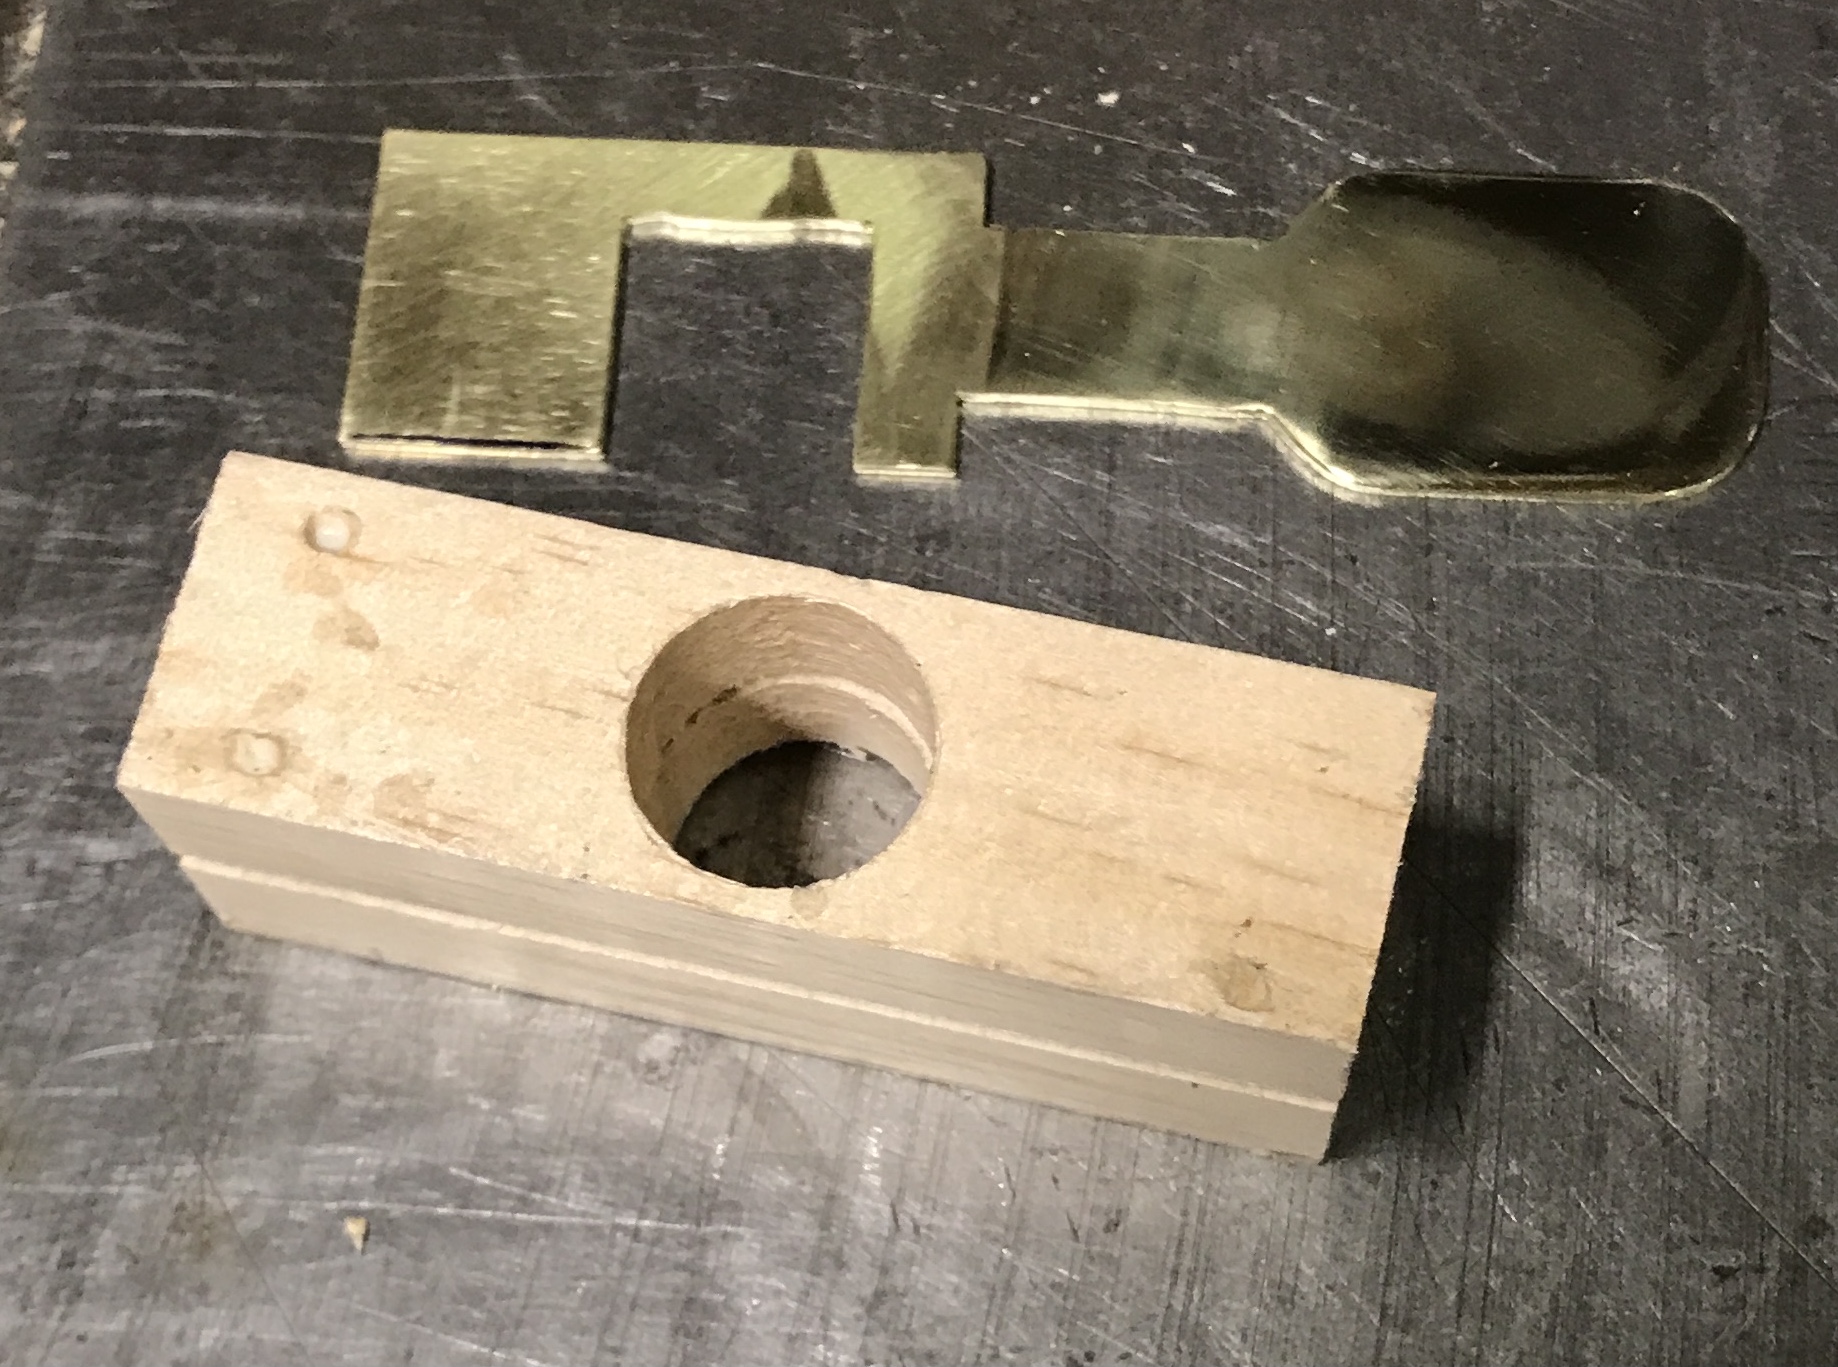
The ball input was begun this afternoon after the boys left. A 3" length of 1" X 1 1/8" stock was cut off. It was sliced down the middle leaving two 9/16" wide sections. The two were clamped together and drilled through with a 3/4" Forstner bit. This hole was purposely drilled very close to one side. This side will be against the back board. Before going further the key needed to be made.
A 4" length of 1/16" X 1" brass was found in the scrap. The desired key shape was laid out after bluing the brass as seen below. Six cuts were made with the hacksaw. The large cutout was removed by cutting on the XXX saw. The blade broke cutting a smaller cutout so the coping saw was used to finish the last two cutouts. The cutout key is seen in the second photo.
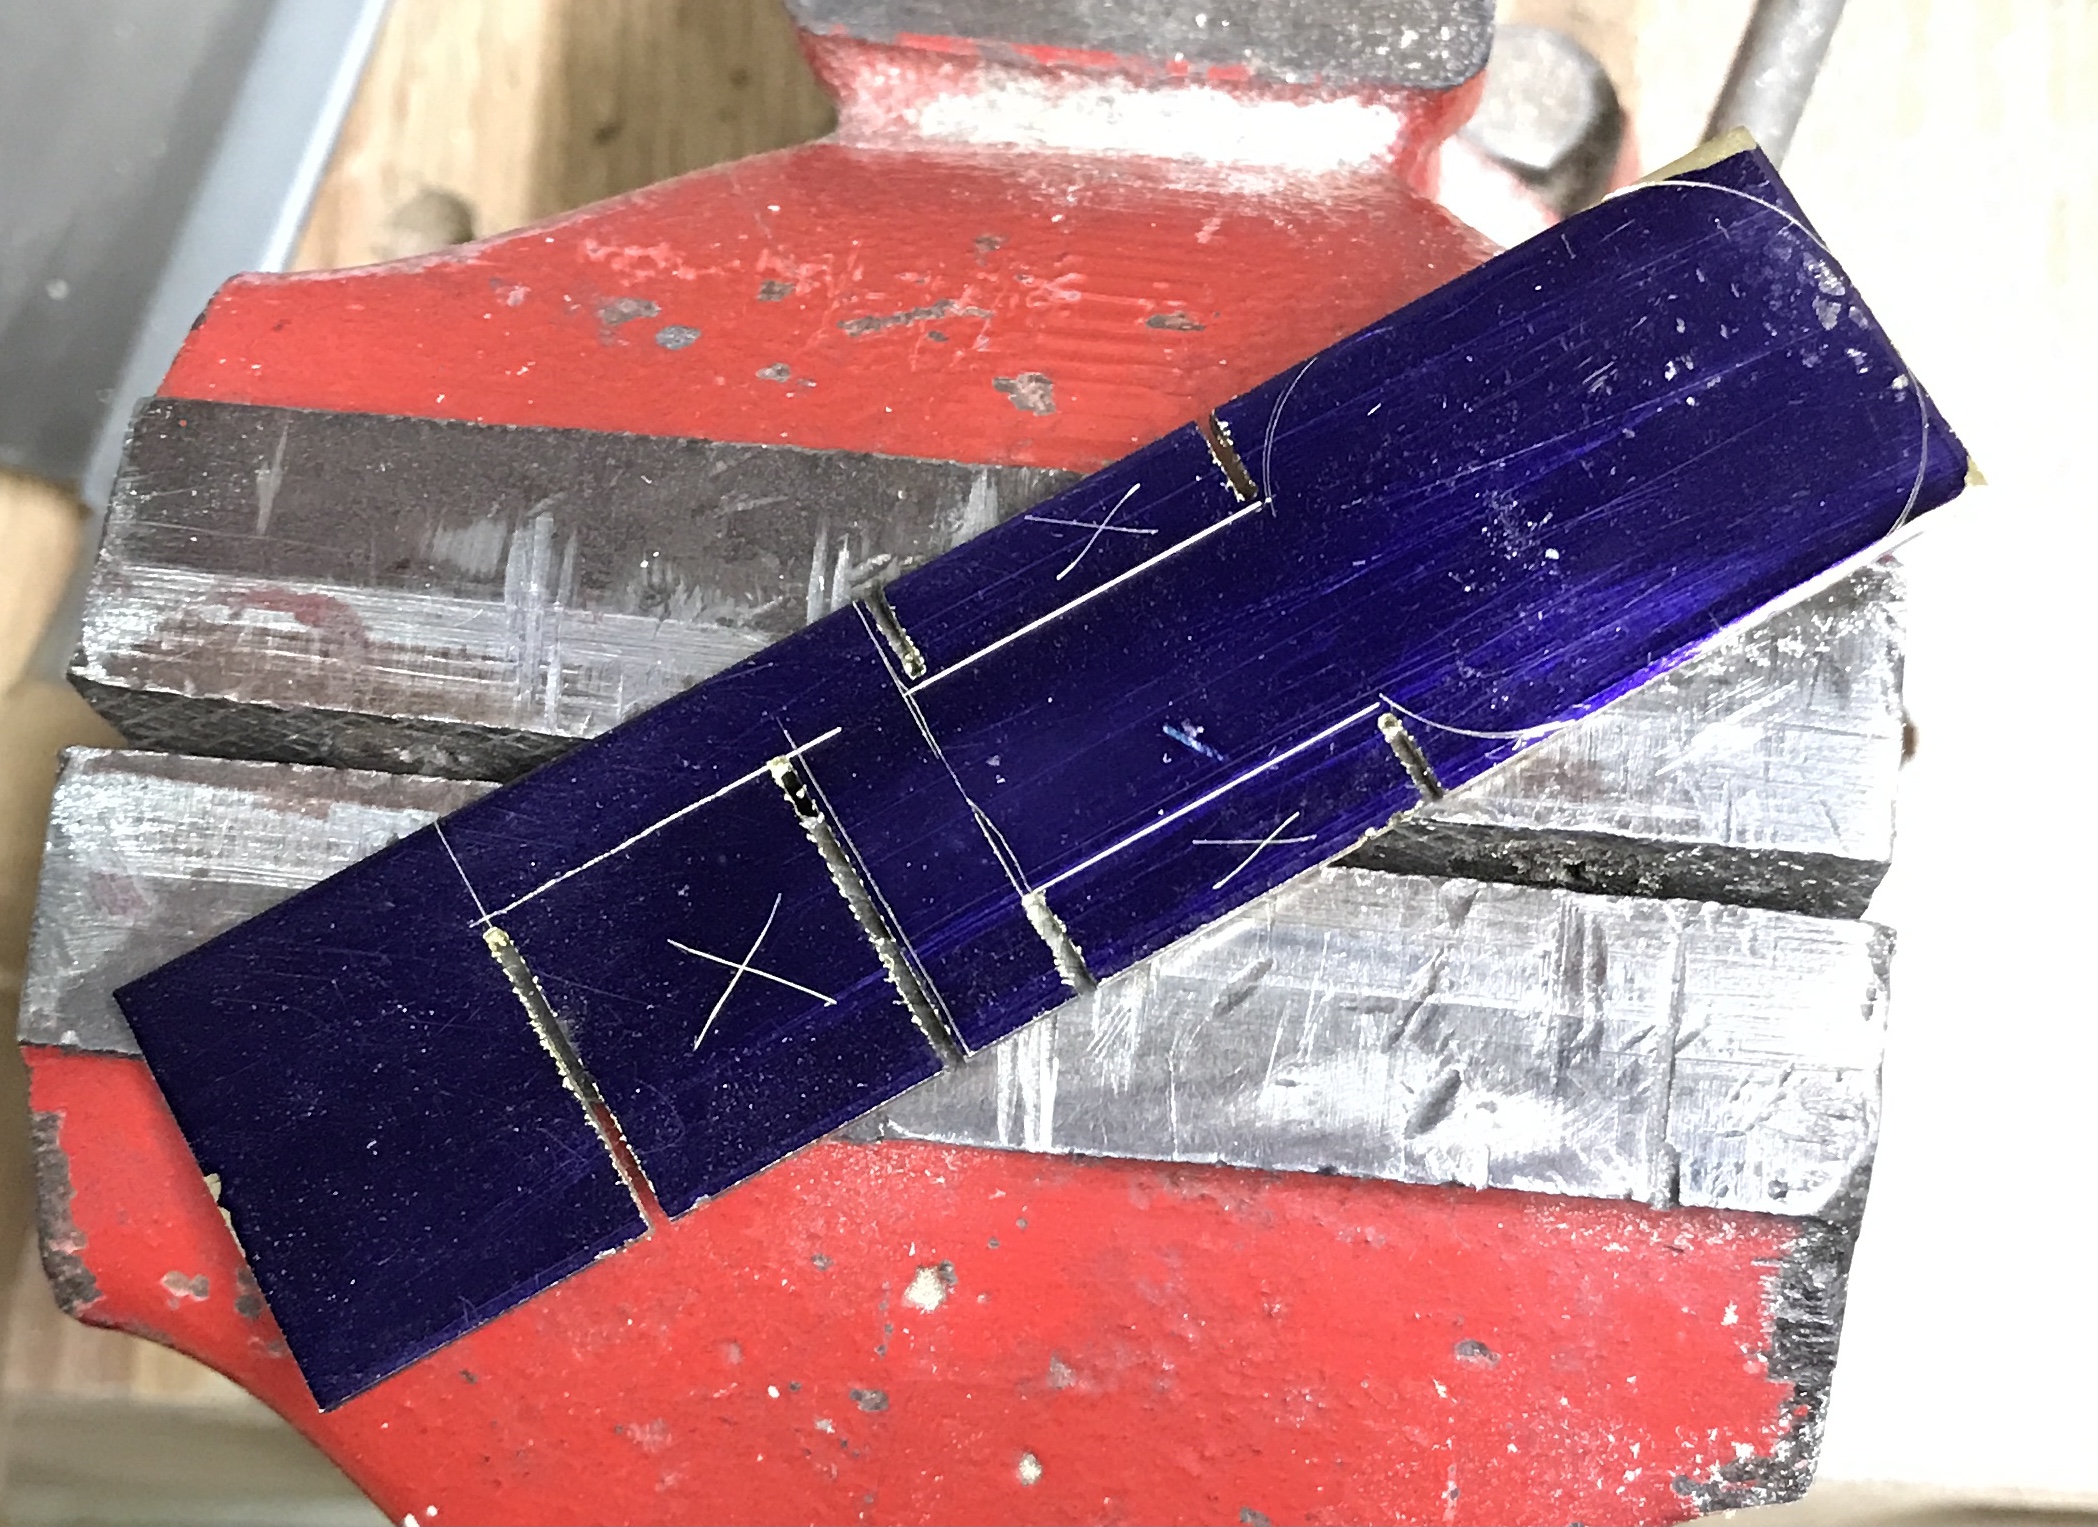
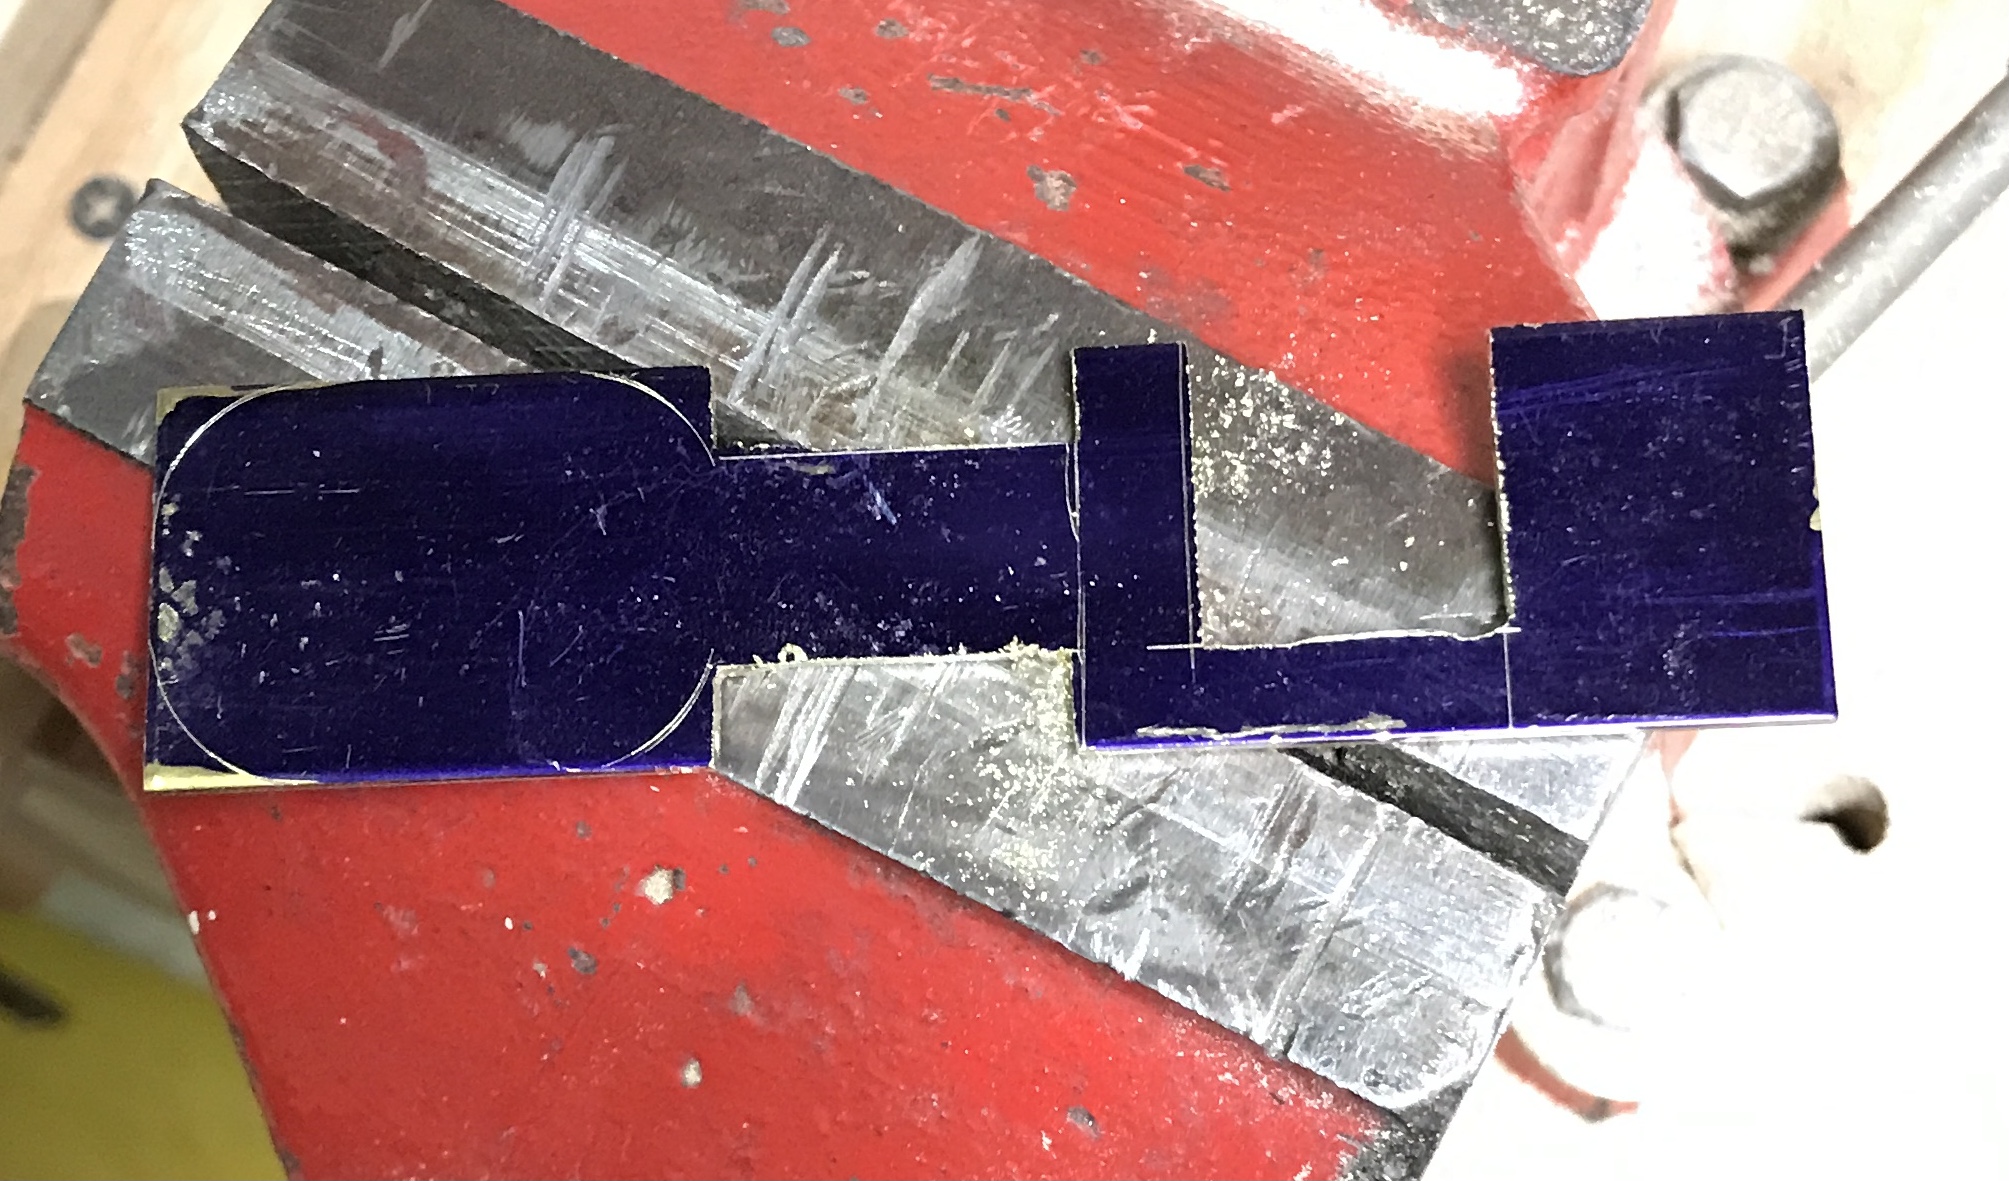
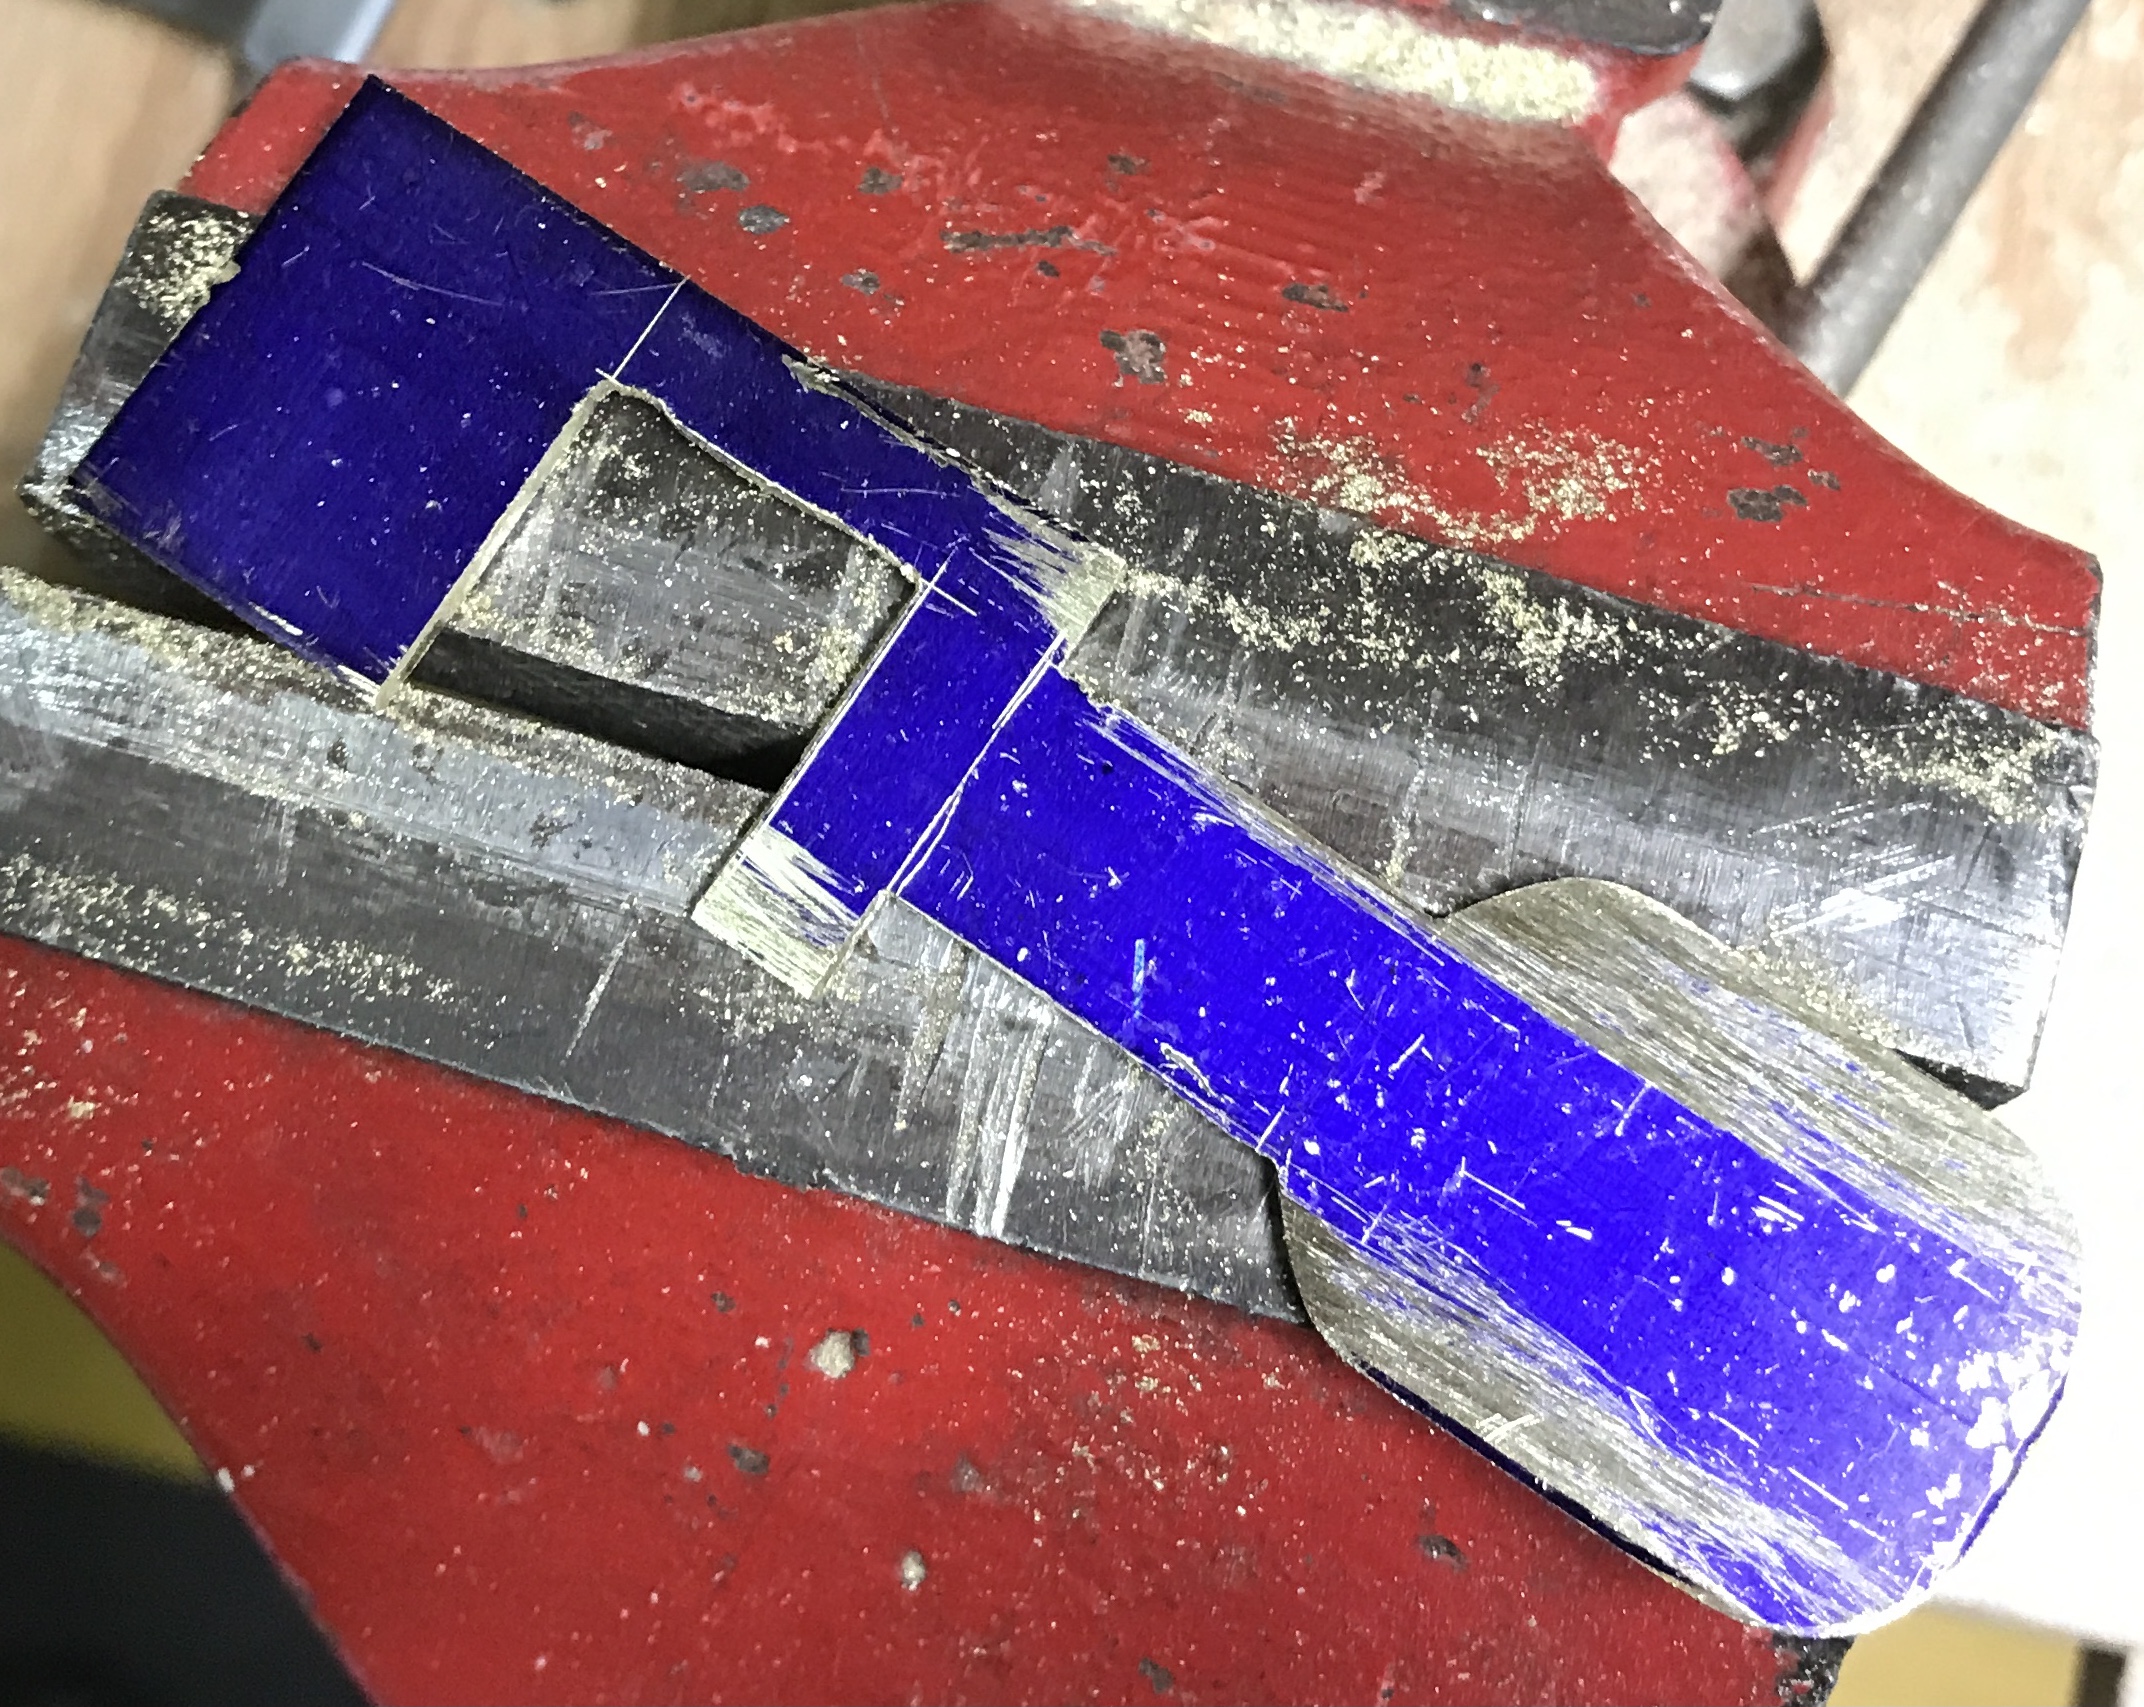
The corners that need to be rounded on the handle were rounded with a course file. The edges were all cleaned up with a fine three-corner file. The handle end of the key was sanded from 220 to 2000 grit. The handle end was polished on the polishing wheel with red rouge. The two photos below document this process.

With the key finished the critical distance from the end to the ball opening was measured. This distance needs to be the same as the distance from the hole edge to a stop. When the key is pushed against a stop the hole needs to be open. This distance was measured and marked. Holes were marked for a 1/8" drill 1/16" from the marked line. A similar line was marked on the other end of the drop box. One hole was drilled at this time in this location to serve as a stop when the hole is covered by the key. These three holes are shown in the photo below.
Three 1 1/8" lengths of 1/8" dowel were cut. Glue was put into the three bottom holes. The dowel pins were pushed into these three holes with the aid of the vise. Glue was placed in the top holes. The pins wee aligned with these holes and with the vise the pins were pushed into the top block until the key was a decent fit between the two halves. The picture shows the two halves pinned together.
The glued and pinned box was sanded. The hole was chamfered on the two sides. A length of 1" wide wood was prepared and cut into two parts with 35° angles on their ends. The These pieces were glued to the top edges of the box to form the funnel for the marbles. After letting the glue dry a small scrap of wood was glued into the back corner of the slot where there was no pin. The key was put in place before this glue-up locking it in.
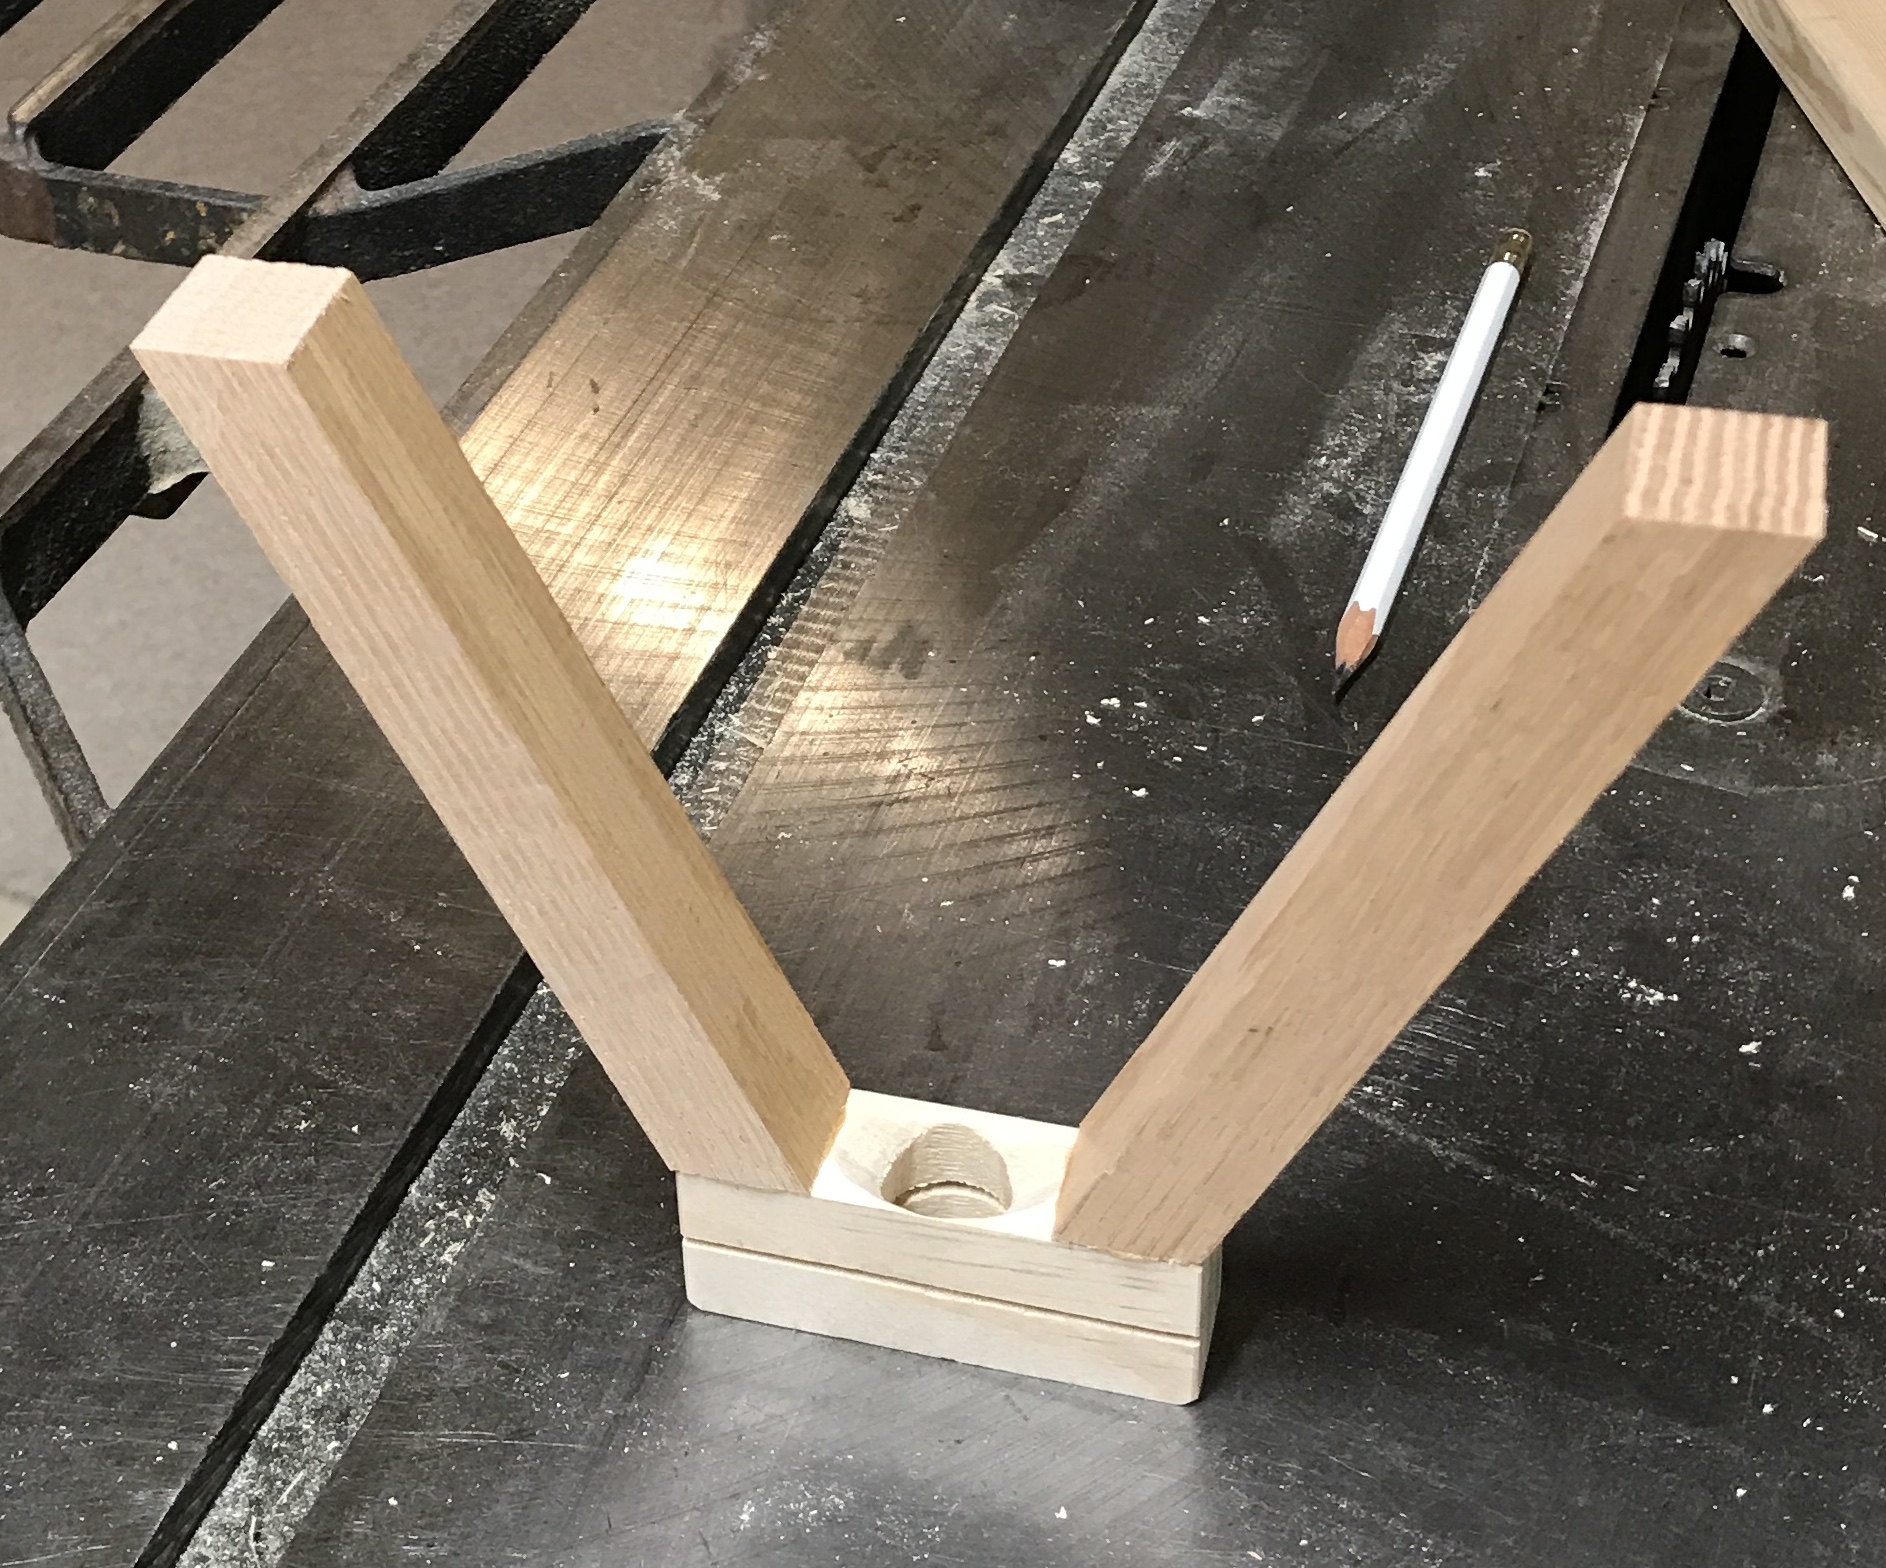
The back board was propped against a wall at what seemed to be a good angle. The angle was locked into the sliding bevel. Six pieces of 1 X 2 were cut to approximate length. The angles were laid out on the wood parts and cut. The acute angles had to be filed to the line. Screw holes were laid out, one per joint. The holes were drilled and transferred to the mating part. The boards were glued and held together with the screws. The angles are not exact, but are close enough.
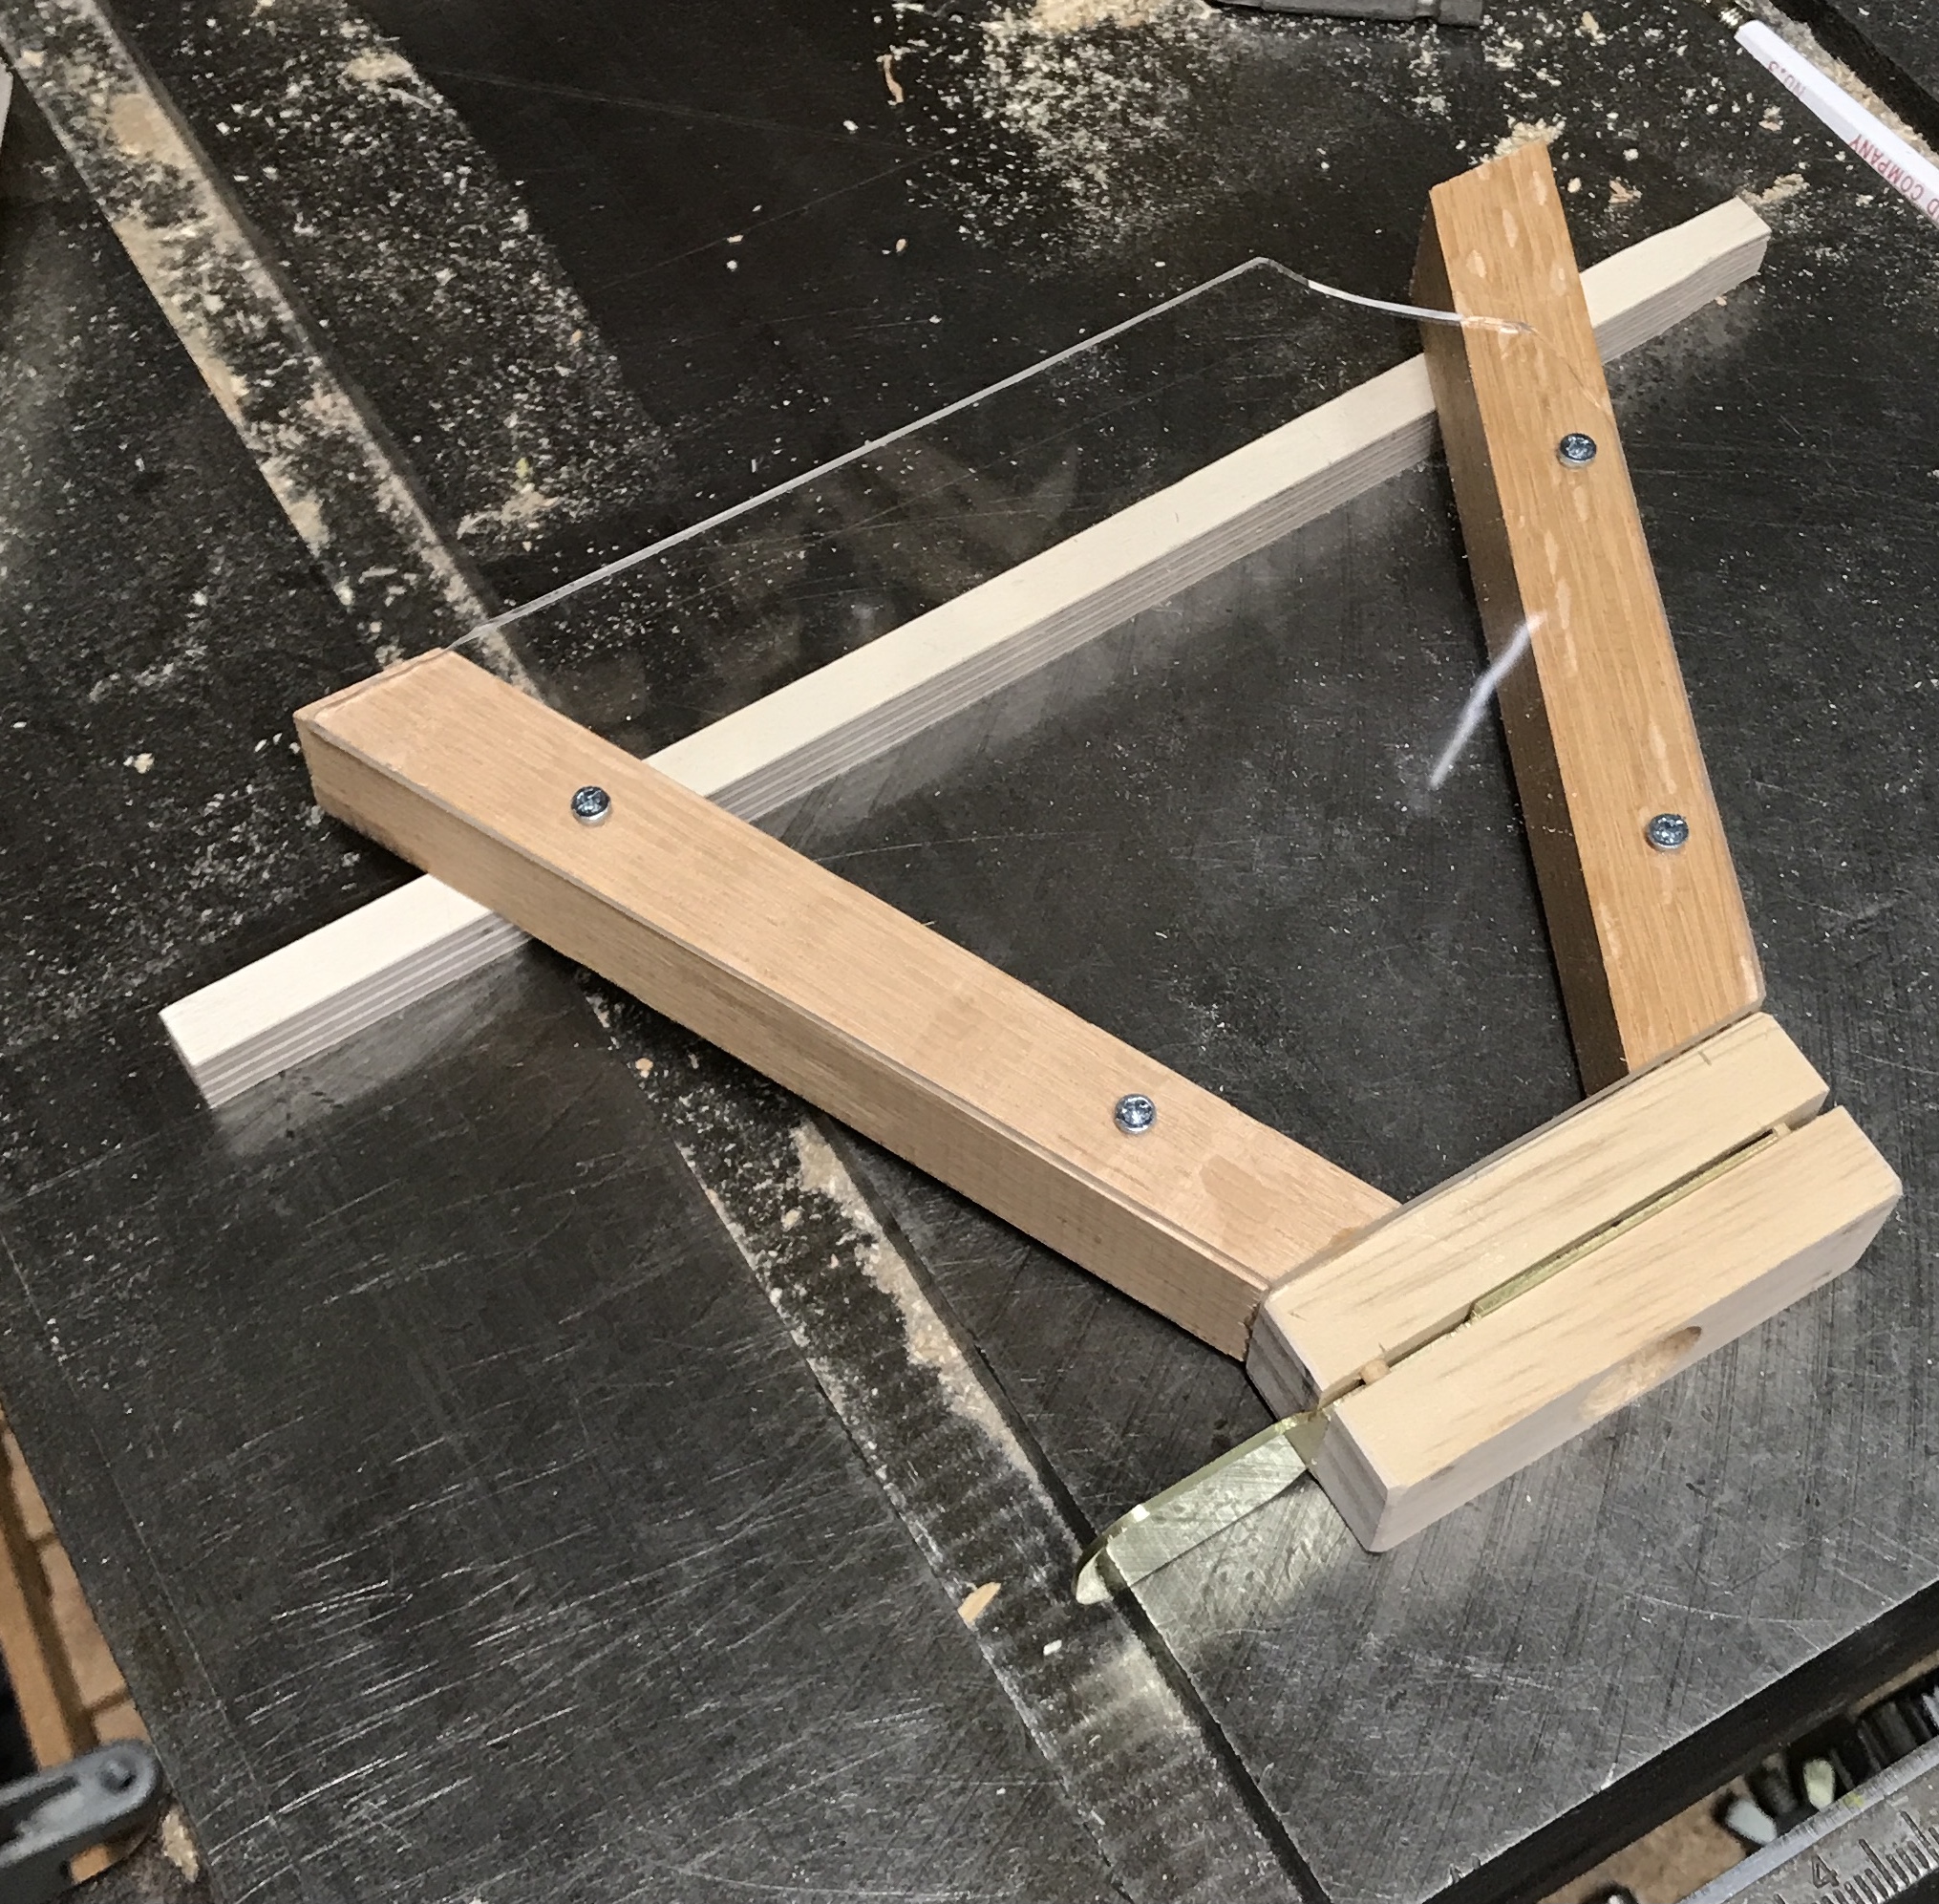
The funnel needs to be angled so the exiting marble will land on a run. With the board at the final angle, the funnel was held against the board with a scrap of wood between. The desired funnel angle was marked on the wood. The angle was cut and rasped to the line. A round rasp was used to put a slight curve in the funnel facing side. Two holes were drilled through with a 1/4" drill two inches apart. The bottom hole (top in the photo) is not deep enough for a standard 1 1/2" peg. A shorter peg will be glued in place. The top hole may be turned into a slot for easier fitting.
Tried out the funnel support and it did not work!. The top is too far from the back. The ball drops onto the support and not into the funnel. I will make some pegs permanently mounted to the funnel. In this fashion the funnel will be pressed against the back and then the ball drops neatly into the funnel. Two 1/2" pegs were cut. Holes were drilled through the pegs down the middle for #4 screws. The funnel was marked for holes 2" apart. These were drilled; screws were installed through the holes and into the pegs. The photo shows the result. And best of all it works!

A 1/8" acrylic plate was cut for the front of the ball input. The plate was laid on the funnel and the sides were marked with a razor blade. The score marks were gone over with the blade five or six times. The acrylic was snapped at the score marks. In order to drill through the acrylic for screws a punch mark was attempted on one hole. The corner of the acrylic cracked off! Now I have a less than perfect acrylic plate. The holes were transferred to the wood sides and screws installed. Not bad even with the corner dingus. It just needs some fabric stapled to the back.
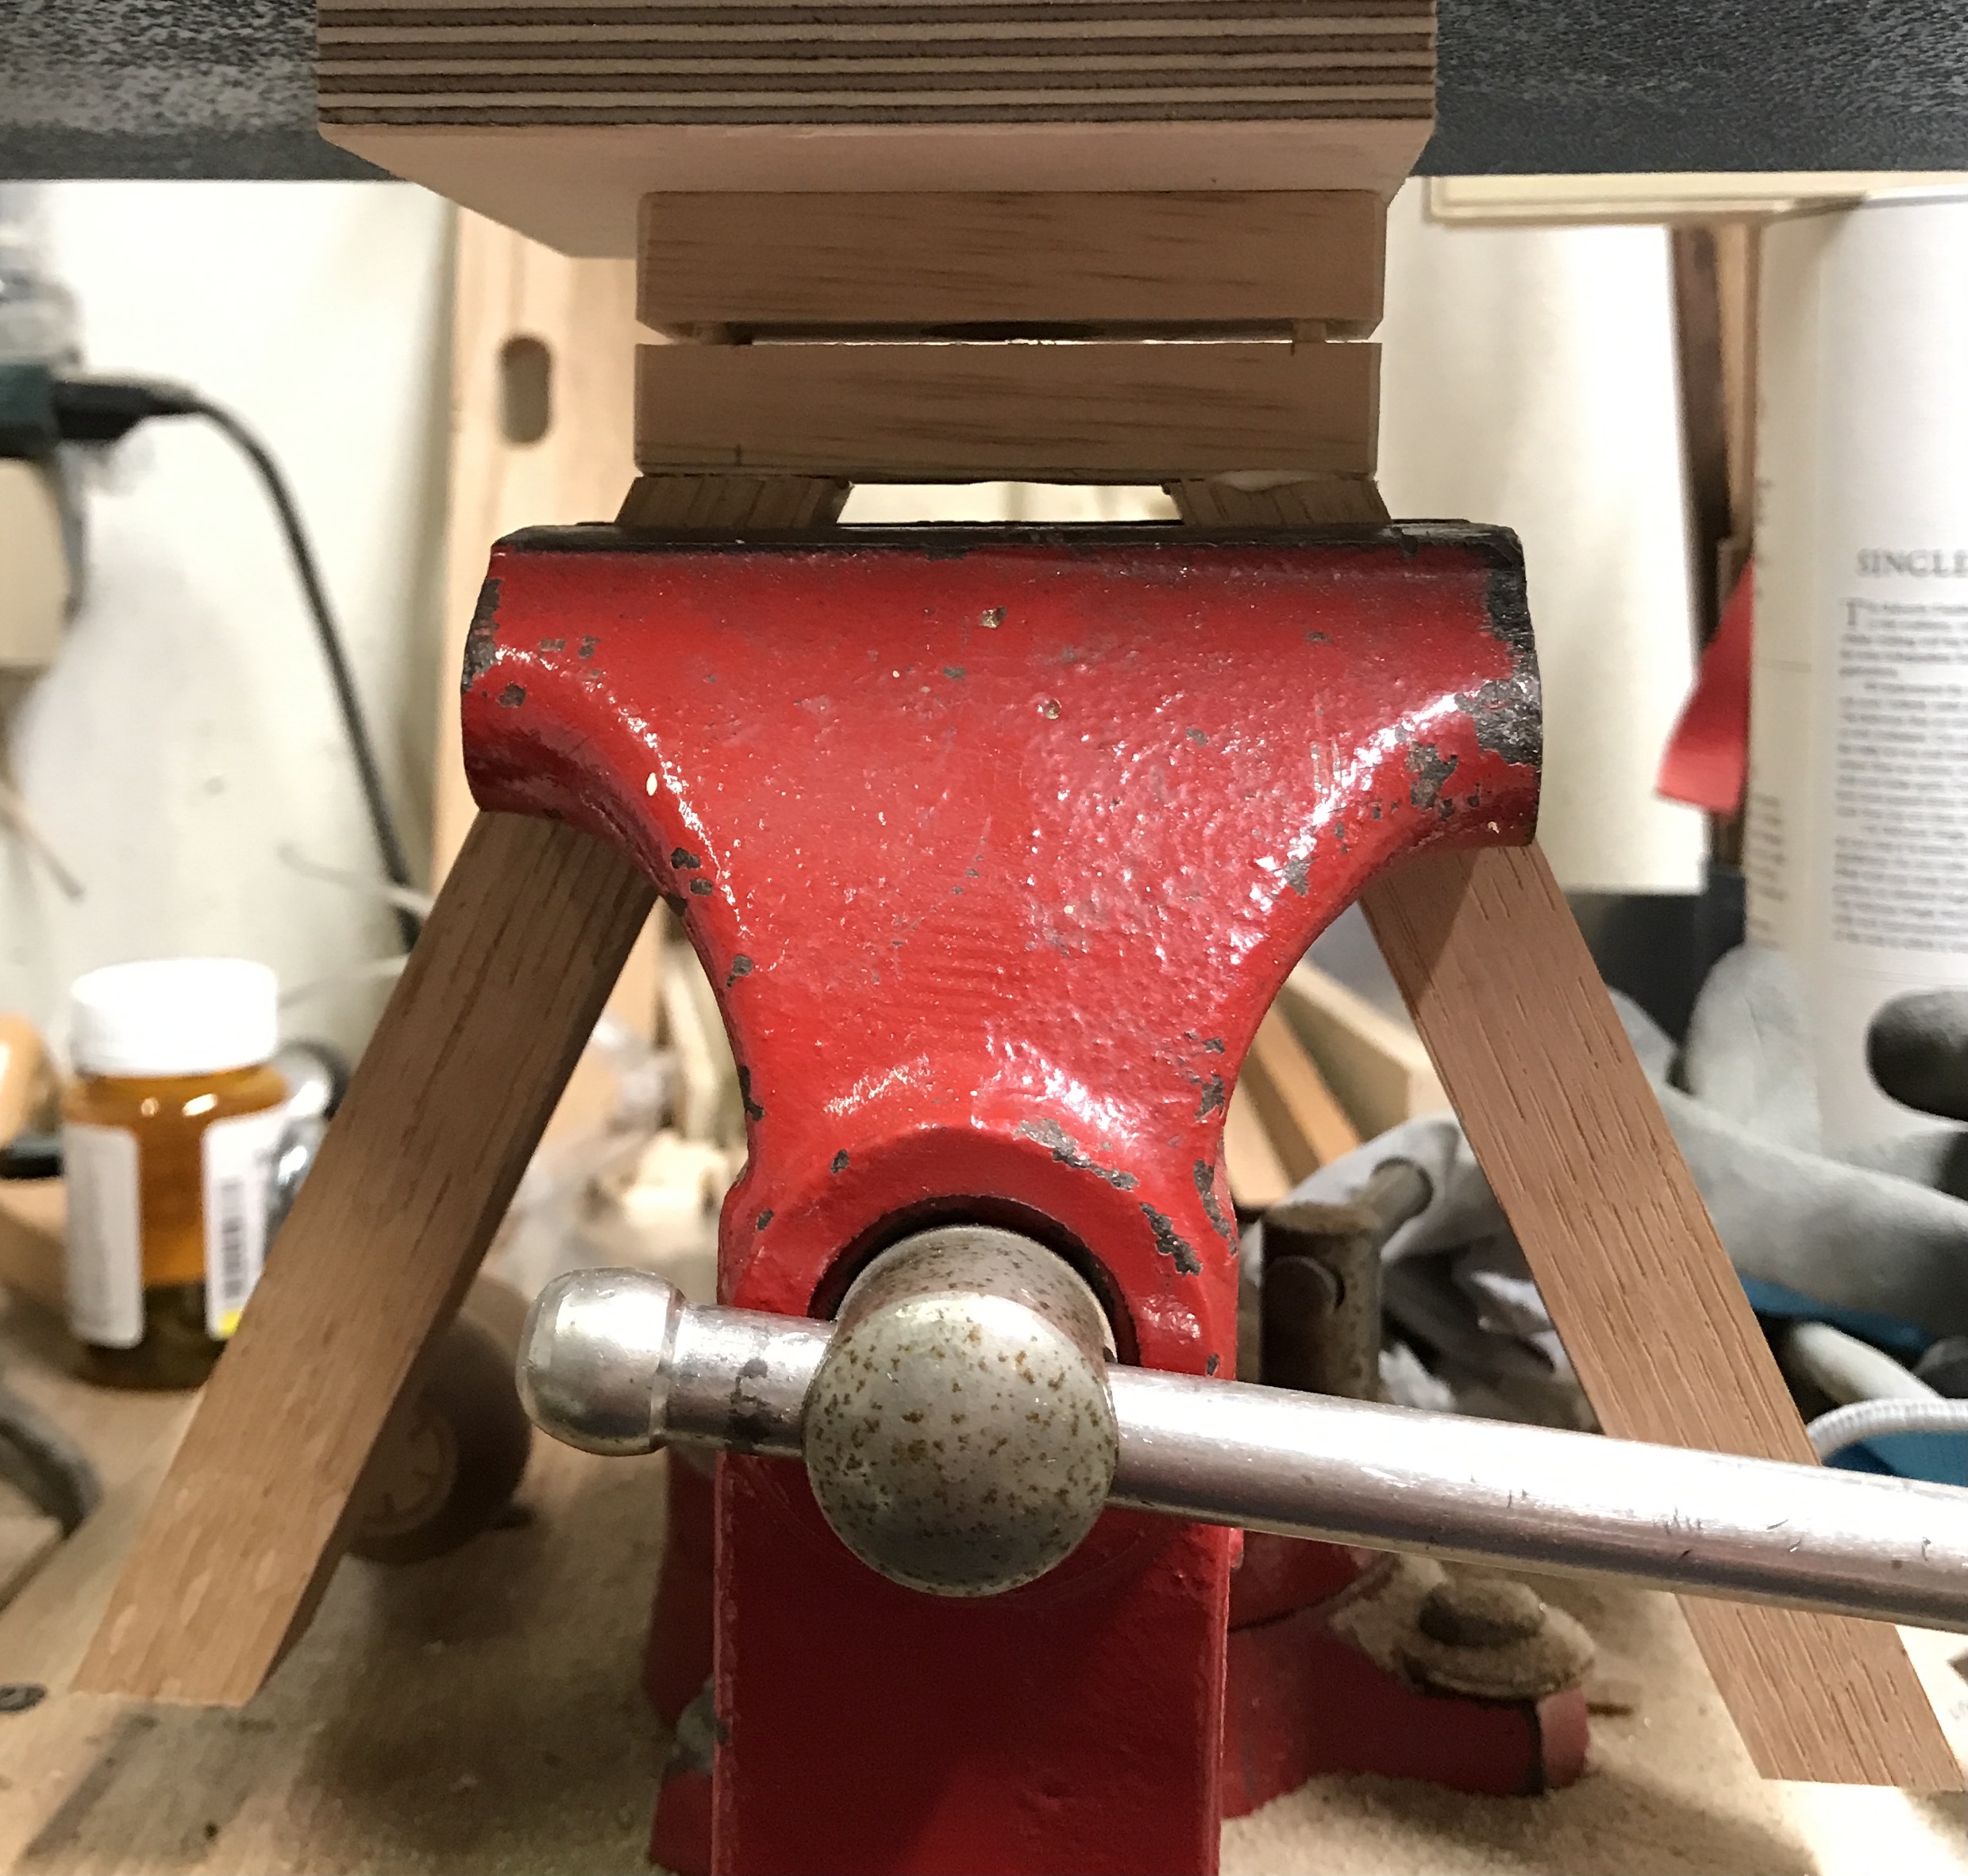
The chimes needed a few modifications to hang it on the board. Two 1" pegs were cut. They were glued into holes drilled into the back of the box 2" apart. A wall with mitered ends was cut and glued to the front of the box. The photo shows the wall and box held in the vise while the glue dried.

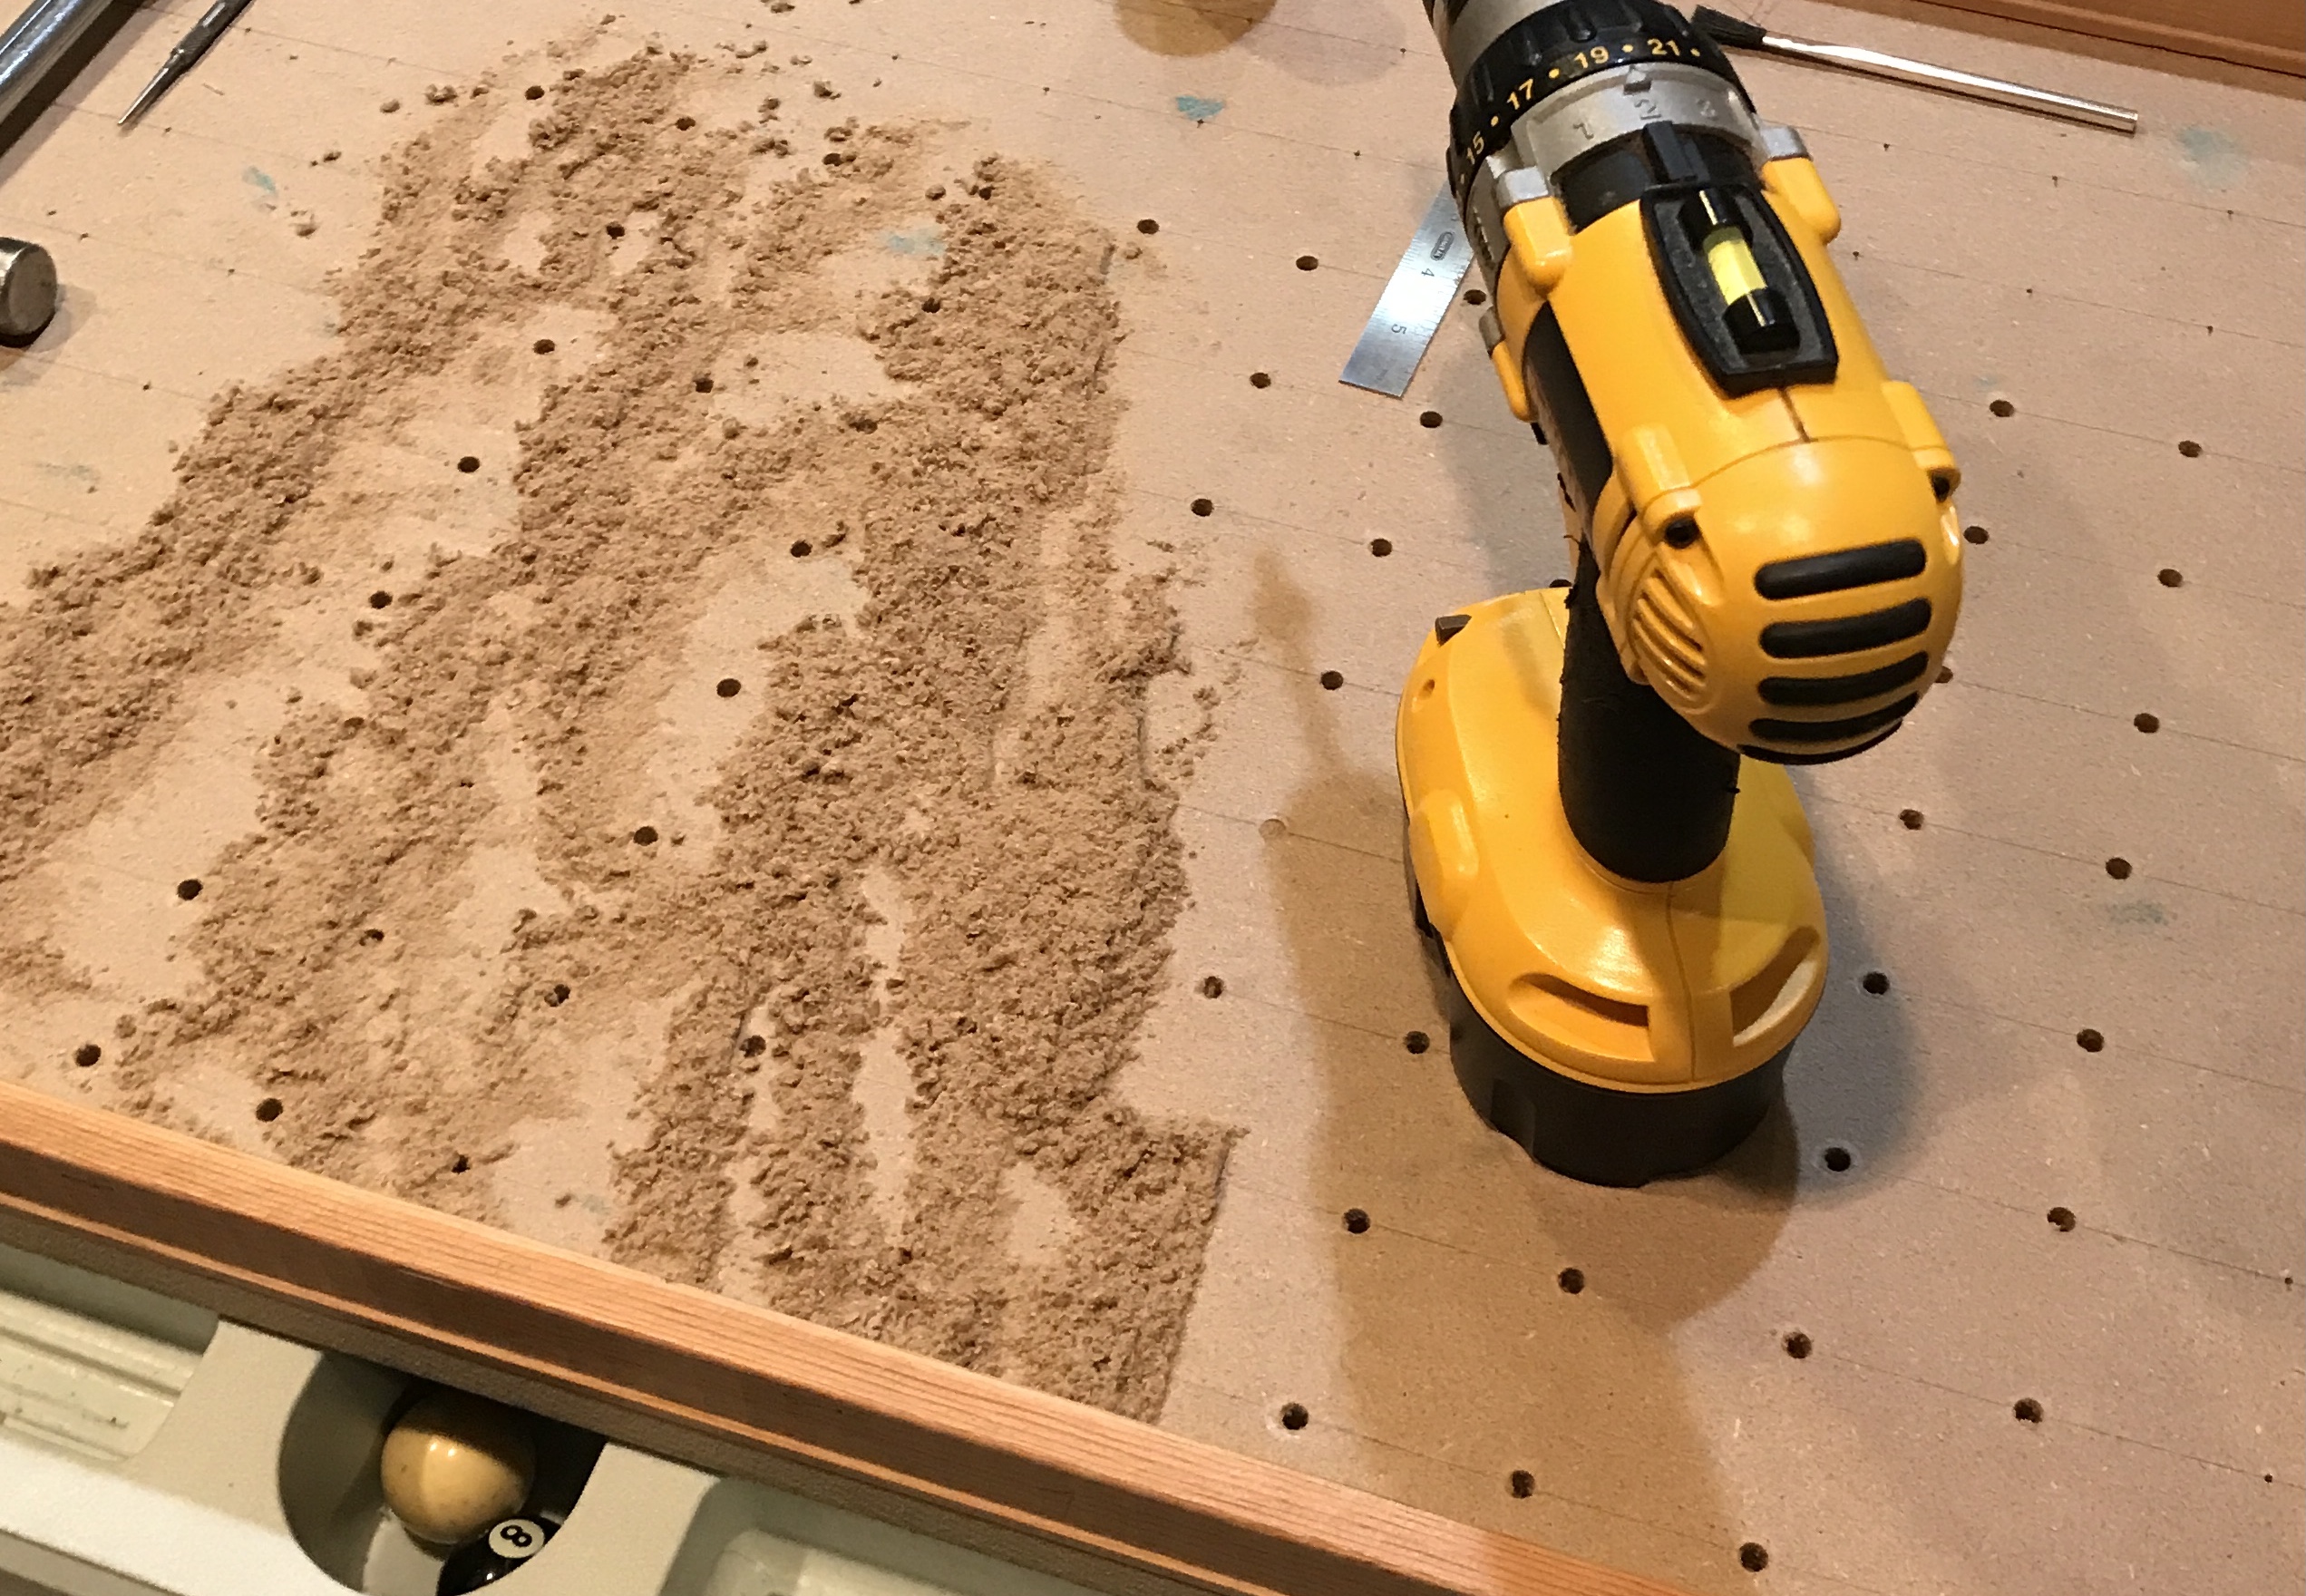
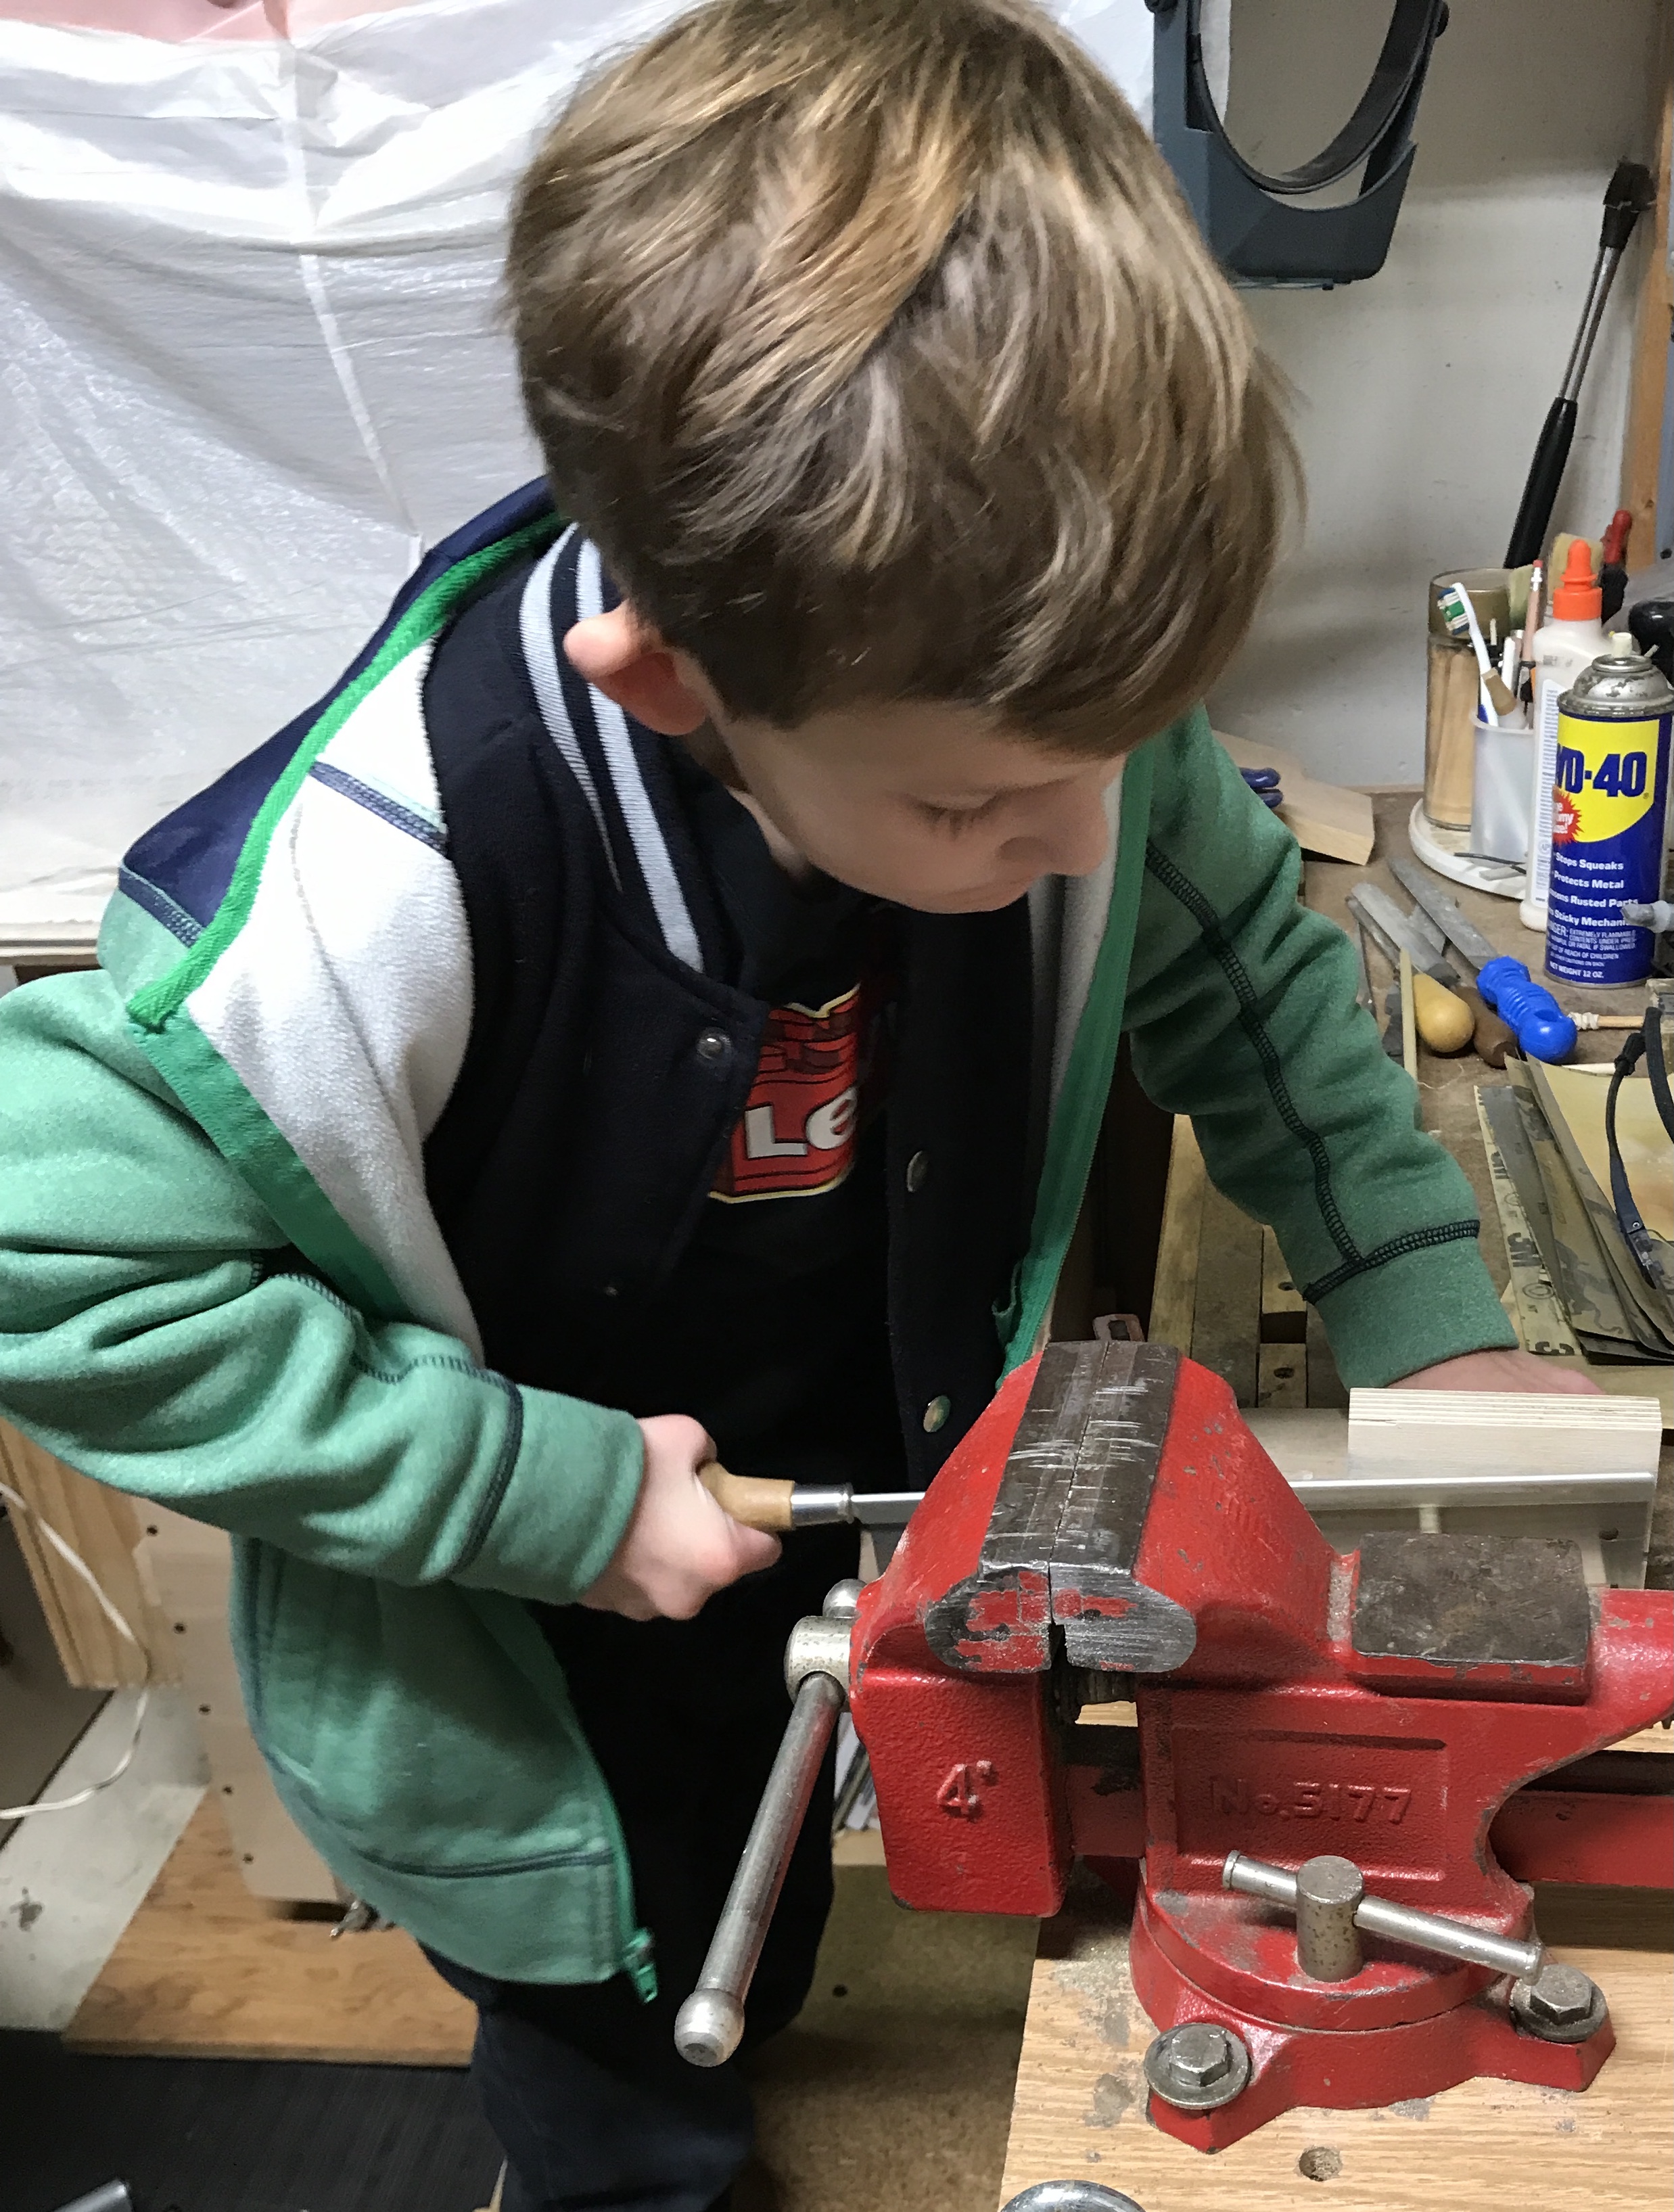
The boys were put to work this morning. The two boys drilled the remaining fifty or so holes in the backboard with a little help holding the heavy cordless drill. They also each cut a 4' length of 1/4" dowel into 1 1/2" pegs. Levi is shown below doing the peg sawing.

No boys today so the nine 10" marble tracks were glued up. After the clamps were freed up the tabs were glued to the bottoms. They were set 1 1/2" in from the ends. The backboard was sprayed with two coats of white primer. A trial run was in order. The marble moves really fast. Maybe the short tracks should be slotted.
Laid three pieces of the poplar 10" lengths side by side on the table saw. The blade was fitted with the dado arbor set to #2. This gave a groove 9/32" wide. Grooves were cut 1/8" deep down the length of the three pieces spaced 9/32" apart. The grooves were cleaned up with sandpaper. The grooved lengths were glued to a second set of 10" lengths serving as a wall. After the glue dried these slotted marble tracks were cut in half. The ends were all sanded (as were the ends of the previously made marble tracks). These short tracks were too short for two tabs when placed over two pegs spaced two over and one down. Only one tab was glued on right at the end of the short track. Three were glued on one end and three on the other as they are asymmetrical with one tab attached.
Levi helped glue up the spinners. I applied the glue and he put the vanes into the hubs. We wrapped rubber bands around them to serve as clamps. They are shown as installed on the board below.